You can make a Halloween costume at home without sewing by building it in two stages: cut the pieces from cardboard, felt, craft foam or old fabric, then attach everything to a base garment with hot glue, duct tape, safety pins and fabric glue. Most costumes in this guide come together in under an hour using a sheet, a cereal box, a pillowcase and whatever is already in your closet.
This is the plan I use every October, when the costume deadline lands on a Tuesday and the sewing machine is still in the box it came in. It suits anyone: parents of babies and toddlers who cannot find a costume that fits, teens, adults, students working on a budget, and anyone who realises the morning of Halloween that they still have nothing to wear. The finish looks homemade in a good way, and it holds up better than most store-bought costumes do after two hours in the rain.
There are only four attachment methods, and once you know which one you are using you can build anything. Learn these first and the rest of the article is just picking a shape and a colour scheme.
- Hot glue gun: the permanent option for cardboard, foam, felt and masks. Let it set 15 to 20 minutes before anyone puts the costume on.
- Safety pins: the strongest no-mesh hold, and the one that still works when a seam gives out mid-night.
- Duct tape, masking tape and hem tape: fast, removable and forgiving. Duct tape is the workhorse for weight-bearing pieces; hem tape is the quiet option for hems and edges.
- Fabric glue and ties: fabric glue for cloth to cloth bonds, ribbon and elastic for anything that has to come off at the end of the night.
Table of Contents
- What You Need to Make a Halloween Costume Without Sewing
- Base layers
- Adhesives
- Fasteners and structure
- Finishing supplies
- Step-by-Step: Building a No-Sew Costume in Six Stages
- Step 1: Choose a Simple Base Costume
- Step 2: Make the Base Fit
- Step 3: Build Armor and Large Shapes Without Sewing
- Step 4: Add Details Without Sewing
- Step 5: Finish Edges and Fasten Everything Securely
- Step 6: Test the Full Costume
- Common Mistakes and How to Fix Them
- Frequently Asked Questions
- What is the best glue for a Halloween costume made without sewing?
- How do you make cardboard costume pieces look less homemade?
- Can kids make a no-sew Halloween costume at home?
- What materials can I use to make a cheap Halloween costume?
- How can I make a no-sew costume more comfortable to wear?
- How long should I leave myself to make a DIY Halloween costume?
- Conclusion: Start With the Base Costume
What You Need to Make a Halloween Costume Without Sewing
The short version: a base garment, an adhesive, a fastener, something structural, and a way to add detail. Everything below is either free because you already own it, or a couple of dollars at a dollar store.
Base layers
A bedsheet, pillowcase, white T-shirt, oversized hoodie, bathrobe, leotard or plain jumpsuit works. Look for something two sizes too big, because you will pin or tape the excess in at the waist. For a toddler, a onesie and a large T-shirt are the two easiest starting points there are.
Adhesives
Fabric glue for anything touching skin or cloth, hot glue for cardboard and craft foam, spray adhesive for fabric on cardboard, and double-sided hem tape for hems and necklines. Household glue sticks work for paper and felt but they snap off fabric, so treat them as a craft-only option.
Fasteners and structure
Safety pins in two or three sizes, duct tape, masking tape, ribbon, elastic, hair elastics, staples for thick cardboard, and a few washers or button pins if you want to wear a piece twice. Cardboard from cereal boxes, paper bags, pizza boxes and toilet paper tubes covers most structural needs.
Finishing supplies
Acrylic paint or spray paint, felt, craft foam, markers, aluminium foil, plastic tablecloth, fringe, feathers and old coffee filters all add detail cheaply. A can of fabric paint or a tube of textile paint works better on cloth than house paint, which cracks when it dries.
Budget substitutions: skip craft foam and cut shapes from cereal box cardboard. Skip fabric glue and use narrow hem tape inside hems. Skip a new bedsheet and use a thrifted pillowcase or a white duvet cover you already have.
Safety first: cut cardboard with a craft knife on a cutting mat, never in your lap, and switch to scissors for anything a child is helping with. Keep masks off the face while working and test vision and breathing before the costume leaves the house. Anything wrapped around the body, like a toilet paper mummy or a trash bag alien, needs full arm movement, at least two fingers of slack at the chest, and no loose cords or straps a child could catch on a door handle or stair rail.
Step-by-Step: Building a No-Sew Costume in Six Stages
Six stages, and the order matters more than the creativity. Most failed homemade costumes fail at stage two, when the base does not fit and everything gets pinned lopsided. Here is the whole process.
Step 1: Choose a Simple Base Costume
The easiest costumes start from one garment and one idea you can read from across a dark street. A bedsheet with two black circles cut from felt is a ghost. A white T-shirt with green fabric paint stripes, glued-on felt foam pieces, and a cardboard leaf headband is a monster. A bathrobe, a cone hat made from cardboard, and a length of ribbon for a beard is a wizard.
Other reliable foundations:
- Cardboard robot: a large box, chest panels, shoulder pads, and a flat base for the head.
- Trash bag alien: a black or green bin bag with holes cut for the face, worn over dark clothing.
- Pillowcase bear or bear cub: one pillowcase, cut ears, a drawn or felt snout.
- Brown paper bag: cut holes for the eyes, add taped-on ears and a drawn face. Excellent for kids and for anyone who cannot stand still for a costume project.
Test the concept on the person who will wear it before you cut anything. Stand them in the base garment in normal light and look at the silhouette. If you cannot tell what they are from ten steps away, simplify. Elaborate designs fail because the details disappear; a clean outline with one strong colour reads better than six fiddly elements.
Step 2: Make the Base Fit
Oversized clothing is the friend of someone without a sewing machine, because taking in a seam is easier than adding one. Mark where the costume should sit on the body first, then take the fabric in to that mark with a belt, safety pins, elastic, hooks, or temporary fabric glue applied inside the fold.
Work in this order:
- Pin the waist or hips first, because everything else hangs from there and a shifting waist ruins the fit of the whole costume.
- Take in the shoulders or neckline next, leaving enough room to pull the costume over the head.
- Shorten hems with a cuff fold held by hem tape or two safety pins, so the wearer can walk without tripping.
- Shorten or pin up sleeves last, checking that the arms can reach above the head for stair railings and car doors.
Fit checks that catch problems early: have the wearer sit down and stand up, raise both arms, and take a full breath. Anything that rides up, digs in at the armpit, or restricts the shoulders needs another inch taken out before you start decorating. Leave the closures unfastened for the first fitting so you can adjust without fighting pins.
Step 3: Build Armor and Large Shapes Without Sewing
Cardboard is how you make a no-sew costume look like it was designed rather than assembled. Cut wings, shields, spikes, chest plates, helmets and fins from cereal box cardboard, a paper bag, or foam board with a craft knife, working on a cutting mat.
Two cuts make a huge difference:
- Score a fold line before bending, so wings and plates fold instead of snapping.
- Round the sharpest corners slightly and cover every exposed edge with tape once the piece is finished.
Attach with hot glue along the full edge rather than in three dots, and add strips of tape across the joint so the weight is spread out. Duct tape works well for attaching to fabric because it flexes with the body and removes cleanly later. Hot glue on cardboard is stronger, so use it where a piece must hold its own shape, such as a helmet or a boot top.
Spread the weight. One shoulder carrying a cardboard wing falls off within an hour, while the same wing spread across both shoulders and the chest survives a whole evening. If something heavy must sit low, support it with elastic crossed over the opposite shoulder, which takes the load off the collarbone.
Step 4: Add Details Without Sewing
Details are what separate a costume from a person in a sheet. Add them last, when the base already fits and you know how much loose fabric you have to work with.
- Masks and helmets: build a cardboard frame, cover it with tissue paper, foil or a plastic tablecloth using fabric glue, then wear it on a headband or elastic rather than a full mask that blocks vision.
- Fur and feathers: cut felt shapes with layered edges, or glue fringed coffee filters to cardboard for fur that moves.
- Scales and symbols: paint or cut from craft foam and glue them on. A single large symbol reads better at a distance than ten small ones.
- Fake wounds and prosthetics: tear tissue paper into layers, glue them in place with cosmetic glue or latex, and colour with makeup. Never place adhesives on a child’s skin without a patch test, and keep costume glue well away from a toddler’s hands and face.
- Props: a foam pool noodle, a cardboard wand, a plastic bucket, a wire coat hanger bent into a hook. Props are the cheapest way to make an outfit read as a character.
Prioritise what people will see first: the head, the chest, and anything that moves. An adult with a great mask and a plain T-shirt beats an elaborate suit with no head detail, because the head is what people look at.
Step 5: Finish Edges and Fasten Everything Securely
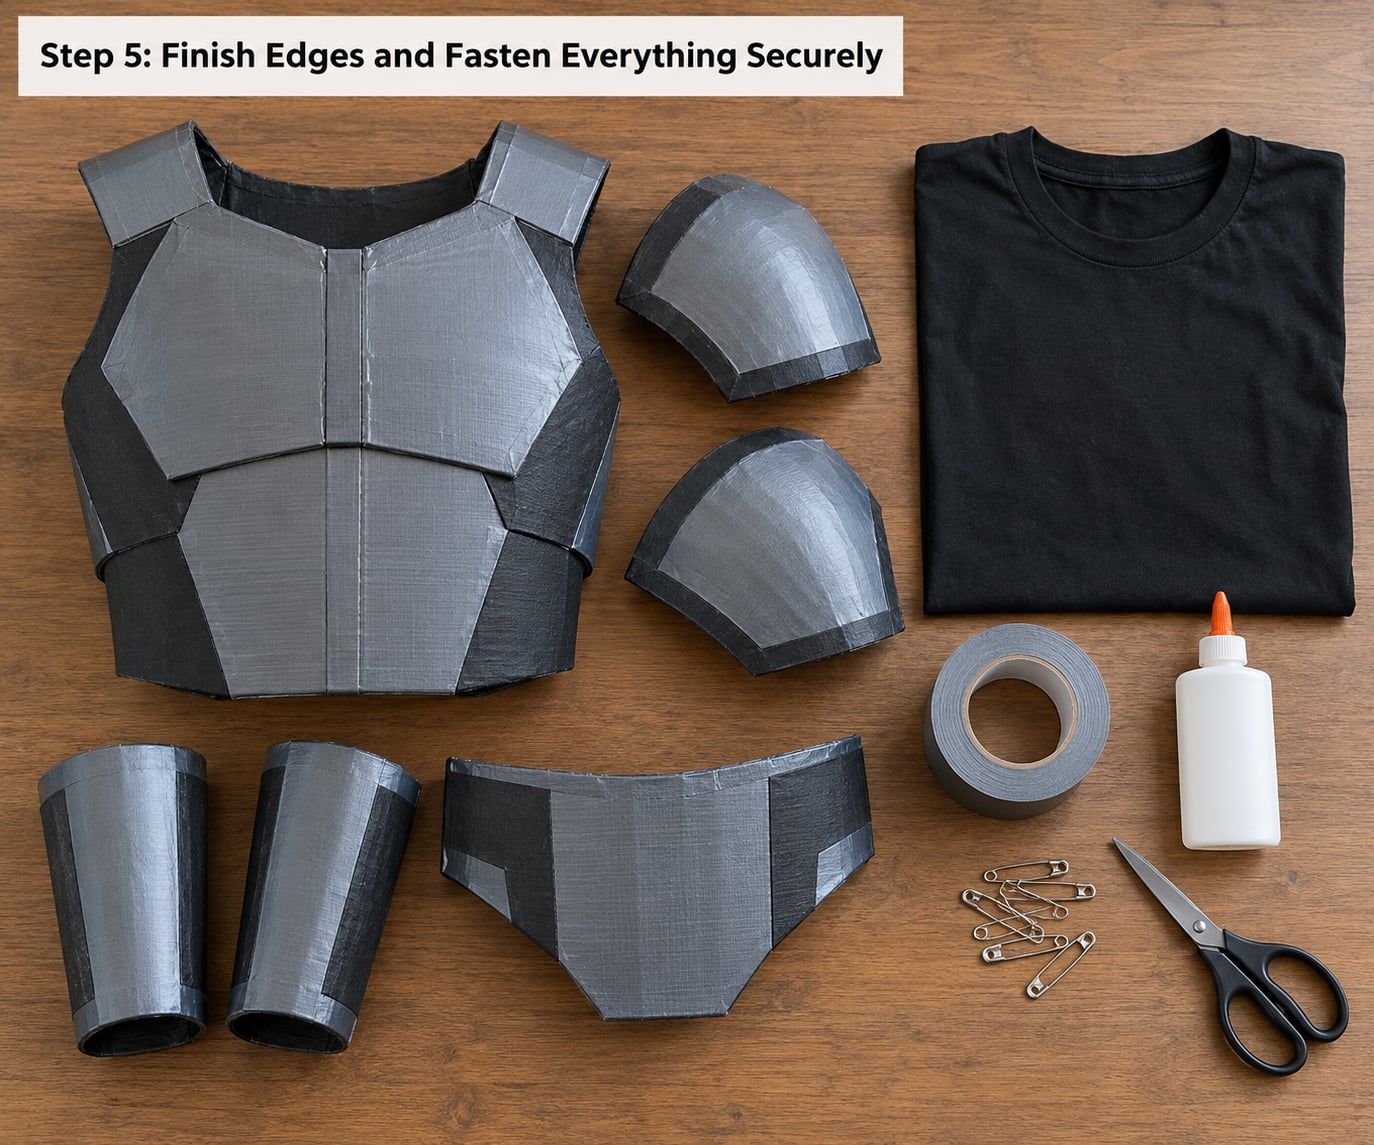
Finishing is where most homemade cardboard costumes look cheap, and it takes about twenty minutes. Cover flat cardboard with a coat of paint, wrapping paper, or a layer of fabric held with fabric glue. Then tape every raw edge, because raw corrugation is what makes cardboard look like packaging.
Check the joints that take the most strain: shoulders, armpits, waist, and anywhere a piece hangs below the body. If a joint feels springy, add another strip of tape or a second safety pin through both layers. Test each closure yourself, pulling gently in the direction the wearer will pull. Replace any glue that has come loose or any pin that sits at an angle, because those fail on the sidewalk rather than in the house.
Give hot glue the full 15 to 20 minutes to set before the costume is worn, and longer if the room is cold. Fabric glue needs overnight for a full-strength bond. If you are out of time, put the costume together now and hold it together with safety pins while the adhesive cures, which is exactly the emergency fix that works.
Step 6: Test the Full Costume
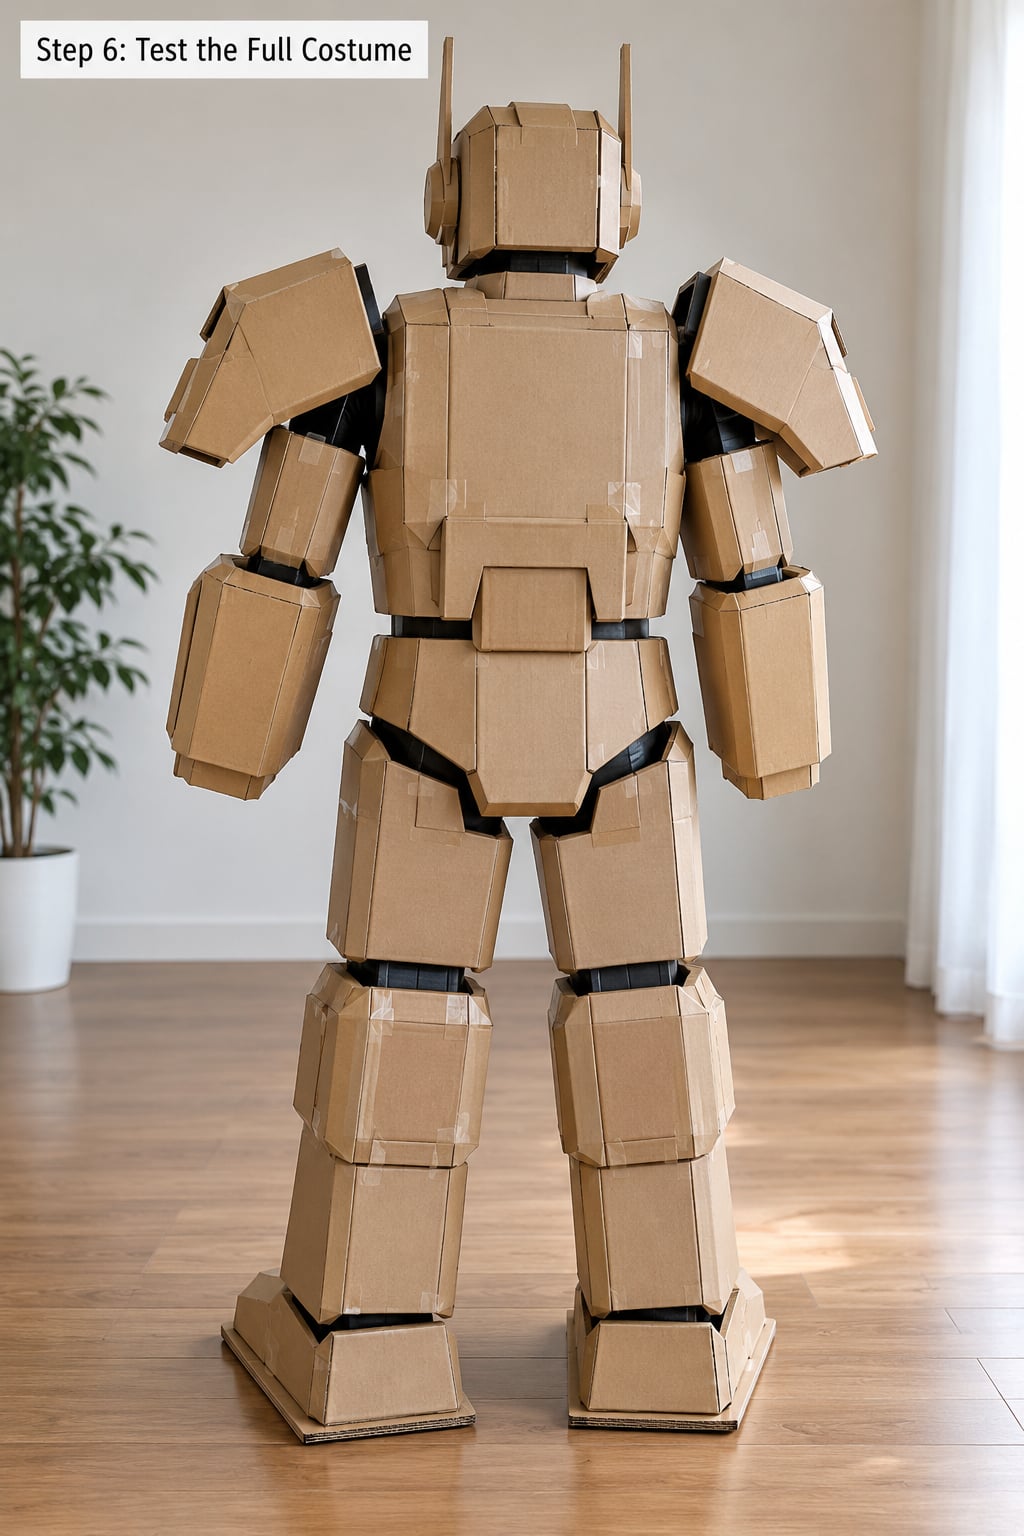
Wear the finished costume for 20 to 30 minutes before the night of the event. Walk up and down stairs, sit down in a chair, bend to the floor, and walk through a doorway at the same width you will use at every house. Cold air and damp weather are the real test, so check it outside if you can.
Ask about the neckline, waist, shoulders and footwear, and check them yourself rather than trusting the answer. Mark any spot that rubs with a soft pencil or a piece of tape on the inside of the garment so you can find it again. Then look for movement: if the whole costume shifts when the wearer turns, something needs pinning or taping at the back. Cardboard pieces that bounce should be re-taped closer to the body, and masks that slide need a tighter headband or a strip of elastic across the back of the head.
Keep a small repair kit with you: safety pins, a roll of tape, a spare hair elastic, and a glue stick. It fits in a coat pocket and it is what stands between a good night and a costume held together with tape in a dark doorway.
Common Mistakes and How to Fix Them
Almost every problem in a no-sew costume comes from one of six mistakes, and all six have simple fixes.
- Picking an over-complicated design. Fix: cut the idea down to one base garment, one colour change, and one large prop.
- Making the costume too tight. Fix: take the fit in at the sides with elastic or pins rather than across the chest, and always test sitting down.
- Putting glue straight onto delicate fabric. Fix: test on a hidden seam first, use fabric glue on cloth, and place a small square of interfacing behind the bond.
- Concentrating weight in one spot. Fix: spread heavy pieces across both shoulders and the chest, and support them with crossed elastic.
- Ignoring skin safety. Fix: adults handle the glue gun, keep hot glue off skin, patch-test anything that touches a child’s face or neck, and keep the costume from blocking vision, breathing or movement.
- Skipping the wear test. Fix: 20 to 30 minutes of stairs, sitting and bending catches what a mirror never shows.
Two habits save the most time. Cut every piece first and assemble second, because re-cutting mid-build costs more than planning does. And keep everything reusable: a sheet, a hoodie, and a box of felt become next year’s costume, a tablecloth, and a set of storage trays, which is a better return than a costume worn once and thrown out.
Frequently Asked Questions
What is the best glue for a Halloween costume made without sewing?
Fabric glue works best for cloth to cloth bonds and stays flexible, so it survives bending and a night of movement. Hot glue holds heavier items such as cardboard, foam and masks, but it can soak through thin fabric and sting skin on contact. For a child, use fabric glue for anything near the skin and keep the glue gun under adult control.
How do you make cardboard costume pieces look less homemade?
Cover the flat grey side with packing tape or a layer of fabric, then paint it. Acrylic paint grips better over a thin coat of white primer, and spray paint in one even pass hides seams faster than a brush does. Round every exposed edge with tape, and add one clear detail such as a symbol, a vent hole or a painted number to break up the flat panel.
Can kids make a no-sew Halloween costume at home?
Yes, and often it is easier with kids than with adults, because they are not trying to control every detail. Good options include a taped brown paper bag, a pillowcase animal, a onesie creature and a toilet paper mummy. Give children rounded-tip scissors, dots of glue rather than a full line, and an adult nearby whenever a glue gun or a craft knife is in use.
What materials can I use to make a cheap Halloween costume?
Check the closet before you buy anything: sheets, hoodies, button-down shirts, leggings and bathrobes all make solid bases. Then raid the pantry for cereal boxes, paper bags, cardboard tubes, aluminium foil and bin bags. Dollar stores supply felt, craft foam, ribbon and fabric glue cheaply, and one can of spray paint covers cardboard panels in minutes.
How can I make a no-sew costume more comfortable to wear?
Add a layer of soft cotton against the skin, because hot glue, foil and cardboard get warm and stiff after an hour outdoors. Cut extra slack at the shoulders, waist and hips, then take the excess in at the sides with elastic or safety pins so nothing presses on the front. Any piece over the face needs a wide opening for breathing and a clear view.
How long should I leave myself to make a DIY Halloween costume?
Give yourself three or four days if the costume has cardboard structures, a mask or a paint job, since glue needs hours to set and cardboard usually wants two coats. A sheet ghost or a closet-based outfit takes one evening. Plan backwards from the time you intend to be out the door, and keep one full extra evening in reserve for the fix you will need.
Conclusion: Start With the Base Costume
If you remember only one thing from this guide about how to make a Halloween costume at home without sewing, make this the order: pick a base garment that fits the person, adjust it with pins, elastic or tape, build the big shapes in cardboard, then add the details people will actually see. Nothing works if the fit is wrong first, and no amount of paint rescues a costume that is uncomfortable to wear.
Start with the base costume this week rather than at the end of October, give hot glue a full evening to set, and do the 20-minute wear test before the first house on your route. You will end up with something that fits, holds together, and looks like you planned it instead of panicked.