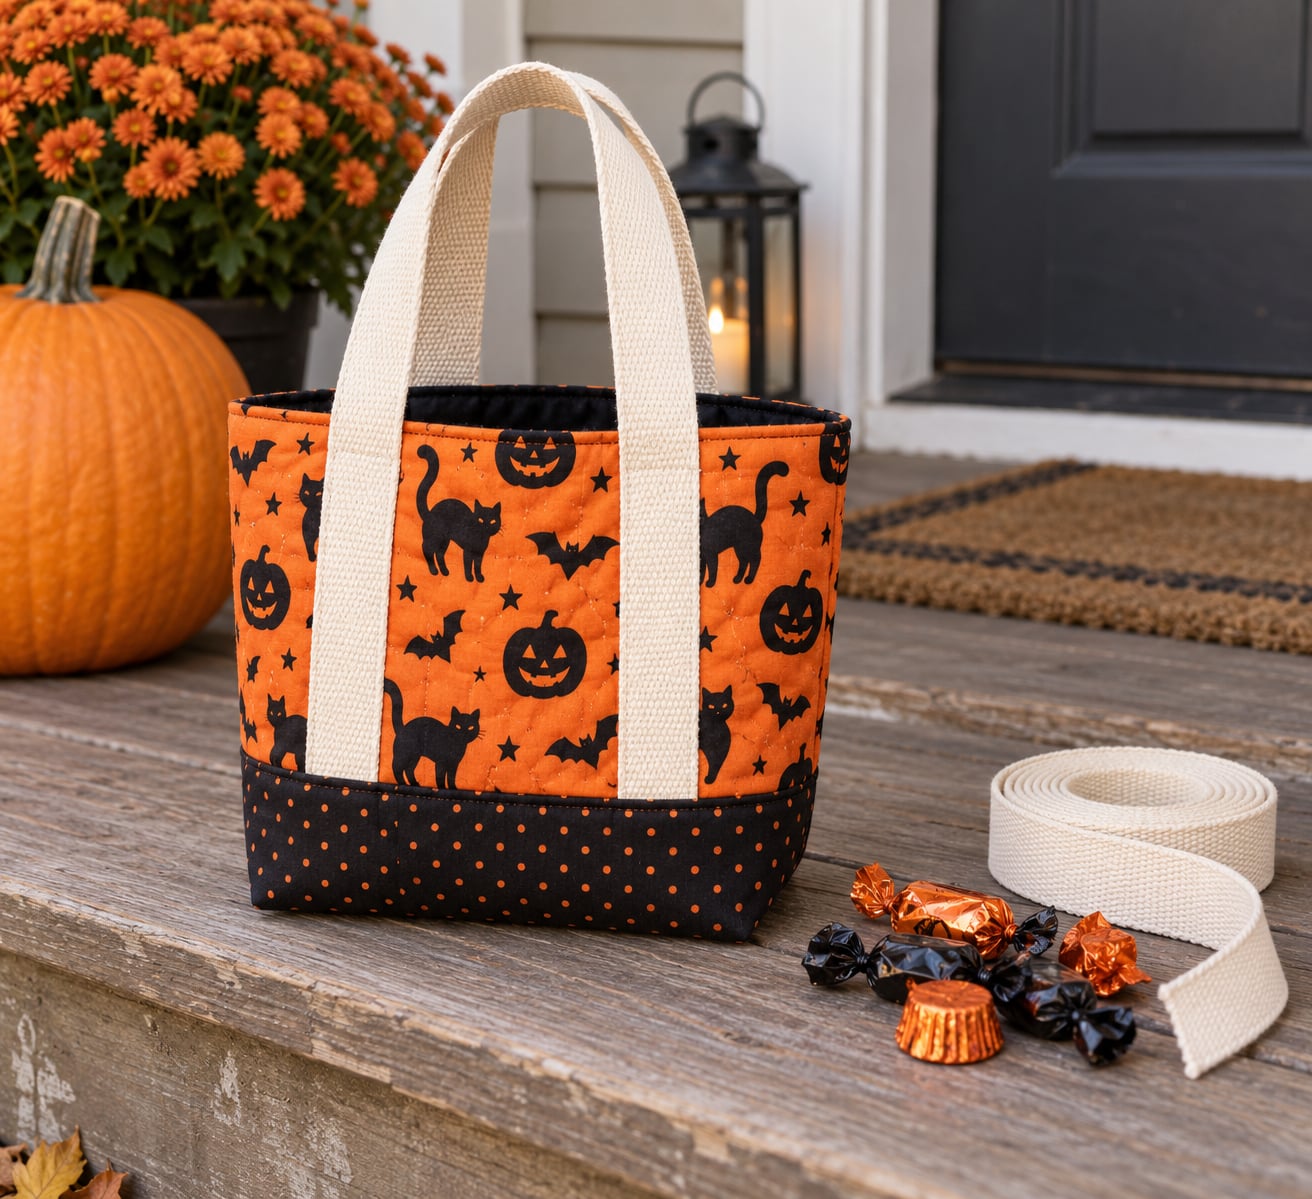
Most trick-or-treat bags get heavy for one reason: narrow straps, a small base and a fabric too thin to hold its shape. To make a trick-or-treat bag easy to carry, you want a light cotton or canvas body, flat handles 2 to 3 inches wide, a wide base that stands up on its own, and a shoulder strap option so a full bag hangs off the body instead of the hand. About an hour of sewing, or ten minutes with a glue gun.
The difference shows up at about the fourth house. A thin-handled sack that starts fine becomes something a five-year-old drags by one finger, hands back to a parent, or upends on a step when the candy shifts. Fix the carry and you fix most of that.
I have made these for three kids across six years of trick-or-treating, and the two things that mattered most were strap width and bag size. Everything else was decoration.
Table of Contents
- What You Need
- Step-by-Step
- How to Choose a Lightweight Bag Shape
- Add a Comfortable Carrying Strap
- Make the Bag Secure and Easy to Fill
- Finish the Halloween Look
- Common Mistakes
- Frequently Asked Questions
- What is the easiest material to use for a lightweight trick-or-treat bag?
- How big should a trick-or-treat bag be for Halloween candy?
- What type of strap makes a trick-or-treat bag easiest to carry?
- Can I make a trick-or-treat bag without sewing?
- How can I keep a Halloween candy bag from getting heavy?
- How do I clean a reusable trick-or-treat bag after Halloween?
What You Need
For the sewn version, the list is short and most of it comes from a single fat quarter or half yard of cotton.
- Outer fabric: quilting cotton, canvas, or a heavy cotton tote you already own
- Interfacing: medium-weight fusible for the base, so the bag stands and holds a flat bottom
- Handles: 2 to 3 inch wide cotton webbing or belting, cut 20 inches each
- Optional strap: 1 inch wide adjustable webbing with a slider buckle, cut 30 to 45 inches
- Binding: double-fold bias tape for the top edge, or a strip of matching fabric
- Thread, scissors, clips, and a 1/4 inch seam allowance
For the no-sew version you need a fabric tote, a pillowcase, or two stiff pieces of felt, plus a hot glue gun, double-sided tape, or duck tape. That version is genuinely easier than it sounds, and it is the one to make if you are sewing for a whole neighborhood.
Here is how the common materials compare. Weight matters more than most people expect, because every ounce sits on a shoulder or in a small hand for two hours.
| Material | Weight | Durability | Skill level | No-sew friendly |
|---|---|---|---|---|
| Quilting cotton | Lightest | Good | Beginner | Yes |
| Cotton canvas | Medium | Best | Beginner | Yes |
| Felt | Medium | Good | Beginner | Yes |
| Duck tape | Light | Poor, tears at seams | None | Yes |
| Kraft paper | Lightest | Single use | None | Yes |
| Plastic sheeting | Light | Cracks when cold | None | Partly |
Quilting cotton with fusible interfacing is the sweet spot for a bag you want light and washable. Canvas holds more, but a toddler notices the difference after the first block of houses.
Step-by-Step
Build in this order and each part supports the next. Cutting the base and wall first means the handle placement is already fixed when you get to the strap, which is the part that decides whether the bag is comfortable.
How to Choose a Lightweight Bag Shape
Shape decides how the weight behaves. A flat-bottomed tote stands up, so candy stacks instead of sloshing to one corner, and a standing bag does not need to be held to keep the treats in.
A small tote with a flat base is the right default for most children. A drawstring sack is lighter but the bottom collapses, and the candy settles into a lump that drags on one side. A pillowcase-style bag is the fastest no-sew option and works fine for handing out treats at a party rather than collecting on a long route. A soft pouch suits a toddler who carries a small handful, not a full run.
Then keep it small on purpose. The table below is a reasonable starting point, and it is deliberately smaller than what most people first imagine.
| Child | Bag size | Comfortable fill |
|---|---|---|
| Toddler, 2 to 3 | 6 by 7 inch | About 6 to 8 pieces |
| Preschool, 4 to 5 | 8 by 9 inch | About 10 to 12 pieces |
| Elementary, 6 to 9 | 9 by 11 inch | About 15 to 18 pieces |
| Tween, 10 and up | 11 by 13 inch | About 20 to 25 pieces |
The test is simple: fill the bag with wrapped candy, close it, and have your child lift it and walk across the room. If they put a finger through the handle and drag, or ask you to carry it, cut the base smaller by an inch next time. Parents on crafting forums describe this exact trade-off, and they land on the same answer. Make the bag a size your child is proud to carry themselves rather than a size that looks impressive.
It worked for us. The bags my kids carried themselves were always a size I would have called too small.
Add a Comfortable Carrying Strap
This is where most DIY treat bags fail. A strap one inch wide cuts into a small hand under load. Two to three inches of flat cotton webbing spreads the same weight across the palm and barely registers.
Cut two handles at 20 inches. Fold each end over twice and stitch across with a box stitch, which is three lines of stitching forming a rectangle. That is the part that stops the handle pulling out when the bag is full, a failure parents complain about repeatedly after the first season.
Place the handles 3 inches in from each side edge and 2 inches below the top. Sew them to both the outer fabric and a patch of interfacing so the stitch does not chew through. Pull hard on both handles before you trim anything; if nothing shifts at the top, the attachment is solid.
For a hands-free carry, add an adjustable shoulder strap instead of a second handle. Cut 1 inch webbing at 30 to 45 inches and attach it to the side seams at the same height, one strap running across the body diagonally. A slider buckle lets an adult lengthen or shorten it, and a full bag then hangs at hip height where both hands stay free for a flashlight and a costume hem.
Make the Bag Secure and Easy to Fill
An unsecured opening is how candy ends up on a dark front step. Three closures work well, and the right one depends on who is carrying the bag.
A drawstring through a casing is the simplest for a child to open one-handed and the easiest to sew. Cut a casing strip, fold it over the top edge, and sew down both sides, leaving the ends open. Run a 3/8 inch cord through it. A zipper is neater and keeps a drawstring out of reach of a toddler, but it takes the most time to install. A simple flap with a hook-and-loop tab works for handing out treats.
Line the interior with a wipeable fabric if you plan to use the bag for something besides candy, and it doubles as a layer that stops a wet wrapper or a melted chocolate bar from reaching the outer fabric.
Add the flat base last. Cut a circle or rounded rectangle 2 inches larger than the bag opening, press interfacing to it, and sew it to the bottom edge with the pieces right sides together. Turn the bag right side out and push the corners out with a chopstick. A base that stands unaided is worth the extra ten minutes, because a bag that tips over spills its contents and ends the run early.
Finish the Halloween Look
Decorate after the structure is finished, and keep every embellishment light. Anything with weight, stiffness or a hard edge cancels the work you did on the straps.
Glow-in-the-dark paint on a jack-o-lantern face, fabric strips of orange and black along the top edge, or an iron-on patch on the front all add nothing to the weight. Reflective tape on the strap is the most useful decoration of the lot, since it catches headlights on a dark street and parents describe it as the one detail they are glad they added.
Skip heavy trim, thick interfacing on the whole body, and glued-on buttons. A ribbon monogrammed with a hot glue gun adds almost nothing and takes ten minutes, which is a good trade on a no-sew bag.
Common Mistakes
Almost every complaint about a DIY treat bag traces back to one of these six.
Handles too narrow. Anything under 2 inches digs in. Use 2 to 3 inch webbing and the problem disappears.
Handles that pull out. Box-stitch the ends instead of a single line of stitching, and anchor through interfacing as well as fabric.
Bag too big. The most common error. Size it to the child, not to the number of houses on your route.
No structure in the base. The candy slides, the bag tips, and the contents end up on the pavement. Fuse interfacing to the base and make it 2 inches wider than the opening.
Open or unsecured top. Drawstring, zipper or flap. A bag that spills takes the fun out of the last three houses.
Heavy decorations. Batting, felt layers and thick trim add weight and scratch against a costume. Keep the body light.
If you do not own a sewing machine, the no-sew path takes about ten minutes: lay out two fabric squares plus one strip of fabric for the handle on a pillowcase, a thrifted tote, or two layers of felt, glue the handle strips between the layers at each side, and press a seam with double-sided tape on the open edges. Duck tape works too, though it splits at the corners after a season of use.
After Halloween, empty it, spot clean with a damp cloth and mild soap, and let it air dry fully before folding. Store it flat with the strap tucked in rather than hanging it, which stretches the webbing over a season. Most fabric bags made this way last several years and get handed down.
Frequently Asked Questions
What is the easiest material to use for a lightweight trick-or-treat bag?
Quilting cotton is the easiest all-around choice. It is the lightest common fabric, it washes well, and medium-weight fusible interfacing gives it enough body to stand up without quilting the whole bag. Cotton canvas is tougher and holds a flat base better, but it is heavier. Avoid thick quilt batting across the entire body, since that weight lands on a small shoulder for two full hours.
How big should a trick-or-treat bag be for Halloween candy?
Size it to the child rather than to the route. An 8 by 9 inch bag suits a preschooler and holds roughly 10 to 12 pieces, while a 9 by 11 inch bag works for a school-age child. Fill the bag with wrapped candy, close it, and check that your child can lift and walk with it. A bag they can carry themselves is always more useful than a bigger one they hand back.
What type of strap makes a trick-or-treat bag easiest to carry?
Flat cotton webbing or belting 2 to 3 inches wide is the most comfortable for a child carrying by hand. For a full bag, an adjustable 1 inch shoulder strap with a slider buckle is better still, because the weight rests on the body and both hands stay free. Box-stitch the ends of any strap so they cannot pull out once the bag is loaded with candy.
Can I make a trick-or-treat bag without sewing?
Yes, and it takes about ten minutes. Use a thrifted tote, a clean pillowcase, or two layers of felt as the body. Glue a 2 inch wide fabric strip between the layers at each side to form handles, then run double-sided tape along the open edges to close the bag. Duck tape works for the seams too, though expect the corners to split after a season.
How can I keep a Halloween candy bag from getting heavy?
Start with a smaller bag than you think you need, since capacity is what creates weight. Use a light fabric such as quilting cotton, add interfacing only to the base rather than the whole body, and keep decorations flat and thin. Packing your own treats with the collecting bag halves the load for a child aged four or under. A shoulder strap also moves the weight off small hands.
How do I clean a reusable trick-or-treat bag after Halloween?
Turn it out, wipe the lining with a damp cloth and a little mild dish soap, and check for sticky wrappers in the seams. Cotton bags with no batting can go in a cool washing machine inside a pillowcase on a gentle cycle, then air dry. Do not tumble dry webbing handles or fusible interfacing. Let the bag dry completely, then store it flat with the strap tucked in.
Start with the handles. Cut two 20 inch lengths of 2 to 3 inch cotton webbing, box-stitch the ends, and sew them on before you think about anything decorative. Pick a bag size your child can lift when it is full, add a wide flat base so it stands up, and you have solved the part of trick-or-treating that actually wears kids out.