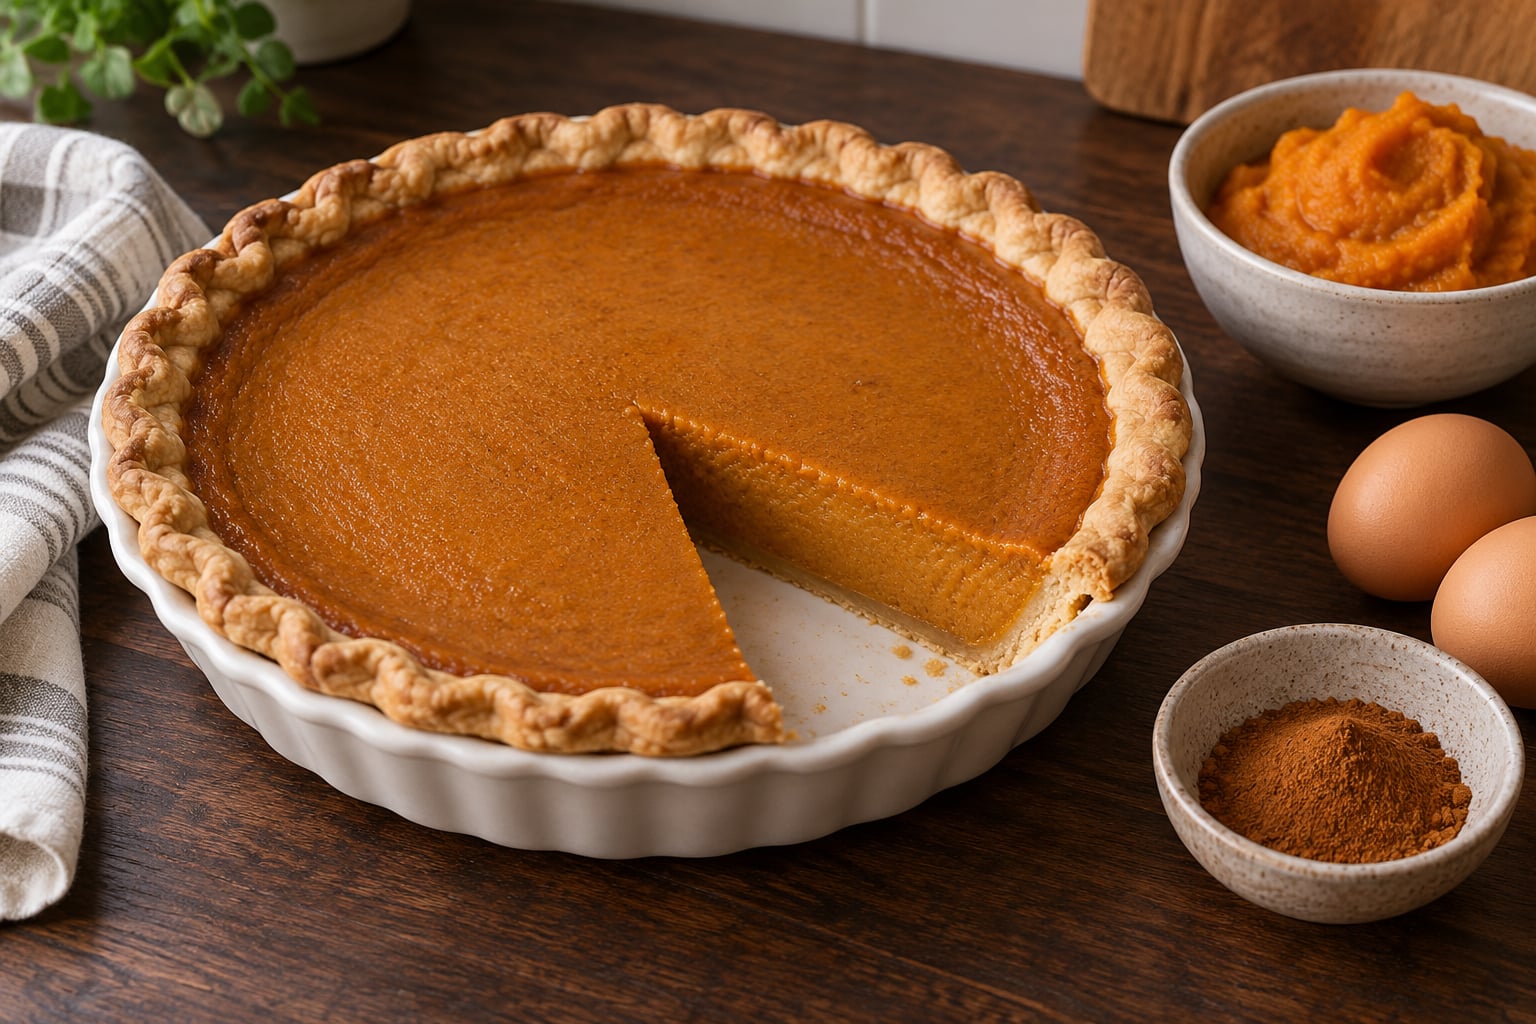
Canned pumpkin pie filling is a pre-sweetened, thickened mixture of pumpkin, sugar and corn syrup, and you do not need it. Making pumpkin pie without canned filling means whisking 100 percent pumpkin puree with eggs, milk, sugar and warm spices, pouring it into a blind-baked crust, and baking it gently until the center just trembles. It takes about 25 minutes of hands-on work and an hour from oven to cool enough to slice.
The reason home bakers go this route is simple: the can cannot be adjusted. A from-scratch filling lets you set the sweetness yourself, use pumpkin you roasted at home, and end up with a cleaner, less gummy texture. The one thing to watch is water, because fresh pumpkin puree carries far more of it than the stuff in a can.
Table of Contents
- What You Need
- Substitutions that work
- Step-by-Step: How to Make Pumpkin Pie Without Canned Filling
- Prepare the Pie Crust and Oven
- Make the Pumpkin Filling from Scratch
- Fill and Bake the Pumpkin Pie
- Cool the Pie Before Serving
- Common Mistakes
- Tips for the Best From-Scratch Pumpkin Pie
- Frequently Asked Questions
- Can I make pumpkin pie without canned pumpkin?
- What can I use instead of evaporated milk in pumpkin pie filling?
- How do I know when pumpkin pie is done baking?
- Why is my from-scratch pumpkin pie watery?
- Can I make pumpkin pie ahead of time?
- How long does homemade pumpkin pie last in the refrigerator?
- Conclusion
What You Need
For one 9-inch (23 cm) pie you need 2 cups (480 g) of 100 percent pumpkin puree, two large eggs, three-quarters cup (150 g) of light brown sugar, one can (12 fl oz / 355 ml) of evaporated milk or half-and-half, one tablespoon of cornstarch or all-purpose flour, one teaspoon of ground cinnamon, one-half teaspoon of ground ginger, a quarter teaspoon of freshly grated nutmeg, a quarter teaspoon of ground cloves, one teaspoon of pure vanilla extract, a pinch of salt, and one unbaked 9-inch pie crust.
Buy plain pumpkin puree, not pumpkin pie filling. The label on puree lists one ingredient: pumpkin. Pie filling lists pumpkin, sugar, corn syrup, starch, spices and preservatives, and it is already sweetened to the point where adding brown sugar makes the pie cloying.
For the pumpkin itself, a small sugar pie pumpkin gives the most flavor and the least water. Roast it whole at 375°F (190°C) until a knife slides through, roughly 45 to 60 minutes, then scoop, seed and blend the cooked flesh. One medium pie pumpkin yields roughly two cups of puree, which is exactly one pie. Roasting beats boiling because the dry heat concentrates the flavor; boiling leaves the flesh wet.
Substitutions that work
| Instead of | Use | What changes |
|---|---|---|
| Evaporated milk | Half-and-half or whole milk | Slightly thinner and less rich; add 1 extra teaspoon cornstarch to compensate |
| Evaporated milk | Coconut cream, full-fat | Dairy-free and rich, but coconut flavor comes through clearly |
| Evaporated milk | Half the volume of sweetened condensed milk plus half milk | Sweeter and denser; cut the brown sugar by a quarter cup |
| Cornstarch | Arrowroot starch, or 2 tablespoons flour | Arrowroot sets glossier; flour adds a faint baked flavor and more body |
| Brown sugar | Granulated sugar plus 2 tablespoons maple syrup | Cleaner sweetness, slightly less depth |
Make the dough a day ahead and refrigerate it, or freeze it for up to a month. Bakers who have frozen a disk of dough report it rolls fine after a thaw at room temperature for 20 minutes.
Step-by-Step: How to Make Pumpkin Pie Without Canned Filling
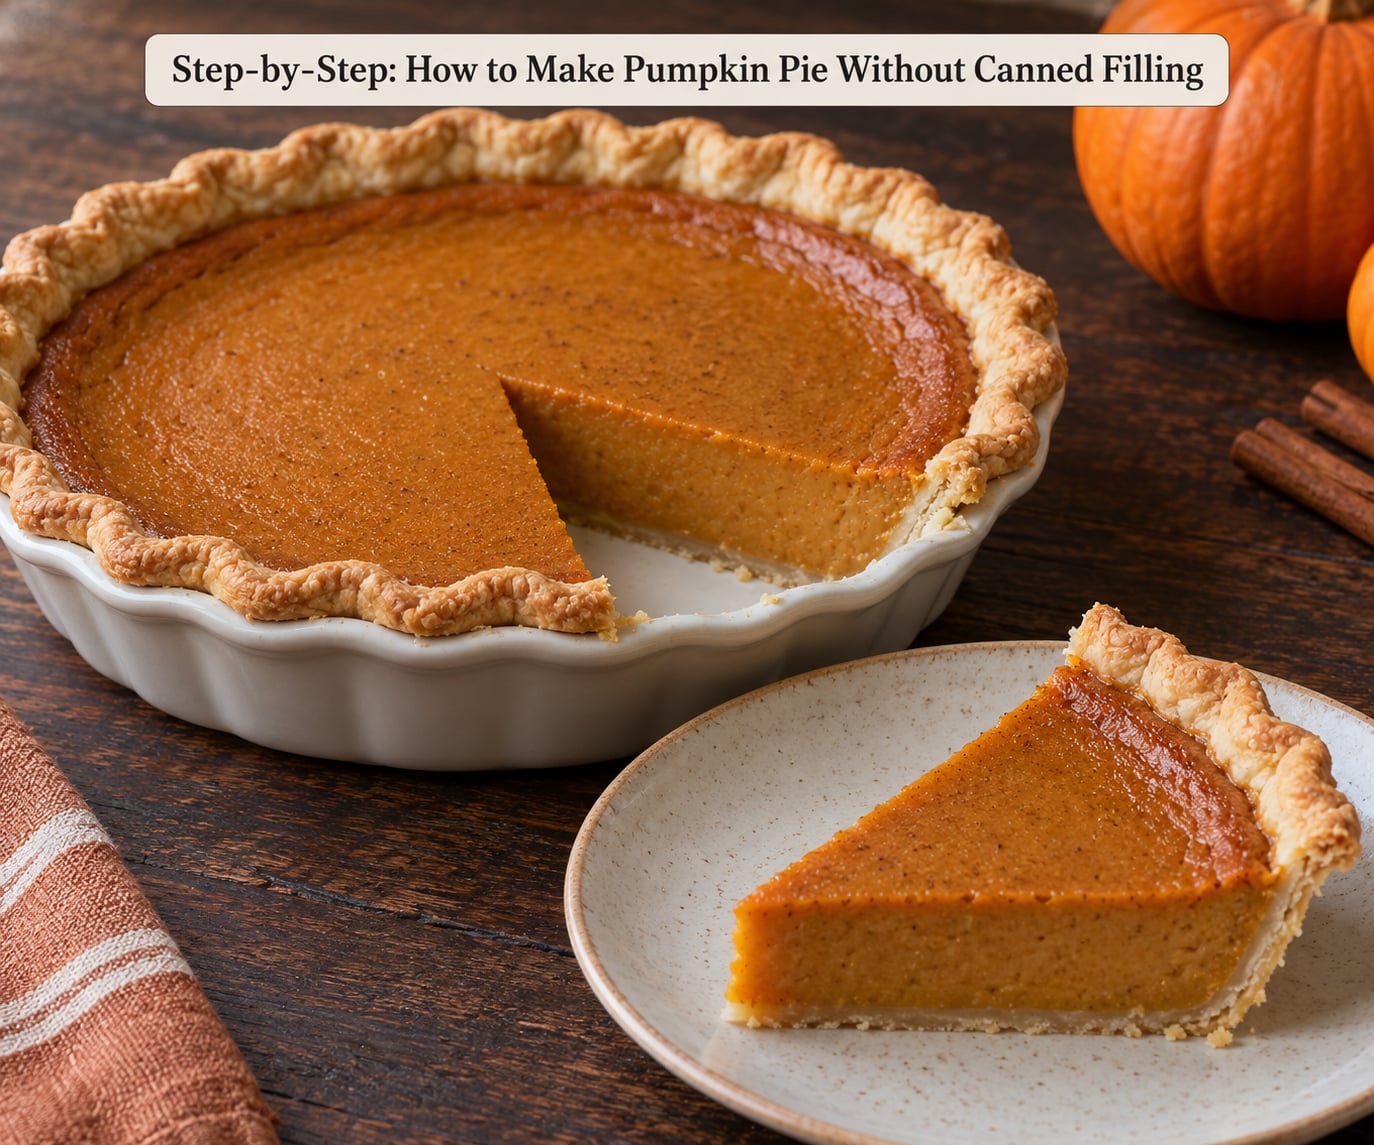
The process has four stages. You prepare and blind-bake the crust, whisk the filling until smooth, pour it into the hot shell, and bake in two stages so the crust sets before the custard finishes. Cooling is not optional, because the filling keeps setting as it cools.
Prepare the Pie Crust and Oven
Blind baking is the step that prevents a soggy bottom. Chill the dish and the crust for 20 minutes, prick the base with a fork, line it with foil, and fill with pie weights or dried beans. Bake at 425°F (220°C) for 15 minutes, pull the foil, and bake 8 more minutes until the base looks dry and pale gold.
Store-bought frozen crusts go straight in without chilling. They are already engineered for this, and chilling makes them shrink. Skip blind baking entirely only for a chilled homemade crust you trust, or for a raw crust you plan to bake with the filling at a lower temperature.
Make the Pumpkin Filling from Scratch
Whisk the eggs and brown sugar together first, until no grainy sugar sits at the bottom. Beat in the puree, then the milk, then the cornstarch, spices, vanilla, and salt. The finished mixture should pour like loose cream.
Whisk gently. A fast mixer incorporates air, and that air turns into holes and a grainy texture once the eggs set. If you made puree from roasted fresh pumpkin, strain it through a fine sieve or press it in a cheesecloth-lined colander and discard what drips out. That one step removes enough water to make the filling the consistency of thick batter.
Fill and Bake the Pumpkin Pie
Pour the filling into the hot shell while it is still warm from the blind bake. Warm crust plus hot filling gives you a better head start than a cold shell, and it reduces the chance of a soggy bottom. Stop about a quarter inch from the rim so the custard has room to rise without spilling.
Bake at 425°F (220°C) for 15 minutes, then drop the oven to 350°F (175°C) and bake 45 to 55 minutes more. The edges should be puffed and matte with light caramel color, while the center still trembles when you nudge the dish. An instant-read thermometer in the center reading 165°F to 175°F (74°C to 79°C) confirms it.
That jiggle is the doneness signal, not the color. Carryover cooking finishes the center during cooling, so a filling that looks set in the oven will slump the moment it sits.
Cool the Pie Before Serving
Cool on a wire rack for two to three hours before slicing. Bakers on baking forums report the pie needs closer to four hours, or an overnight rest in the refrigerator, before it holds a clean slice without slumping. Warm filling is still custard, not set custard.
Use a long thin knife dipped in hot water and wiped between cuts. Wipe the blade each time and the slices come off razor clean, with no crumbs dragging across the surface.
Common Mistakes
| What went wrong | Why it happened | The fix |
|---|---|---|
| Filling is watery and the slices slump | Fresh pumpkin puree carried too much water into the custard | Strain the puree, add 1 extra tablespoon cornstarch, and add 2 tablespoons extra evaporated milk to keep the egg ratio honest |
| Bottom crust is soft after baking | Crust was under-baked, or the pie was not cooled before slicing | Blind bake a full 15 minutes with weights, and do not cut the pie for at least three hours |
| Cracks run across the center | The pie was overbaked, so the egg proteins tightened | Pull it 10 to 15 minutes earlier and trust the jiggle instead of the color |
| Custard weeps or leaks at the rim | Filling was overfilled, or the crust edge was not crimped high | Crimp the edge well and stop a quarter inch below the rim |
| Way too sweet | Pumpkin pie filling was used where 100 percent puree was called for | Start over with puree and brown sugar; next time halve the sugar to three-eighths cup |
| Filling tastes rubbery or bakes chewy | Too much flour, or the pie sat in the oven too long | Drop the flour entirely and use cornstarch, which sets without a grainy bite |
The watery version of this problem is the dominant one for people cooking with fresh pumpkin. Reddit bakers who roasted whole pumpkins at 350°F to 400°F reported pulling out as much as 64 ounces of puree, and the first batch they used straight from the blender produced a pie that would not hold a slice.
Tips for the Best From-Scratch Pumpkin Pie
- Control sweetness at the source. If you like the classic canned-pie flavor, use three-quarters cup brown sugar plus two tablespoons maple syrup. If you want the pumpkin to lead, drop to half a cup.
- Grate the nutmeg fresh. A quarter teaspoon of freshly grated nutmeg smells like pie. The same amount of ground nutmeg from a jar tastes dusty and slightly soapy.
- Salt the puree, not the dish. A quarter teaspoon of fine salt in the filling sharpens everything else. Salting the water you drain from the puree does nothing.
- Plan the make-ahead. An unbaked filled pie refrigerates for up to two days; bake it cold, adding about 10 minutes to the second stage. A baked pie keeps 3 to 4 days refrigerated, covered loosely, and freezes for two months uncut.
- Freeze the puree in portions. Portion home-roasted puree into 1-cup bags, lay them flat to freeze, then stack them. Thaw overnight in the fridge and use it in pie, bread, pancakes or a latte.
- Use the crust for a party tray. The same filling poured into mini pie pans or a muffin tin with rolled dough cups gives you a Halloween dessert tray that holds a dozen portions and needs no slicing.
Frequently Asked Questions
Can I make pumpkin pie without canned pumpkin?
Yes, and many bakers prefer it. Roast a sugar pie pumpkin at 375°F until a knife slides through the thickest wall, about 45 to 60 minutes. Scoop out the seeds, peel the skin, blend the cooked flesh, then strain it through a sieve to drop the excess water. Two cups of that puree is exactly the amount one 9-inch pie needs. Boiling works too, but the puree stays wetter and the flavor is flatter.
What can I use instead of evaporated milk in pumpkin pie filling?
Half-and-half or whole milk is the easiest swap. Use the same volume and add one extra teaspoon of cornstarch, because dairy milk is thinner than evaporated milk and the custard sets less firmly. Full-fat coconut cream gives you the richest dairy-free result with a noticeable coconut flavor. For sweetness control, replace half the evaporated milk with sweetened condensed milk and cut the brown sugar by a quarter cup.
How do I know when pumpkin pie is done baking?
Nudge the dish gently. The edges should be puffed and set while the center still trembles slightly, and an instant-read thermometer in the middle should read between 165°F and 175°F. The filling finishes setting during cooling, so a center that looks firm in the oven will still be soft on the counter. Baking past the jiggle stage is what causes cracks and a dry, rubbery texture.
Why is my from-scratch pumpkin pie watery?
Almost always excess water in the puree, especially if you made it from fresh pumpkin. Fresh puree holds far more liquid than canned 100 percent puree. Strain it through a fine sieve, press it in a cheesecloth-lined colander, or simmer it in a pan for 10 minutes until it thickens. You can also add an extra tablespoon of cornstarch to the filling. Under-baked crust is the second cause, so blind bake the shell fully before pouring.
Can I make pumpkin pie ahead of time?
Yes. An unbaked filled pie refrigerates for up to two days; bake it straight from the cold, adding roughly 10 minutes to the second bake stage. A baked pie keeps 3 to 4 days in the refrigerator covered loosely, and freezes well for up to two months if you leave it uncut and cool it completely first. Thaw a frozen pie in the refrigerator overnight, never on the counter.
How long does homemade pumpkin pie last in the refrigerator?
A baked pumpkin pie made with eggs and dairy keeps 3 to 4 days in the refrigerator at or below 40°F. Cover it loosely with foil or a pie dome so the crust does not dry out. For longer storage, freeze it uncut in a foil-wrapped pan for up to two months, then thaw it in the refrigerator overnight. Do not leave pumpkin pie at room temperature for more than two hours.
Conclusion
Start with the crust. Blind bake it at 425°F for 15 minutes with weights, then finish it uncovered, because a fully set shell is what keeps the bottom from going soft under a wet custard. Make sure the ingredient is 100 percent pumpkin puree rather than pie filling, and strain any fresh puree you made at home before it goes in the bowl.
Whisk everything gently, pour into the hot shell, and watch for the jiggle rather than the color. Pull the pie at 165°F to 175°F in the center, let it cool three hours or refrigerate it overnight, and you will get clean slices from a filling you built entirely yourself.