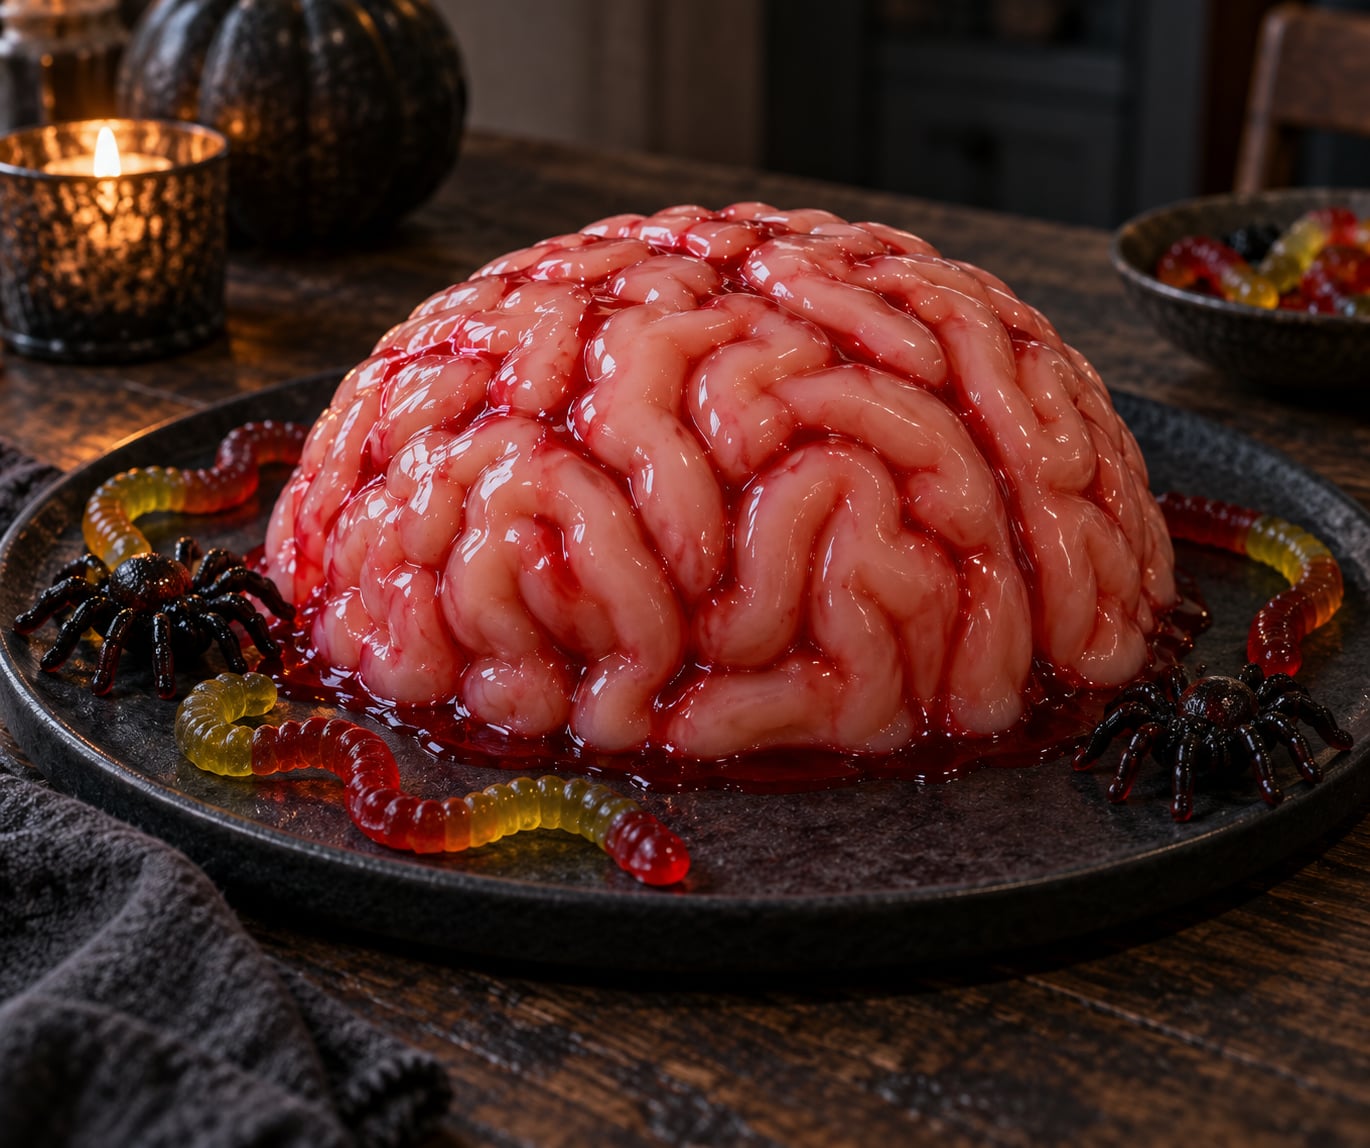
A brain shaped jello is just flavored gelatin poured into a silicone brain mold, chilled until firm, and turned out onto a plate. You dissolve the gelatin in boiling water, stir in evaporated milk for the grey-pink flesh tone, tint it with a few drops of food coloring, then let it set 4 hours or overnight. This is my dependable 2026 method.
It takes about 15 minutes of actual work plus chill time, and the difficulty is low. One brain serves 8 to 10 people as a party centerpiece. Everyone squints at it, then eats it.
Table of Contents
- What You Need
- Brain Shaped Jello at a Glance
- Ingredients
- Equipment, and what to use without a brain mold
- Step-by-Step
- How to make brain shaped jello in 8 steps
- Make the Jelly Base
- Color and Flavor the Base
- Fill the Brain Mold
- Unmold and Decorate
- Common Mistakes
- Frequently Asked Questions
- Do I need a brain mold to make brain shaped jello?
- How long does a jello brain need to refrigerate before unmolding?
- Why is my jello sticking to a silicone mold?
- Can I make a brain-shaped jello without a brain mold?
- Can I make brain jello a day ahead?
- What is the 3 ingredient version of a brain jello recipe?
- Conclusion
What You Need
Brain Shaped Jello at a Glance
- Prep time: 15 minutes
- Chill time: 4 hours minimum, overnight for the cleanest release
- Yield: 1 whole brain, 8 to 10 servings
- Difficulty: Easy, as long as you let the gelatin dissolve fully
- Keeps: 3 to 4 days refrigerated; serve within 24 hours of unmolding for the best shape
Ingredients
- 1 box (6 oz / 170 g) peach or watermelon flavored gelatin
- 2 cups (480 ml) boiling water
- 1 cup (240 ml) fat-free evaporated milk
- 8 to 10 drops green liquid food coloring
- 4 to 6 drops red liquid food coloring
- Nonstick cooking spray or neutral oil
Peach is the classic pick because the pink base only needs green added to land on that grey-pink flesh tone. Watermelon works too, and it skews a little redder, so drop the red coloring to two drops.
If you use unflavored gelatin, use 7 g (about 2 envelopes) and add 1/3 cup sugar. Skip the water entirely and let the evaporated milk do the thinning, which is what gives you the creamy set that holds the groove detail.
Equipment, and what to use without a brain mold
A silicone brain mold is the obvious tool and the only one that gives you the two-lobed shape with wrinkled folds. Lightly spray it, set it on a flat shelf, and leave it alone.
If you do not own one, these substitutes all work:
- Loaf pan: reads as a long ridged block. Score the top with a knife after it sets, or drag a fork through it to fake folds. The easiest option for a first attempt.
- Silicone glove or hand mold: the closest DIY shape to a real brain, since the fingers give you the lobes.
- Small bowl: flip it out dome-side up and it looks like a smooth dome with a brain-like curve.
- Ice cube tray: individual gelatin cubes for party guests who do not want to share a face-shaped dessert.
- Round cookie cutter: press set gelatin down inside it, then lift the rim away. Good for flat brain slices on a platter.
Step-by-Step
How to make brain shaped jello in 8 steps
- Prep the mold with cooking spray and place it on a level fridge shelf.
- Boil 2 cups of water and pour it over the gelatin powder.
- Stir 2 minutes until every grain is dissolved.
- Add the evaporated milk and stir again.
- Tint with green and red food coloring, drop by drop.
- Cool the mixture to lukewarm, about 10 minutes.
- Pour into the mold, leaving a finger of headroom, and tap out bubbles.
- Chill 4 hours or overnight, then unmold onto a cold plate.
Make the Jelly Base
Pour the boiling water over the dry gelatin and stir until clear. If you see a grainy swirl at the bottom, the gelatin is not dissolved yet, so keep stirring or heat the bowl again briefly. Undissolved powder is the single biggest reason a brain ends up weak or crumbly.
Let the liquid cool about 10 minutes before adding the evaporated milk. Very hot gelatin plus milk is how you get curdled, lumpy pudding instead of a smooth set, which is the mistake several Halloween forum threads describe.
Food safety is simple here. Keep gelatin hot above 140°F (60°C) when it sits for more than an hour, use a clean bowl and spoon, and refrigerate the finished brain within 2 hours of unmolding. Skip it entirely for anyone avoiding prepared desserts made outside a commercial kitchen.
Color and Flavor the Base
Add coloring with a toothpick rather than a whole bottle. Start with 8 drops of green and 4 drops of red, stir, and hold the bowl up to the light. You are aiming for grey-pink, not mint or bubblegum, so keep adding one drop at a time.
Too much food coloring is the one mistake that actually damages the result. The dye load thins the gelatin slightly, so a brain dyed heavy can slump in the fridge instead of holding its folds.
For flavor, keep it mild. Peach and watermelon both taste wrong once you push them into corpse territory, so the milk is doing the work and the gelatin is just a carrier.
Fill the Brain Mold
Spray the inside of the mold, then wipe out the pooling spray and leave the surface tacky. If the mold is at all greasy, gelatin will peel away in sheets rather than release whole.
Hold the bowl close to the mold and pour slowly from one side. Tap the mold on the counter twice so trapped bubbles rise, then poke any remaining ones with a toothpick.
Leave half an inch of headroom. Brain molds are deep and a full mold overflows the moment you move it, and gelatin in the fridge carries flavor into everything else in there.
Refrigerate 4 hours at minimum, overnight if you can. Wrap a folded kitchen towel around the base if the mold wobbles on the shelf, which is the trick most often recommended on Halloween cooking forums.
Unmold and Decorate
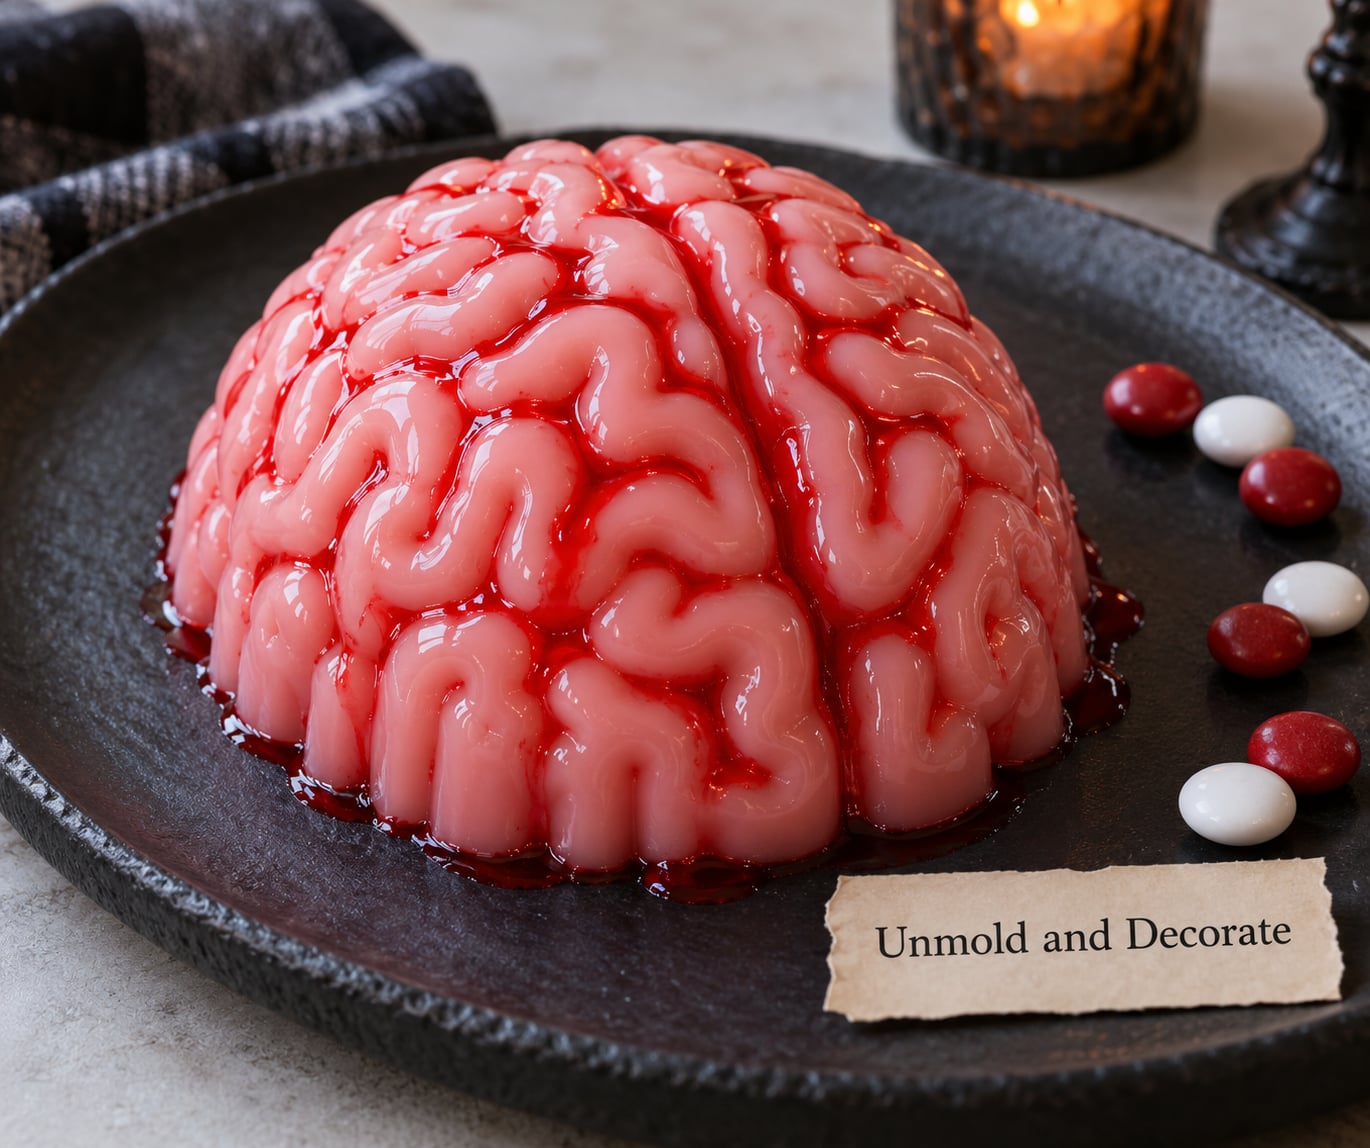
Run a thin knife around the rim, then flex the silicone with your fingers until you see daylight along the edge. Turn it onto a chilled plate and lift straight up, no twisting. If it grips, dip the base in warm water for 10 seconds and try once more.
Skip the warm water on a brain you already want to slice, and never pour hot water down inside the mold. Enough warm water melts the surface and turns the folds into a puddle, which is a known complaint on dessert troubleshooting threads.
Dress it right before serving. Thin red syrup or watered-down raspberry preserves along the grooves reads as fresh-from-the-coroner, and gummy worms, candy spiders or mini chocolate chips pressed into the filling do the rest.
Common Mistakes
- Too much food coloring: use a toothpick and count drops. Heavy dye thins the gelatin and the brain slumps.
- Mold not greased: spray, wipe out the puddles, and use the mold again within a few minutes.
- Unmolding too early: if it slumps or the plate wobbles when you touch it, it needs more time. Four hours is the floor.
- Gelatin not fully dissolved: stir a full 2 minutes after the boiling water goes in, or reheat and stir again.
- Too-thin mix: extra water or melted ice makes it weep. Use less liquid next time and keep the headroom.
- Curdled milk: you added evaporated milk while the gelatin was still very hot. Cool it down first.
- Brain breaks in half: chill overnight, spray before pouring, and lift rather than pry.
For a bigger party, double everything and pour half the mixture into a loaf pan. Leftover gelatin poured into a shallow dish turns into a brain dip or a stack of flat brain slices.
Frequently Asked Questions
Do I need a brain mold to make brain shaped jello?
No, but it is the only tool that gives you the real thing. A loaf pan makes a ridged block that you can score with a knife once it sets. A silicone glove or hand mold comes closer, since the fingers form lobes. A small bowl flipped dome-side up gives a smooth curved shape. All four release the same way: grease lightly, chill fully, lift gently.
How long does a jello brain need to refrigerate before unmolding?
Four hours is the minimum, and overnight is better. Gelatin needs cold time to finish setting its network, and a brain that is only just firm will tear as you lift it. Test by touching the center of the mold gently; if it still moves or wobbles, give it another two hours. Unmold within a day of setting for the cleanest release.
Why is my jello sticking to a silicone mold?
Three things cause it. Greasy or unwarmed molds grab gelatin, so spray and wipe out the pooling. Food coloring overload adds extra liquid and weakens the set. And cool gelatin shrinks tightly onto silicone. Try coating the inside with a thin layer of neutral oil, keep coloring to about 10 drops, and flex the mold while it is still slightly chilled from the fridge.
Can I make a brain-shaped jello without a brain mold?
Yes, and it takes about the same time. A loaf pan is the easiest swap: pour in the gelatin, let it set, then run a knife tip along the surface to carve fold lines, or drag a fork through it for texture. A cookie cutter pressed into a set round dish gives clean brain slices. A silicone glove or hand mold has the closest built-in shape to a real brain.
Can I make brain jello a day ahead?
Yes, and you should. Mix, pour and chill the night before, leaving it in the mold so nothing dries out. Unmold the day of the party and decorate within the hour, since syrup and candies pull moisture from the surface. Refrigerated gelatin keeps 3 to 4 days, though a brain that has sat for a day loses some of its shine.
What is the 3 ingredient version of a brain jello recipe?
Flavored gelatin, boiling water and evaporated milk. Use one 6 oz box of peach gelatin, 2 cups boiling water and 1 cup fat-free evaporated milk. That gives the grey-pink tone on its own, so you can leave food coloring out entirely or add just a few drops of green. Chill 4 hours in a greased mold and it is done.
Conclusion
Start by dissolving the gelatin completely in boiling water and stirring the evaporated milk in once it has cooled. Everything else follows from that one step, and it is what separates a brain that holds its grooves from one that slumps on the plate.
Grease the mold, pour slowly, and chill the full 4 hours or overnight. Unmold gently onto a cold plate, then add the syrup and candies just before guests arrive. That timing is the whole recipe.