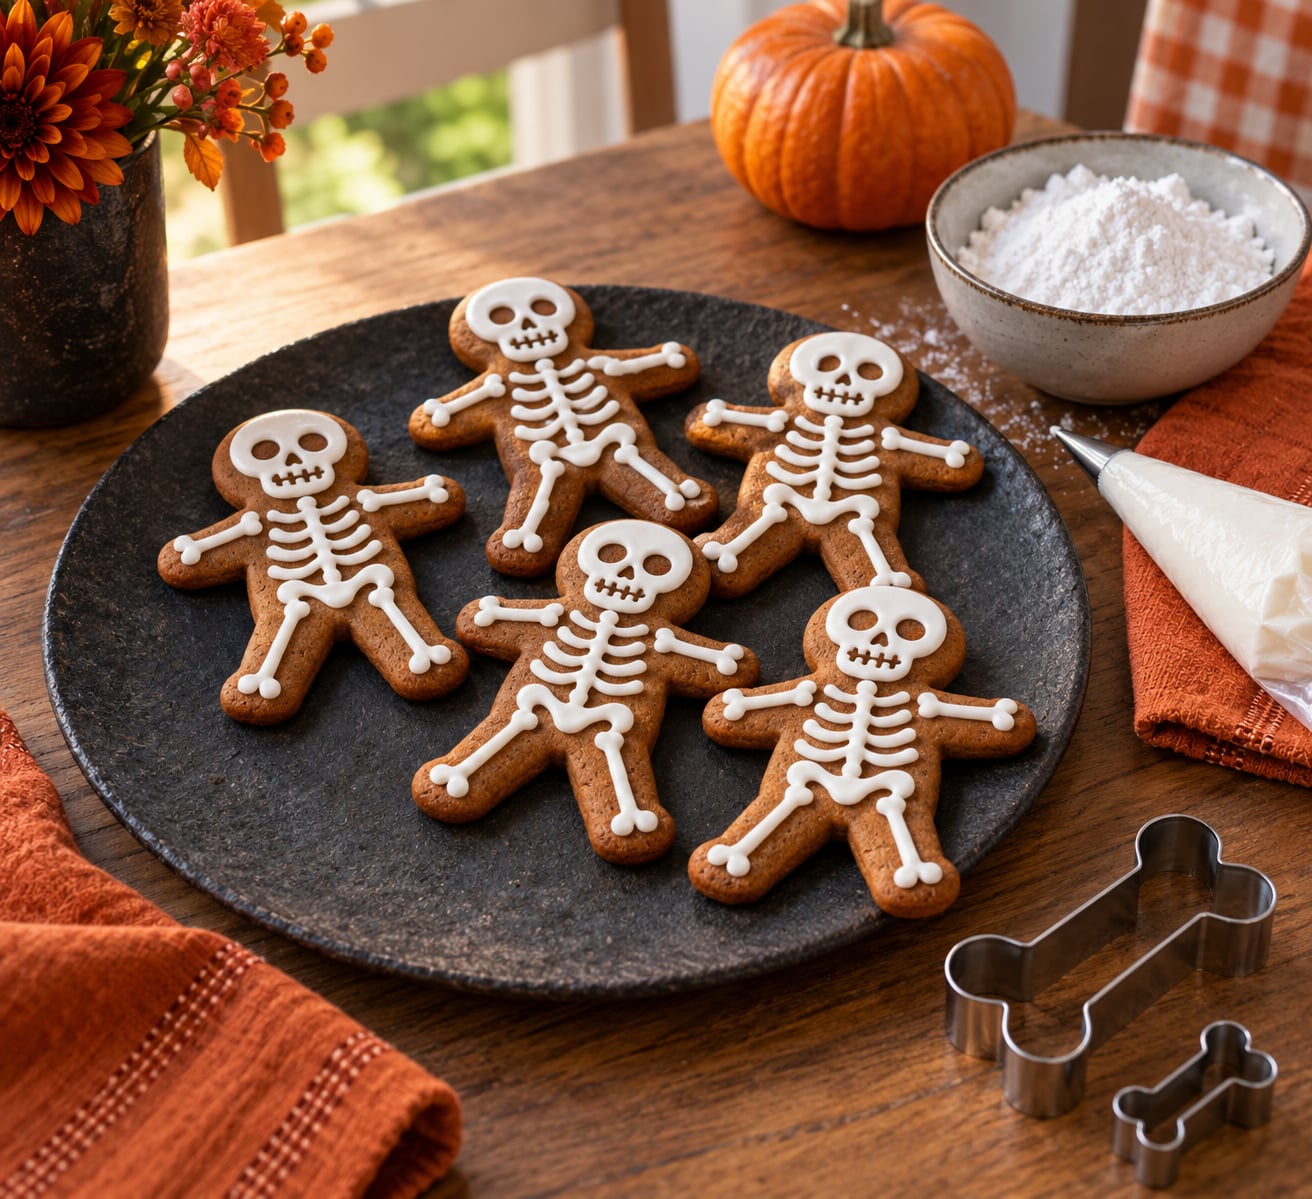
Gingerbread skeleton cookies are ordinary gingerbread men baked until golden, then piped all over with white royal icing so they read as a skull, ribcage, spine and limb bones. Learning how to make gingerbread skeletons comes down to four stages: mix and chill the dough, roll and cut the shapes, bake, then pipe. Active time is about an hour, plus 30 minutes chilling and 10 to 12 minutes baking per tray.
Nothing in this method is difficult, and the dough is forgiving. The part that catches people out is the icing: royal icing has to be stiff enough to hold a thin bone line, and that is a texture thing, not a shopping thing.
A batch makes about 16 cookies, which covers a family with leftovers for the trick-or-treaters. I bake mine a few days early and decorate on the day, because piped icing and fresh cookies do not get along in a sealed box.
Table of Contents
- What You Need
- For the dough
- For the royal icing
- Equipment
- Step-by-Step: How to Make Gingerbread Skeletons
- 1. Cream the butter and sugar
- 2. Mix in the wet ingredients
- 3. Add the dry ingredients
- 4. Chill the dough
- 5. Roll and cut
- 6. Bake
- 7. Cool completely
- 8. Pipe the skeleton
- How to Decorate Gingerbread Skeletons
- Common Mistakes and Easy Fixes
- Storage, Serving, and Make-Ahead Tips
- Frequently Asked Questions
- Do I need a special gingerbread skeleton cookie cutter?
- Can I make gingerbread skeletons ahead of time?
- What icing holds gingerbread skeleton pieces together?
- How do I stop my gingerbread cookies spreading?
- How can I fix cookie dough if it is too crumbly to roll out?
What You Need

For the dough
- 2 1/4 cups (280g) plain flour, plus extra for dusting
- 1 teaspoon bicarbonate of soda (baking soda)
- 2 teaspoons ground ginger
- 1 teaspoon cinnamon
- 1/4 teaspoon mixed spice (optional, for a warmer note)
- 1/2 cup (110g) unsalted butter, softened
- 3/4 cup (150g) brown sugar
- 1/3 cup (80ml) molasses or golden syrup, interchangeable here
- 1 egg
- 2 tablespoons milk
For the royal icing
- 2 cups (480g) icing sugar, also called confectioner’s sugar or powdered sugar
- 2 egg whites, or 4 tablespoons of water for a stiffer egg-free version
- 1/2 teaspoon lemon juice or cream of tartar, to help it set hard
- A piping bag and a 3mm round nozzle
Equipment
A rolling pin, a bone or gingerbread man cookie cutter, baking parchment, a wire rack, a mixing bowl, and an oven mitt you trust more than your bare hands. Icing sets hard, so a silicone baking mat saves you from peeling parchment off delicate cookie edges later.
| Measurement | US customary | Metric |
|---|---|---|
| Flour | 2 1/4 cups | 280g |
| Brown sugar | 3/4 cup | 150g |
| Molasses or golden syrup | 1/3 cup | 80ml |
| Icing sugar | 2 cups | 480g |
| Bake, conventional oven | 350F | 180C |
| Bake, fan oven | 325F | 160C |
Step-by-Step: How to Make Gingerbread Skeletons
1. Cream the butter and sugar
Beat the softened butter and brown sugar together until pale, about 2 minutes on medium speed. If you are doing this by hand, mash them with a fork until the mixture is light and no lumps of butter remain.
2. Mix in the wet ingredients
Add the molasses or golden syrup, then the egg and milk, and mix until combined. Scrape the bowl down once, because molasses hides in the bottom.
3. Add the dry ingredients
Whisk the flour, bicarbonate of soda, ginger, cinnamon and mixed spice in a separate bowl, then fold them into the wet mixture. Stop mixing the moment the flour disappears. A food processor does this in about 20 seconds and leaves less gluten behind than hand mixing.
4. Chill the dough
Wrap the dough and put it in the fridge for 30 minutes, up to 3 days ahead. Cold dough holds its edges, and edges that hold their shape are the whole game when the cookies go near a hot oven. Take it out and let it sit at room temperature for 10 minutes so it is workable but still cold.
5. Roll and cut
Roll the dough between two sheets of baking parchment to about 5mm, or 1/4 inch, thick. Even thickness matters more than the exact number: thin cookies bake through in eight minutes and go hard and brittle, thick ones stay doughy in the middle.
Cut out gingerbread man shapes, or skull and bone shapes if you have them. Press the cutter straight down without twisting or it drags the dough and rounds the outline.
No skeleton cutter? Print or draw a template, tape it to the dough, and cut around the lines with a sharp knife or a small round cutter. A skull is a circle, a ribcage is a rounded rectangle with four short bars, and limbs are straight bars with a knob on each end. Bake everything on one sheet and glue the parts together with icing afterwards. Reuse the same cutters for bats, cats and tombstones and you have a full Halloween sheet from one roll of dough.
6. Bake
Line a tray with parchment and bake at 350F (180C, 325F or 160C for a fan oven) for 10 to 12 minutes. Pull them while the centres still look underdone: they carry over on the tray and finish as you leave them. The edges should just be turning golden.
7. Cool completely
Let the cookies sit on the tray for 5 to 10 minutes before moving them to a wire rack. Moving them hot is the number one reason cookies snap in half, and warm icing slides off a warm cookie.
8. Pipe the skeleton
Make the icing, load a piping bag fitted with a 3mm nozzle, and draw the bones. Set the cookies on a sheet of baking paper so you can pick up the icing that misses, and pop that paper in the fridge for a few minutes to firm it, then scrape it off.
How to Decorate Gingerbread Skeletons
Whisk the icing sugar, lemon juice and egg whites (or water) together until thick and glossy, about 2 minutes. Test it by dragging a spoon across the bowl: the icing should hold a line that peaks and stands instead of slumping flat. Too runny and the bones bleed into each other. Too stiff and it tears the cookie as you pipe. Rescue either end with a spoonful of water or more sugar.
Work from the head down, and let each section dry for a minute before touching the next.
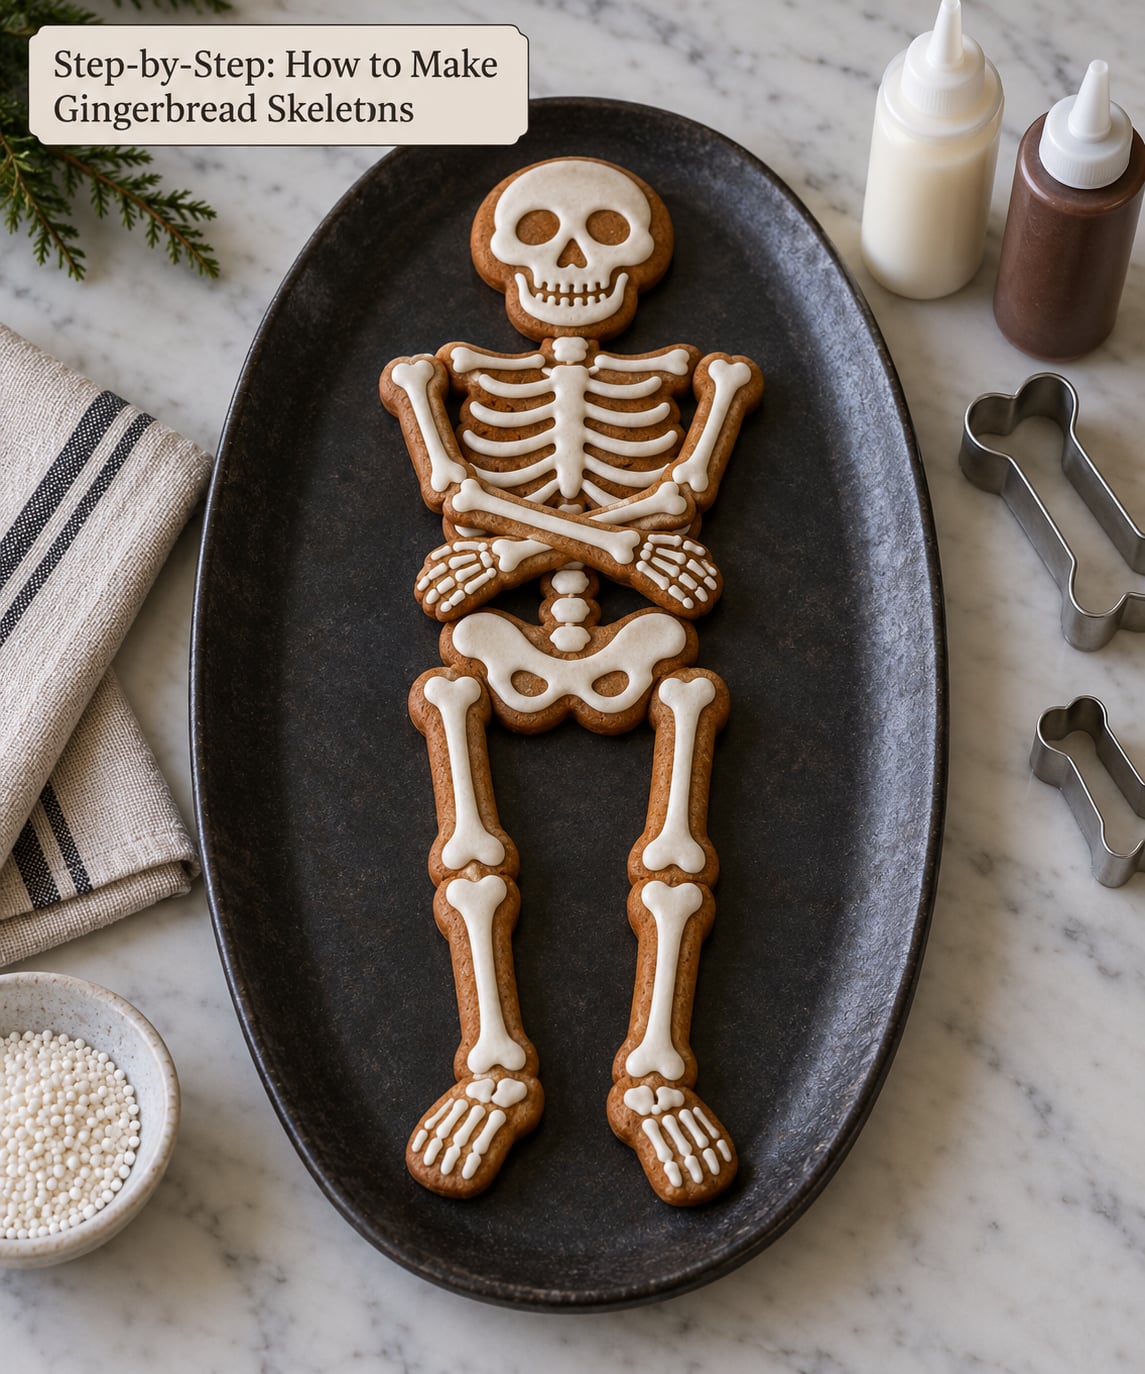
- Skull. Outline a rounded head shape with the rim of the nozzle, then fill the eye sockets with two dots and add a small nose triangle.
- Jaw and teeth. Pipe a short line across the lower face, then dots underneath for teeth.
- Ribcage. Draw a long oval for the chest and pipe three or four short curved bars inside it, evenly spaced.
- Spine. A straight line of small dots or short segments running down the centre, each one a vertebra.
- Pelvis. A flattened oval at the waist with a line or two across it.
- Arms and legs. Long bones down each limb, thick in the middle and thin at the ends, with a knob piped on at each joint and at the hands and feet.
Leave the finished cookies on a rack for 2 hours, or overnight if the room is warm, so the icing sets hard enough to stack and eat.
No piping bag for the kids? Flood the whole cookie with thinned white icing and let it dry, then let them draw bones on top with a gel pen, a squeeze bottle, or a chunk of a drinking straw dipped in icing and used like a stamp. Candy eyes, mini marshmallows cut into teeth, and pretzel sticks for a spine all work on top of a set flood layer.
Common Mistakes and Easy Fixes
| Problem | Cause | Fix |
|---|---|---|
| Cookies spread and merge | Dough too warm or not chilled enough | Chill 30 minutes minimum, roll to an even 5mm, and space cuts 2cm apart |
| Cookies hard and brittle | Thin dough or too long in the oven | Roll slightly thicker and pull them at 10 minutes, not 15 |
| Edges crack when rolling | Dough too cold or rolled too fast | Let it sit 10 minutes, then roll in gentle passes with light flour |
| Dough crumbles when handled | Too little molasses or too much flour added during mixing | Press it back together with your hands, add a teaspoon of molasses, and knead briefly |
| Icing bleeds and lines merge | Royal icing too runny | Add icing sugar a spoonful at a time until the spoon test holds a peak |
| Cookies break when moved | Moved hot or straight from a soft liner | Cool 5 to 10 minutes on the tray, then use a thin spatula on parchment |
The most repeated complaint in home baking threads is hard, dry cookies, and it is almost always an overbake rather than a bad recipe. Trust the carry-over and take them out early.
Storage, Serving, and Make-Ahead Tips
Undecorated cookies keep in an airtight container at room temperature for up to 5 days and stay soft. Decorated ones last about 3 days, because the icing slowly picks up moisture from the container and goes tacky.
For longer storage, freeze at the undecorated stage, in layers between sheets of parchment. They hold for 2 to 3 months in a sealed box. Thaw them in the container, uncovered, for a few hours before decorating, and decorate the same day you serve.
A working October timeline: make and freeze the dough two weeks out, cut and bake the shapes a week out, decorate the day before the party. Give the icing a full night to dry before stacking the cookies into a treat box.
For allergen reasons, this dough has gluten and dairy, and the egg-white version of the icing has egg. Use the water-based icing and a gluten-free flour blend if that matters for your table, and add one or two days of set time because gluten-free cookies are crumbly and the icing needs to carry them.
Frequently Asked Questions
Do I need a special gingerbread skeleton cookie cutter?
No. A skull, bone, circle, oval and small rectangular cutters work, or you can print a skeleton template, tape it to the rolled dough and trace the parts with a knife. Bake the pieces flat on one tray and join them with icing after, which is easier than juggling a fragile assembled cookie in and out of the oven.
Can I make gingerbread skeletons ahead of time?
Yes. Bake the undecorated cookies up to five days ahead and store them airtight at room temperature. You can also freeze them in layers between parchment for two to three months and thaw uncovered before decorating. Assemble or pipe them the day you plan to serve, since decorated cookies only keep about three days.
What icing holds gingerbread skeleton pieces together?
Thick royal icing, or a stiff icing made from icing sugar and a little water or milk, works well. Mix it until a spoon test holds a peak, then pipe or spread a small amount onto the joints. A thin glaze looks shiny but sets too softly to glue bones together or survive stacking.
How do I stop my gingerbread cookies spreading?
Chill the dough for at least 30 minutes before rolling, and roll it to an even 5mm thickness so the edges are not thinner than the middle. Leave 2cm between shapes on the tray. If they still spread, the oven is likely running hot, so drop the temperature by 25F (15C) and check it with an oven thermometer.
How can I fix cookie dough if it is too crumbly to roll out?
Press the crumbs together firmly with your hands, add a teaspoon of molasses or water, and knead briefly until it holds when you squeeze. Too much dusting flour is the usual culprit, so scrape the loose flour back off the worktop and roll between baking parchment instead of adding more.
Start with the dough tonight, chill it, and the hard part of how to make gingerbread skeletons is done. Bake the shapes a few days ahead, then set out the royal icing and let everyone draw their own bones.