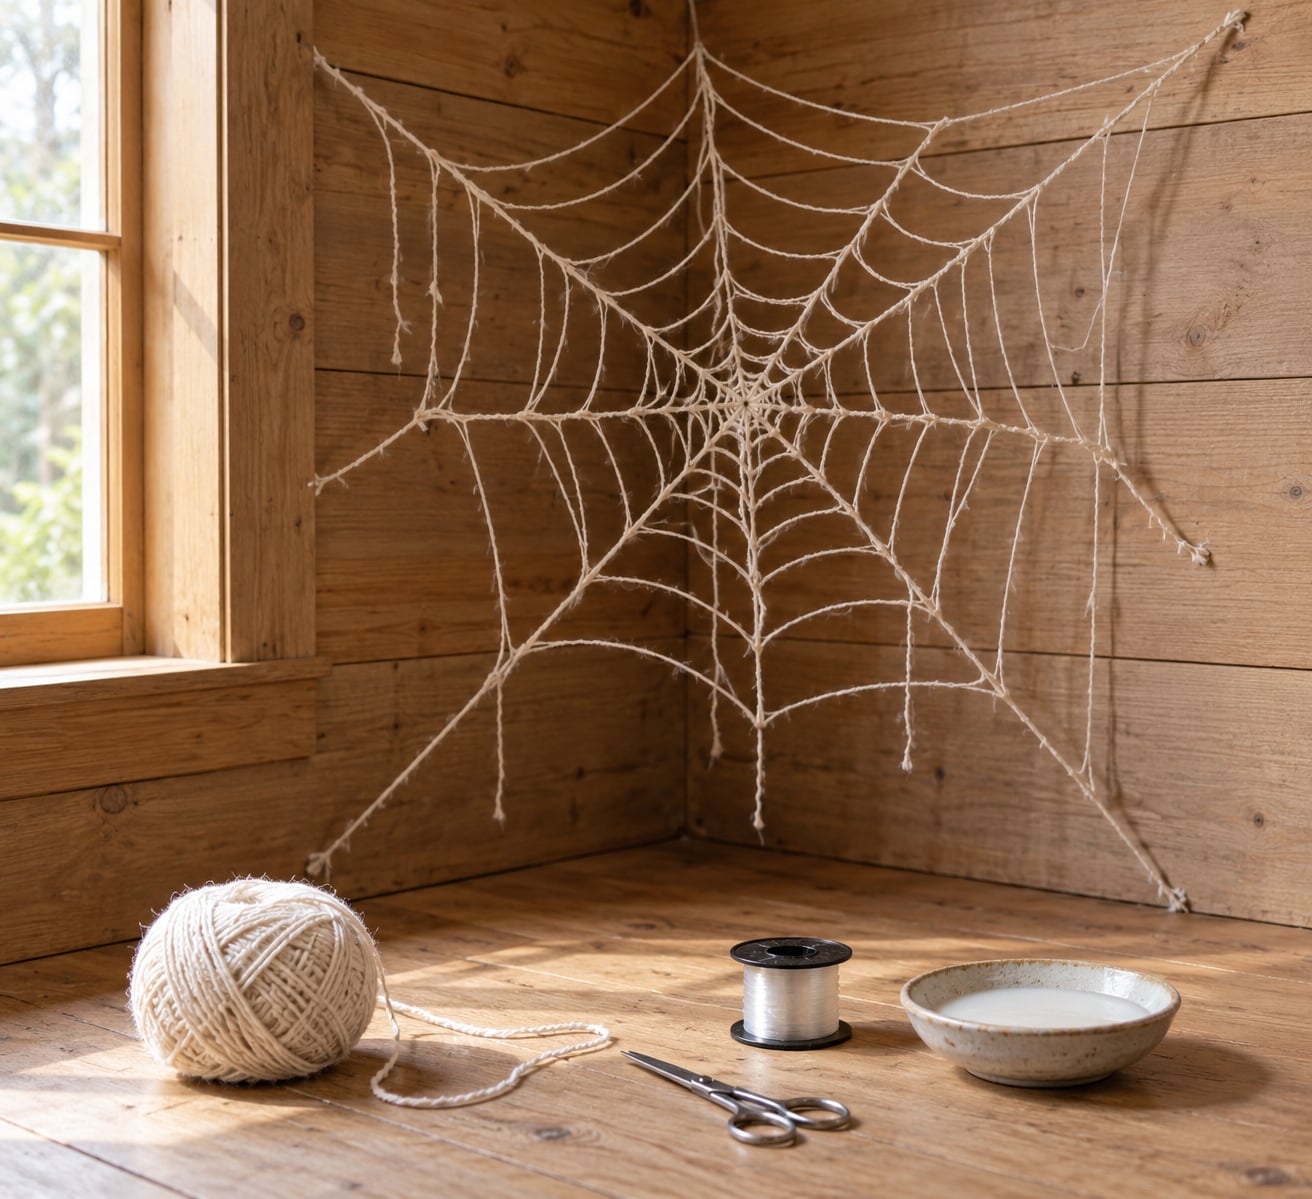
You can fake a cobweb with yarn, fishing line, paper, or a puddle of thinned washable glue, and none of it needs an aerosol can. Learning how to make fake cobwebs without the spray cans comes down to picking one of three methods: stretched fiber for the classic wispy corner web, glue and water for a temporary web you peel off at the end of the night, and torn paper for a cheap option that never smears. Set aside about 20 minutes for the first one and most of the work is done.
The reason people look for a spray-free method is mostly about cleanup. Aerosol webbing oversprays onto cars, floors, and walls, and the residue clings to hair and costumes long after the web itself is gone. Stretching and gluing also gives you control. You decide where the anchor points sit, how far the strands stretch, and how uneven the spacing looks.
Two habits do most of the work here. Cut webbing with scissors instead of tearing it, because torn fibers bunch into clumps. And resist the urge to make every spoke the same length or the same distance from the center, since the unevenness is exactly what reads as real.
Table of Contents
- What You Need
- Step-by-Step: How to Make Fake Cobwebs Without the Spray Cans
- How to Make Fake Cobwebs Without the Spray Cans with Stretched Yarn
- Making Fake Cobwebs with Glue and Water (No Aerosol)
- Making Fake Cobwebs from Paper (No Aerosol)
- Common Mistakes
- Easy Ways to Customize the Finished Cobwebs
- Frequently Asked Questions
- What is the easiest way to make fake cobwebs without spray adhesive?
- Can I make washable fake cobwebs with glue and water?
- How do I make fake cobwebs look less perfectly symmetrical?
- What is the best no-spray method for outdoor Halloween decorations?
- How do I remove fake cobweb glue from walls or furniture?
- Are DIY fake cobwebs safe around children, pets, candles, or heaters?
What You Need
Three methods share a short list of basics. Everything else depends on which one you pick.
- Scissors and a small spool or ball of material
- A washable tray, sheet of parchment, or old towel to work over
- Painter’s tape or removable putty for anchoring
- A soft, clean paintbrush for spreading glue and for adding dust later
- Paper towels, because something will be tacky at some point
Then add what your chosen method needs.
- Stretched fiber method: cream or white cotton yarn, wool roving, cotton batting, or 20 lb fishing line
- Glue and water method: washable school glue or a clear water-soluble craft glue, plus a small bowl and a toothpick
- Paper method: tissue paper, tracing paper, coffee filter paper, or thin white printer paper, plus removable putty or low-tack tape
Before you start, one caution. Fibers, thin thread, and paper decorations are not flame-retardant, and most glues here are not rated for heat either. Keep every method well away from candles, fireplaces, space heaters, and hot light fixtures, and hang it after the lights go on rather than before.
| Method | Setup time | Difficulty | Typical yield | Reusable? |
|---|---|---|---|---|
| Stretched yarn | 20 to 30 minutes | Easy | 2 to 3 corners | Yes, if you take it down gently |
| Glue and water | 10 minutes plus 2 hours drying | Easy | 6 to 10 small webs | No, peel off and bin it |
| Torn paper | 15 minutes | Easy | 10 to 15 pieces | Yes, flat pieces store in a box |
Step-by-Step: How to Make Fake Cobwebs Without the Spray Cans
How to Make Fake Cobwebs Without the Spray Cans with Stretched Yarn
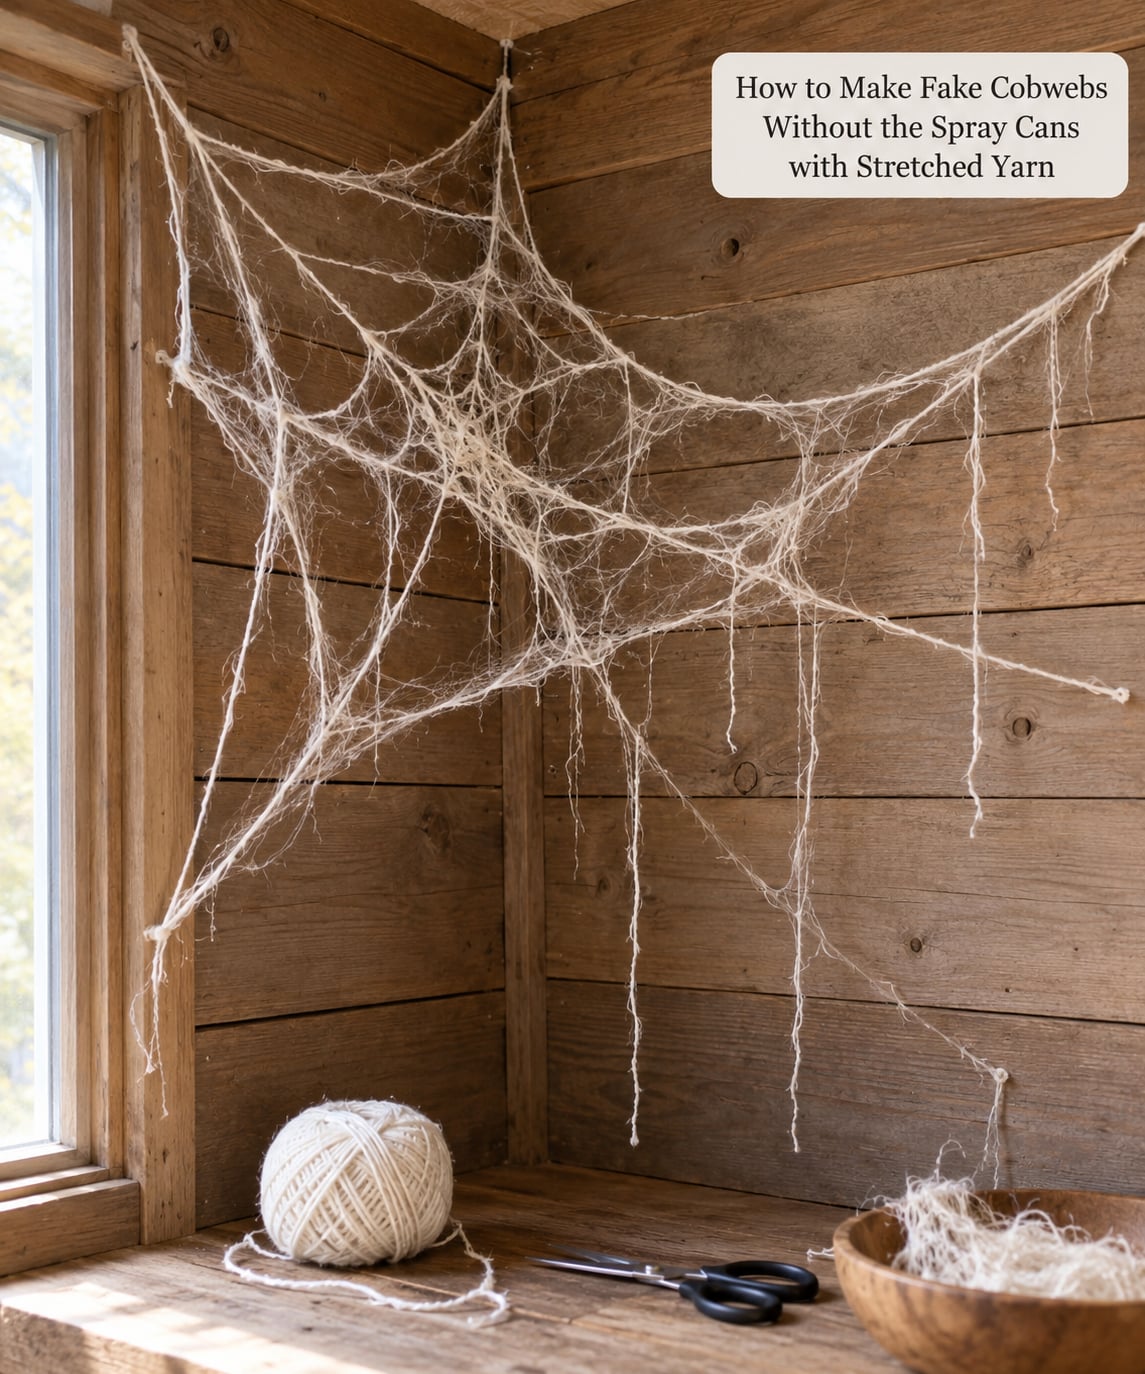
This is the method that looks the most like something a spider left behind, and it is the one I come back to every year. Pick a real corner first, where two walls meet the ceiling or a doorframe.
- Tape a small dab of removable putty about 6 inches up one wall, roughly at eye level. That is your hub.
- Tape a second dab about 12 inches up the other wall, 10 to 14 inches away from the first. This gives you a fan, not a flat square.
- Cut a 3-foot length of yarn and tie one end to the hub. Pull it to the second anchor until it just goes slack, then tie it off.
- Add 5 to 7 more strands the same way. Vary the distance from the hub between 8 and 14 inches. Even spacing is what makes it look fake.
- Now add two or three gentle arcs that cross between the spokes. Bend them into the corner rather than hanging them flat, and let them sag a little.
- Trim one or two strands and leave the ends dangling near the floor. A few loose fibers sell the whole effect.
How do you know it is right? The strands should be taut enough to hold a light touch without stretching further, and the fan should not be a clean triangle, because spiders do not build right angles. If a strand sags hard when you tap it, take it down and re-anchor it a little tighter.
Cotton batting works the same way, and it stretches further, so use less tension. Wool roving gives you a fuzzier, older-looking web. Fishing line is nearly invisible, which is great for a ceiling effect and terrible if anyone walks into it at head height.
Making Fake Cobwebs with Glue and Water (No Aerosol)
This is the fastest method and the least forgiving one. You get real strands in the shape you drew, and you get a web that peels off when the night ends. If your goal with how to make fake cobwebs without the spray cans is a mess you can rinse away, this is the one to try first.
Thin the glue heavily. Mix roughly one part washable school glue with three to four parts water and stir until it runs like thin cream. Any glue you buy as craft or school glue is fine. Skip anything labeled waterproof, permanent, or solvent-based.
- Lay parchment paper or a washable tray under your work surface. This method will drip, and it will drip onto whatever is under it.
- Pour a small pool of diluted glue in the center. Use a toothpick for thin lines and the tip of a paintbrush for wider ones.
- Pull eight to ten straight spokes out from the pool to the edge of your sheet. Let them set for 3 to 4 minutes.
- Now connect them with arcs. Curve each one in one direction, not perfectly, and make the gaps between arcs uneven.
- Let the whole thing dry undisturbed for 2 hours at room temperature. Warm, dry air speeds it up. Touch it only when it is completely dry and slightly tacky, not wet.
The web lifts off paper in one piece, which is why the parchment matters. Peel it from the edge slowly with a fingernail or a spatula. Keep in mind that this web will not survive being handled, moved, or reused next year.
Making Fake Cobwebs from Paper (No Aerosol)
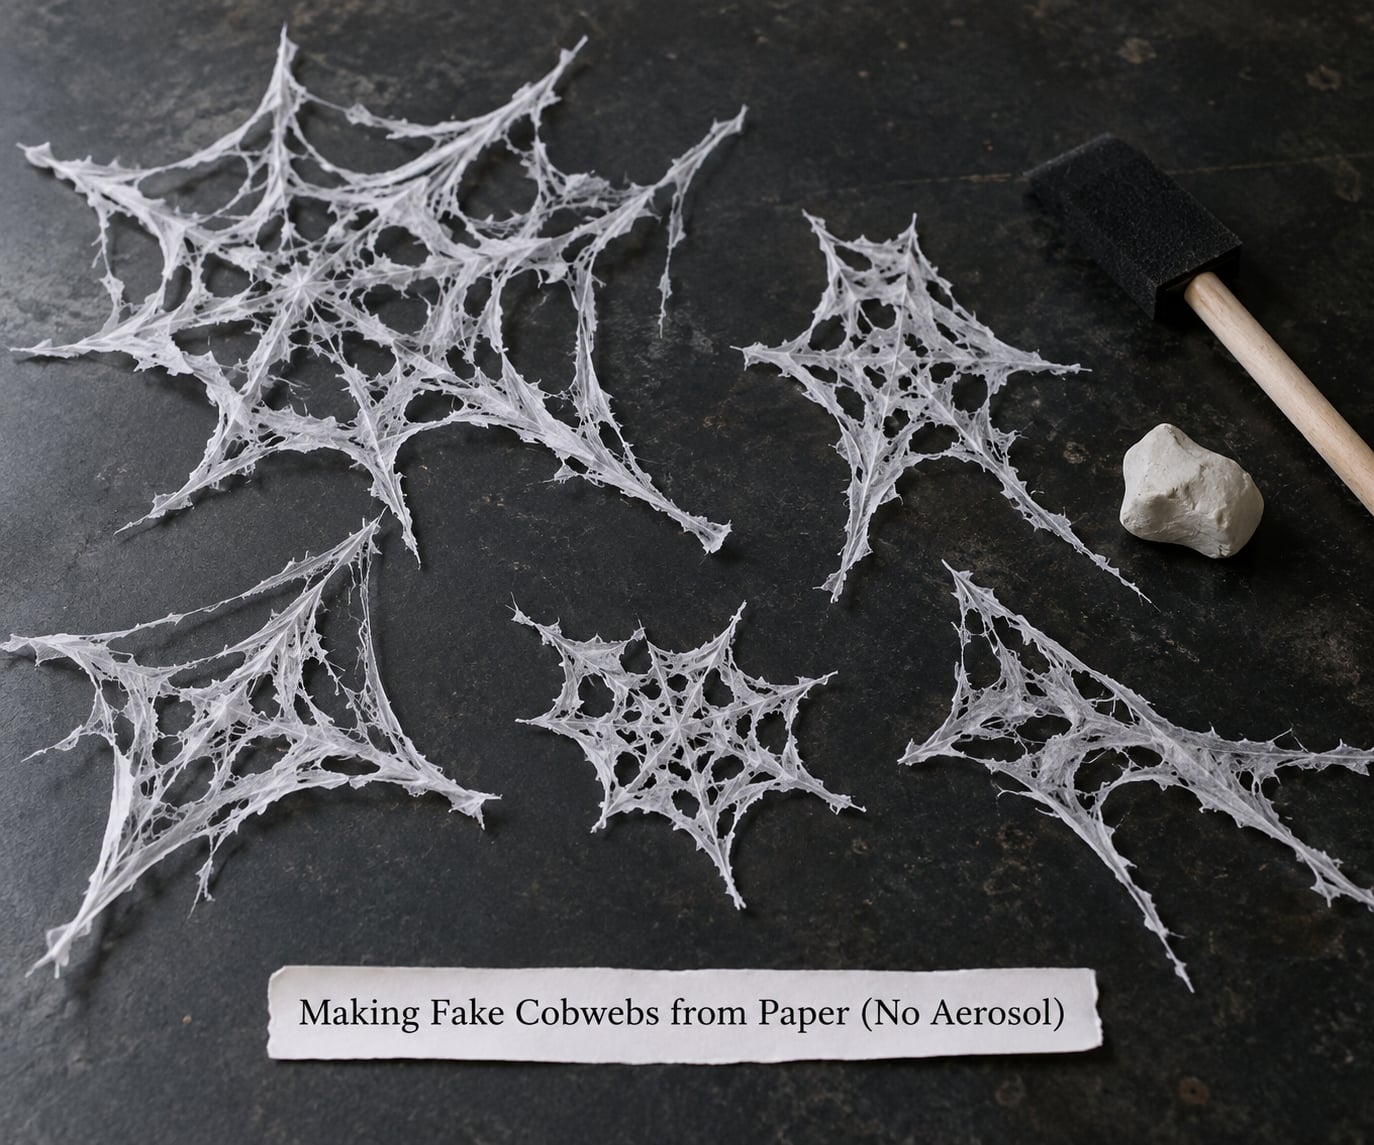
Paper is the fastest method for filling a large bookshelf or a room corner with something that reads as neglect at a distance. It also survives being handled, which makes it the pick for anyone decorating the same space year after year.
- Make a web shape by folding a small paper square in half, twice, then cutting along the fold lines. Leave the outer edge uneven and uncut.
- Unfold it and trim away a few sections so the gaps are ragged. Cutting is faster than tearing and it keeps the fibers from bunching.
- Layer two or three sizes: a big one behind, a smaller one rotated 30 degrees in front. The layered version looks far less deliberate.
- Attach each piece with a small blob of removable putty on the wall or the back of a shelf, or with low-tack tape on a smooth painted surface.
Weight is the test. If the piece hangs and the lower edge sags more than a quarter inch, it is too heavy for putty alone, so tape the top edge and use putty for the rest. Tissue and coffee filter paper are light enough to stick with a single dab of putty on most walls.
Tracing paper gives you a translucent web that shows through on glass or a window, which is a nice touch on a front door. It is also the tidiest answer to how to make fake cobwebs without the spray cans when you have to clear the room out again the next morning.
Common Mistakes
Perfectly straight, evenly spaced lines. The web looks like a diagram. Space your spokes and arcs unevenly, and change the anchor distance by an inch or two as you go.
Glue too thick. Thick diluted glue beads up into a glossy ridge instead of drying flat. Thin it further and test a single line on scrap paper first.
Paint drips on the floor or carpet. Work over parchment or a tray every time. The glue lifts off paper reliably and off carpet barely at all.
Webs peeling off porous surfaces. Rough brick, popcorn ceiling, and unfinished wood swallow adhesive. Use removable putty, more of it than you think, and press for a full 15 seconds.
Excessive shine when dry. That is over-application. Scrape the dried web gently with a plastic card, or dust it with a soft brush, which knocks the shine back.
Cleanup that takes an hour. Skinny fibers get into hair, beards, costume trim, and pet fur. Pull them off while the web is still on the wall rather than after, and pick the debris up with a damp toothbrush or a lint roller.
Placing decorations too near candles, heaters, or hot bulbs. Fiber and paper ignite easily, and glue softens near heat. Hang webs on the cool side of a light source.
Ripping instead of cutting. Torn strands bunch into fuzzy knots that read as mistakes. Snip each strand at both ends instead.
Easy Ways to Customize the Finished Cobwebs
A soft clean brush loaded with a little foundation powder or cocoa dust turns a new web into a two-year-old one. Tap it on from about 6 inches away and stop before the strands disappear.
Vary the opacity by mixing your glue at two strengths in the same web. Heavily diluted glue for the outer arcs and slightly thicker glue at the hub creates depth without adding a support structure.
For a large outdoor panel, stretch yarn between two points 4 to 6 feet apart and add a second layer behind it at a different angle. Anchor each strand separately, because tying them all at shared knots creates a net rather than a web.
Combining methods also works. Glue webs inside a corner and drape a torn paper or yarn layer over the same spot, then hang a plastic spider at the hub so it looks like it is holding everything together.
One important split: anything made with glue and water is a washable indoor decoration only. It will smear on damp surfaces and dissolve if it gets wet. Outdoor installations need fiber, paper, or thread, and even those should come down after a storm or a hard frost.
Skip the glitter and metallic dust if the web is anywhere near a flame. Neither is treated, and glitter makes webs catch light in ways that pull the eye away from the spiders you worked to place.
Frequently Asked Questions
What is the easiest way to make fake cobwebs without spray adhesive?
Stretched cotton yarn is the easiest and it looks the most convincing. Tape one anchor about 6 inches up a wall and a second anchor 10 to 14 inches away, then tie 8 to 10 strands between them with uneven spacing. Add two or three sagging arcs that cross the spokes. Set up takes about 20 minutes and the whole web peels down and can be rehung next year.
Can I make washable fake cobwebs with glue and water?
Yes. Mix one part washable school glue with three to four parts water until it runs like thin cream, then draw the web on parchment paper with a toothpick. Let it dry about 2 hours until it is clear and slightly tacky. It lifts off the paper in one piece and rinses away with warm water and a cloth. It cannot be reused, and it is an indoor method only.
How do I make fake cobwebs look less perfectly symmetrical?
Change the distance from your hub anchor, not just the order of your spokes. Vary it between 8 and 14 inches, leave some gaps in the outer arcs, and let a couple of strands droop or trail down. Real webs are built under load in wind and insects, so uneven spacing and gravity sag are what make them read as real rather than as a diagram.
What is the best no-spray method for outdoor Halloween decorations?
Stretched yarn or wool roving anchored with removable putty is the most reliable. It survives wind, does not dissolve in rain the way glue webs do, and comes down cleanly at the end of October. Give yourself more anchor points than you think you need, keep the web off the ground where animals can get into it, and check local guidance on wildlife entanglement before leaving any webbing up overnight.
How do I remove fake cobweb glue from walls or furniture?
Warm water and a cloth handle washable school glue on painted surfaces, so soak a paper towel, lay it on the spot, and give it a minute. For residue on wood or fabric, dab with a barely damp cloth rather than scrubbing. Avoid soaking wallpaper or porous brick, where water lifts the surface along with the glue. Pull fibers off the wall before you clean the surface underneath them.
Are DIY fake cobwebs safe around children, pets, candles, or heaters?
Around children and pets, glue-and-water and paper methods are the safest, but stretched thread is a real snag hazard for anyone running through the area. Keep fishing line and fine yarn off play areas and out of reach of curious hands. Never place any of these decorations near candles, fireplaces, space heaters, or hot bulbs, because fiber, paper, and craft glue are not flame-retardant.
Start with one stretched yarn web in a corner and get the spacing right, because that single decision does more for realism than any other step in this guide. Add a plastic spider at the hub, aim a warm light across it from one side, and take down whatever you put up before the fibers end up in a broom or a wig.