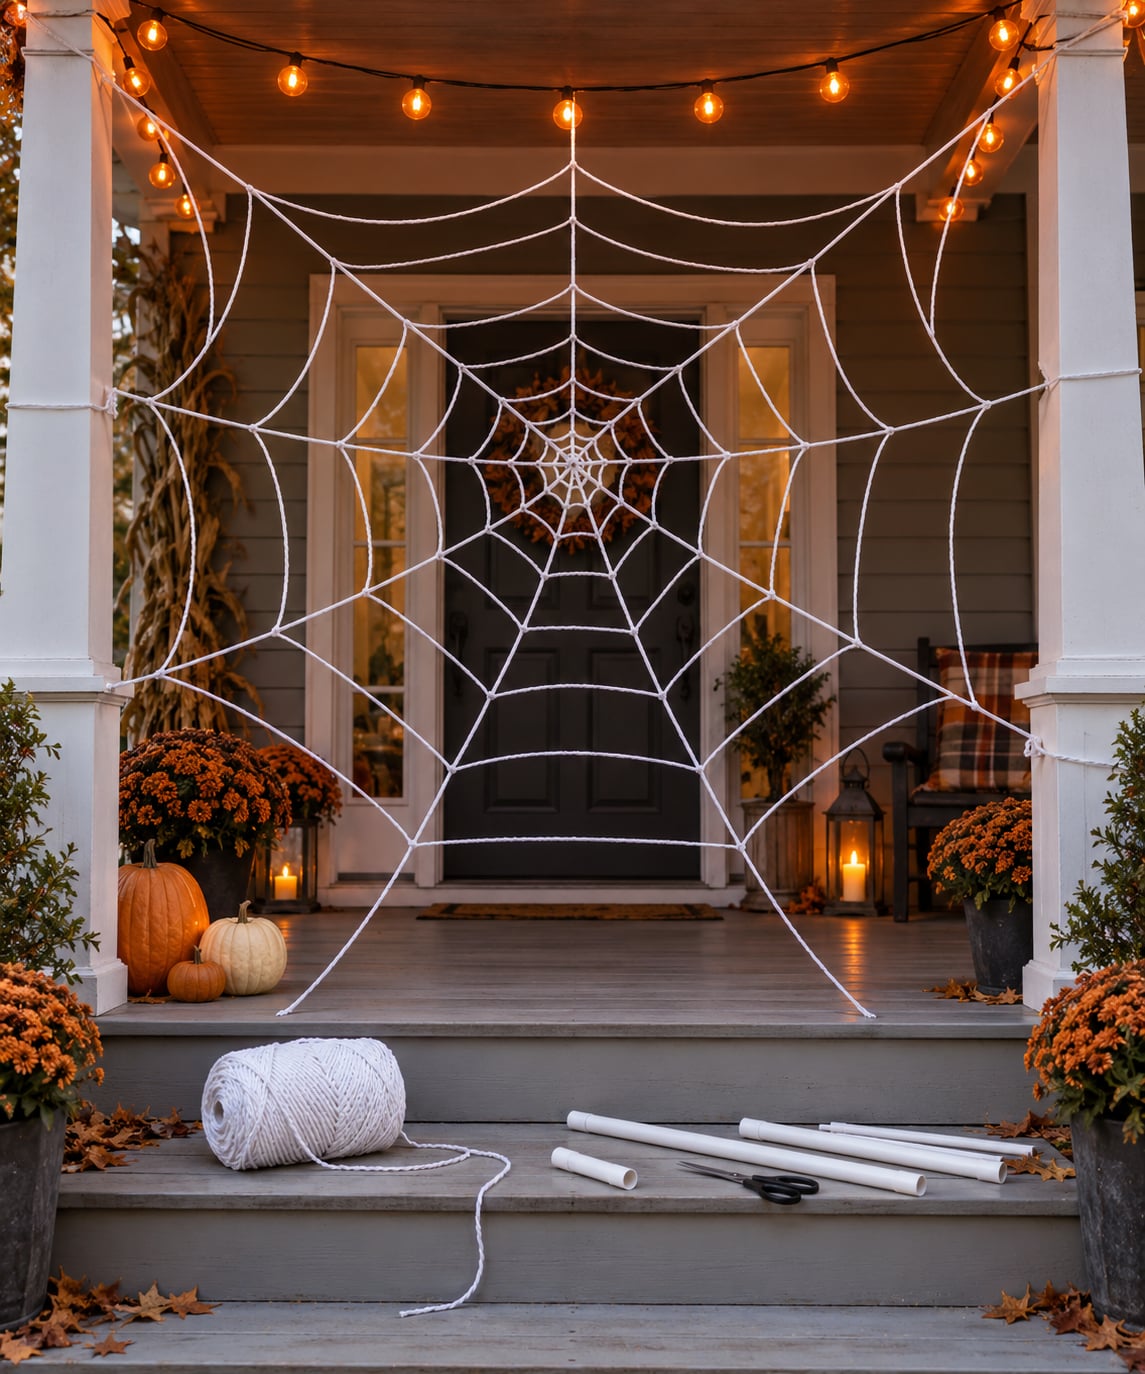
The fastest way to make a giant spider web for your porch is to stretch polyester beef netting between four anchor points, cutting out the squares you do not want and letting the rest sag into shape. Poly cord and ordinary yarn take longer but cost less, let you control every strand, and come down cleanly with no residue on the paint.
Either way, the whole build is an afternoon’s work. The part that trips people up is not the web itself. It is finding something to tie to on a porch, where there are usually no trees, and then keeping it up through a week of October wind.
So this guide covers three material options, a five-step build, and an anchoring plan that uses no nails. Start by walking your porch and finding four solid attachment points before you buy anything.
Table of Contents
- What You Need to Make a Giant Spider Web for Your Porch
- Comparing the three frame materials
- Step-by-Step: Building and Hanging the Web
- 1. Measure Your Porch and Choose a Layout
- 2. Build the Outer Frame
- 3. Add the Radial Spokes
- 4. Weave the Spiral Web Lines
- 5. Finish the Display and Hang It Safely
- Common Mistakes and Their Fixes
- Frequently Asked Questions
- What is the easiest material for making a giant spider web on a porch?
- How large should a porch spider web be?
- Can I make a giant spider web outdoors if rain is expected?
- How do I keep a porch spider web from blocking the door or walkway?
- How do I remove a giant spider web decoration after Halloween?
- What can I use to make the web look spooky without real spiders?
- Conclusion
What You Need to Make a Giant Spider Web for Your Porch
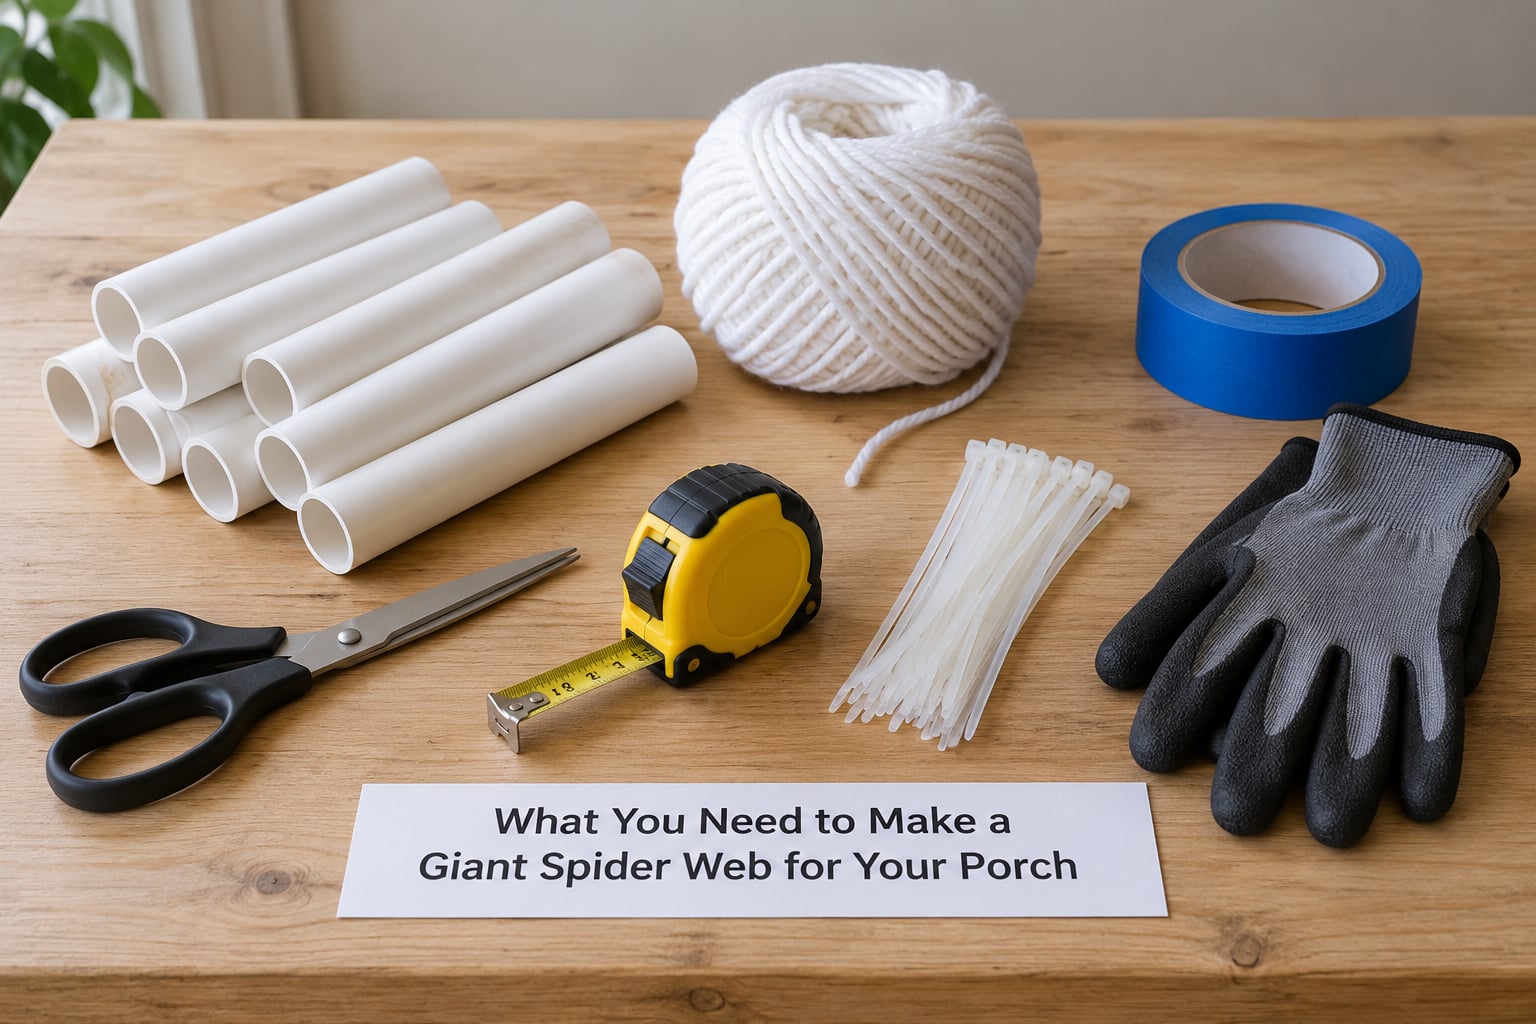
The recommended build here is the removable one: a PVC frame laced with yarn, hung from existing porch hardware. Nothing touches the siding and everything comes down in about ten minutes when the trick-or-treaters are finished.
- 1/2 inch PVC pipe – about 24 feet for a 10 by 10 foot web. Cut into four corner lengths plus one hub piece.
- White yarn or poly cord – 300 to 400 yards of medium-weight cord. Thinner string tears; thicker cord reads as rope.
- Zip ties or split-ring hooks – roughly 40 of them, one per spoke and spiral junction.
- Painter’s tape – for marking anchor points on the wall so you do not drill.
- Scissors, a tape measure, and a mallet – plus work gloves if you are driving stakes.
- Optional: fishing line, black floral wire, clip-on plastic spiders, orange string lights, glow-in-the-dark paint.
Most of this sits in a hardware aisle or a dollar store. Beef netting, the polyester net butchers use to wrap meat, is the one item you may need to order online or buy from a restaurant supply place. A five-pound roll of 24-inch-wide netting covers a very large web.
Comparing the three frame materials
Beef netting is the shortcut. You cut holes, stretch, done – no knots, no measuring, and it is waterproof, so rain is not a problem. It is also the most expensive option and the fiddliest to cut, because polyester net fights you the whole way.
Poly cord is the best balance for most porches. It is waterproof braided twine from the camping aisle, holds tension well, and you can re-tension any strand later by loosening one knot.
Yarn is the cheapest and the softest looking, but it stretches when it is damp and sags after a few nights outdoors. It works well under a covered porch where it never gets hit directly by rain.
Painter’s tape on the wall is worth knowing about too. It makes a small, quick corner web for a door or a window, and it comes off cleanly on paint. It will not hold anything larger than about 4 feet across.
| Method | Skill level | Weather tolerance | Best surface |
|---|---|---|---|
| Beef netting | Easy – cut and stretch | Waterproof, wind resistant | Open porch, fence, side of house |
| Poly cord and PVC frame | Moderate – build and lace | Waterproof if cord is braided | Porch ceiling, railing, corner V |
| Yarn and PVC frame | Moderate – build and lace | Sags when damp | Covered porch, indoor doorway |
| Painter’s tape | Beginner | Must be removed before rain | Door frame, window, small wall patch |
| Balloon and glue | Beginner – kids project | None – indoor only | Classroom, craft table |
Step-by-Step: Building and Hanging the Web
1. Measure Your Porch and Choose a Layout
Measure the width between your anchor points and the height above the railing or walkway. A 10 by 10 foot web reads as enormous from the street and stays clear of head height.
Three layouts work well on a porch. An overhead canopy stretches across the ceiling between posts. A railing wrap frames the front face without blocking the view. A corner V-shape runs up two adjoining walls, which is what most people picture when they say porch web.
Sketch your anchor points in tape on the wall first, and walk the layout at night. If you cannot walk it without ducking, move the bottom edge up.
2. Build the Outer Frame
Cut the PVC into two long sides and two short sides to your measured dimensions, plus one short hub piece for the centre. Dry-fit the rectangle and shim the corners until the frame is square.
Join the corners with zip ties rather than permanent fittings. Pull each tie tight, trim the tail, then test the frame by lifting one corner – it should hold its shape without racking.
If you are using beef netting instead, skip the frame entirely: fold the net lengthwise, cut holes through both layers, then open it up and stretch it corner to corner.
3. Add the Radial Spokes
Run a length of cord from each corner to the hub piece at the centre, giving you four main spokes. Add four more at the diagonals, so eight spokes divide the circle evenly.
Space them by eye against the clock face rather than by measurement. Equal spacing is what makes the finished web read as real.
Tie each spoke to the frame, pull until the cord is taut and humming, then lock it with a zip tie. Slack spokes are the single biggest reason a homemade web looks like a grid.
4. Weave the Spiral Web Lines
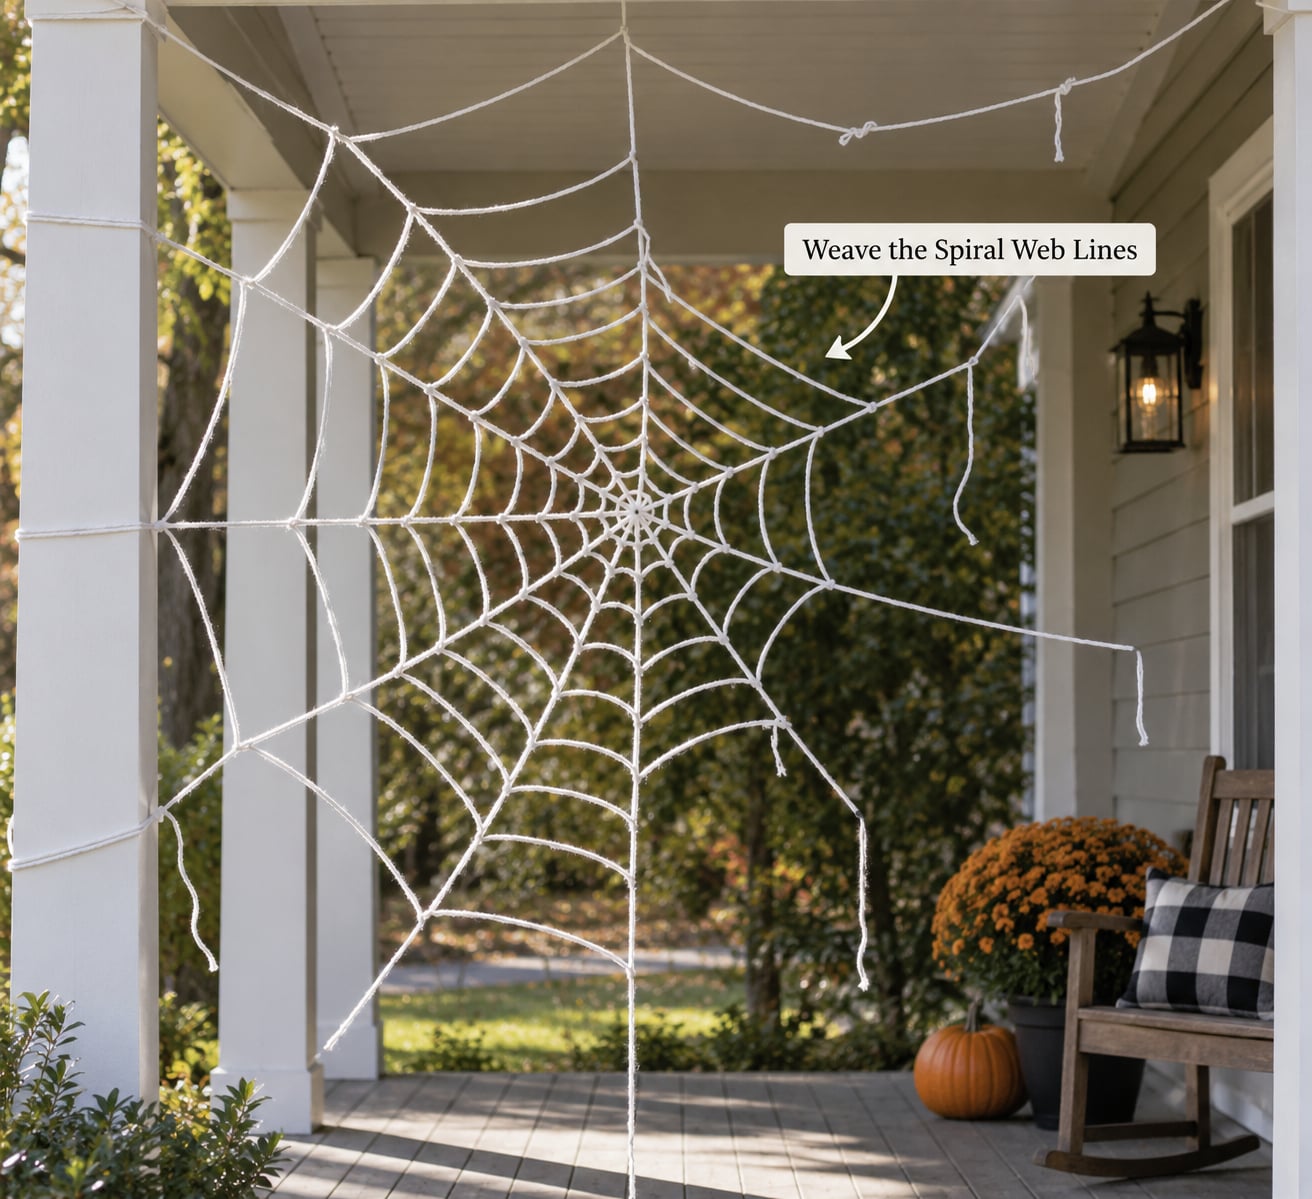
Now add the curved rings that turn spokes into a web. Start near the hub with a tight ring, then work outward with each ring spaced a hand’s width further from the last.
Do not make the rings circular. Pull each strand slightly past the spoke, then let it settle back, so the line bows and dips the way a real orb web does. Imperfection is the whole trick.
Connect neighbouring spokes with one strand each time rather than running a full circle, so you can adjust tension ring by ring. A few strands that hang loose at the bottom edge sell the effect better than a tidy one.
5. Finish the Display and Hang It Safely
Hang the spider with fishing line or black floral wire. Wrap the wire around the narrowest part of the body, twist to lock it, then run the tail up to the hub and twist again.
Anchor at four corners, not one. Use existing hardware wherever you can – porch post bases, railing brackets, hook-and-eye straps on a beam, or suction cup hooks on smooth glass doors. If you must reach the ground, drive stakes at 45 degrees with a mallet.
Skip gutter clips for anything large. Decorators on the Halloween forums report them repeatedly letting go in October wind, and a 15 foot web coming down onto a walkway is a real hazard.
For night impact, run one orange string light along the top edge or clip a warm spotlight to the post and aim it across the face of the web. A thin line of glow-in-the-dark paint on the outer ring catches flashlight beams.
| Surface | Hardware to use | Marks the surface? |
|---|---|---|
| Vinyl siding | Suction cup hooks or existing hook-and-eye straps | No |
| Wood post or beam | Screw eyes or existing nail holes | Small, permanent |
| Metal railing | C-clamps or zip ties through the balusters | No |
| Lawn or bed | 9 inch tent stakes at 45 degrees | Small hole |
| Brick or masonry | Masonry clips, avoid drilling | No, if clips grip |
| Glass door | Suction cup hooks, load-bearing grade | No |
Keep the bottom edge at least 7 feet off the ground where trick-or-treaters walk past, and check the whole thing the morning after your first windy night. A few slipped ties are easy to reset in daylight.
Common Mistakes and Their Fixes
The web looks flat. Too many perfectly straight spokes and evenly spaced rings read as a grid. Vary the ring spacing and bow each strand outward past its spoke.
Spokes are uneven. Re-measure the frame diagonal and equalise it before lacing anything. A square frame is the fix for almost every lopsided web.
Joints fail. Zip ties on PVC grip well; tape and glue alone do not. Any load-bearing corner gets at least two ties.
Hardware is visible. Black ties on dark posts disappear. Choose hardware in a colour close to the surface behind it.
Rain flattens it. Braided poly cord sheds water and tightens when wet, then relaxes as it dries. Cotton yarn stretches and stays stretched, so dry it flat overnight.
The walkway gets blocked. Re-hang higher, or switch to a corner V that stays above the path entirely.
Frequently Asked Questions
What is the easiest material for making a giant spider web on a porch?
Beef netting is the easiest material. It arrives as a tube, you cut holes through the folded layers, and it stretches into a convincing web with no knots and no tools beyond scissors. Poly cord is the easier choice if you want control, since every strand can be re-tensioned after it is up. Yarn works but sags once it gets damp.
How large should a porch spider web be?
Ten feet across is the sweet spot for a front porch. It reads as enormous from the street, covers a lot of visual space with a small amount of material, and stays out of head height. Bigger than about 15 feet and you are fighting wind load and climbing ladders. Start smaller if you have never built one, then add a second panel.
Can I make a giant spider web outdoors if rain is expected?
Yes, if you use synthetic materials. Braided poly cord and polyester beef netting both shed water and tighten slightly when wet, then relax as they dry. Cotton yarn is the exception – it stretches and stays stretched, so take it down before rain or dry it flat overnight. Paper and glue webs dissolve outdoors and belong indoors only.
How do I keep a porch spider web from blocking the door or walkway?
Keep the bottom edge at least 7 feet above the ground where people walk, and check the layout at night before you lace anything. A corner V that runs up two walls stays clear of paths entirely. An overhead canopy between posts clears the walkway best of all. Walk the route in daylight and at night with the frame hung and empty.
How do I remove a giant spider web decoration after Halloween?
Loosen the four corners first, then pull the frame away rather than yanking strands, which snags on the railing. Zip ties release with a small twist and cut cleanly. Roll the cord into a ball, keep the PVC frame, and the whole thing is reusable next October. Wipe the railings down with warm water and a little dish soap to remove any residue.
What can I use to make the web look spooky without real spiders?
Clip-on plastic spiders in matte black work best, and one oversized prop on the lower third looks more convincing than several small ones. For extra menace, add fishing line that pulls up from the spider to the hub so it appears suspended. Some homeowners also find real orb weavers move into the finished web, which adds to the effect – leave them there rather than disturbing them.
Conclusion
Walk your porch tonight and mark four anchor points in painter’s tape. That single step decides which of the three methods suits you, and it costs nothing but ten minutes.
Build one small test panel first, about four feet across, to learn how the cord behaves in wind. Once that holds a night without shifting, scale up to the full porch web. Keep the frame and the cord, and next October you start ahead of schedule.