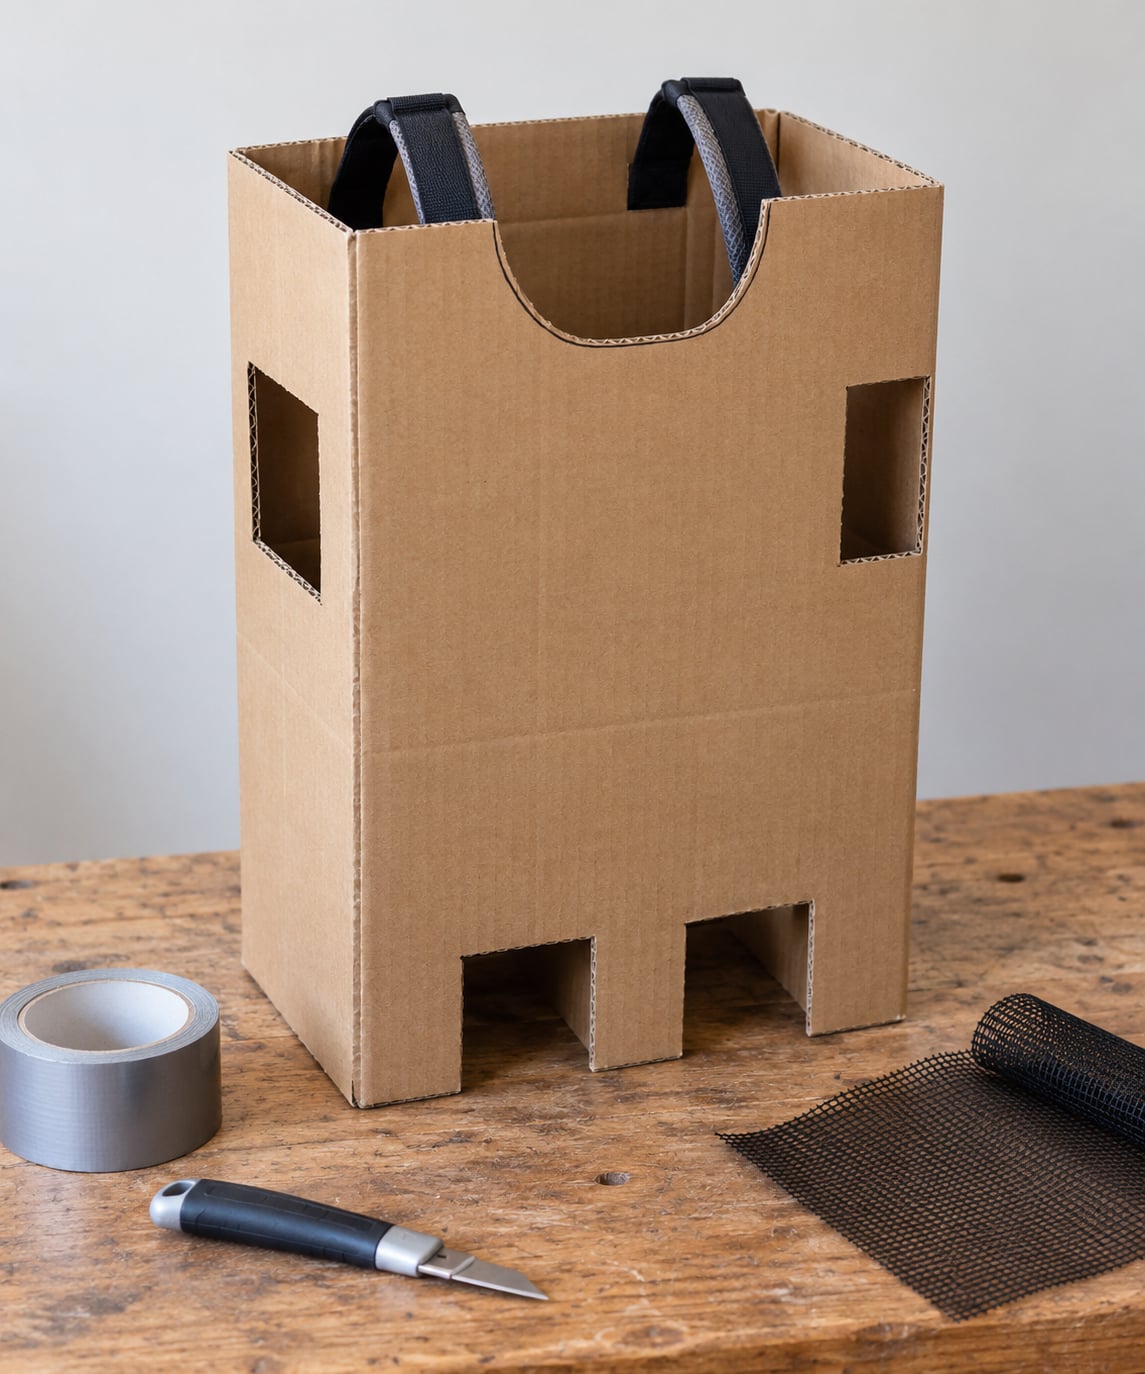
A cardboard box costume kids can walk in is one large corrugated box with a head hole, two arm holes, leg openings at the bottom and a pair of shoulder straps inside. Cut the openings, tape the seams, hang a simple harness, and your child steps in and walks as normal. How to make a cardboard box costume kids can walk in well takes about two hours of building, plus drying time for paint.
The box itself is the fiddly part. Start saving one now: a large appliance box, a wardrobe box, or the box a new chair arrived in all work. Two smaller boxes taped together make an even better body, because the seam gives you a place to hide extra cardboard bracing.
Decide what “walk-in” means before you cut. Here it means the child stands inside the box with head, arms and legs free, so the costume moves with them instead of riding on their shoulders. That is the version most people search for, and it is the one this build covers.
Table of Contents
- What You Need
- How to Make a Cardboard Box Costume Kids Can Walk In: Step by Step
- Step 1: Choose a Box and Measure Your Child
- Step 2: Mark the Openings
- Step 3: Cut the Cardboard Carefully
- Step 4: Reinforce the Costume
- Step 5: Add Shoulder and Body Support
- Step 6: Decorate the Cardboard Box
- Step 7: Test Visibility and Movement
- Step 8: Fit and Wear the Finished Costume
- Common Mistakes
- Frequently Asked Questions
- What size cardboard box is best for a child costume?
- Can I make a cardboard box costume without cutting the top off?
- How do I keep the costume from falling over while walking?
- What materials can I use to decorate a cardboard box costume?
- How can I make sure my child can see and breathe inside it?
- Is cardboard safe for a child to wear for a Halloween costume?
- Conclusion
What You Need
Almost everything is either free, already in a kitchen drawer, or cheap from a hardware store. Gather it all before you start cutting, because interrupting a halfway build to hunt for tape is miserable.
- One large corrugated cardboard box, ideally double-walled. Single-walled works fine for a few hours, it just needs more taping.
- Utility knife and metal ruler, or a craft knife for small children. A pair of scissors is a poor substitute on corrugated board.
- Cutting mat or a flat piece of carpet to protect the floor and your knife tip.
- Pencil and tape measure for marking openings before you commit to a cut.
- Masking tape and duct tape. Masking tape holds the shape while you work, duct tape does the structural work.
- School glue or craft glue to flatten the inside flaps, plus a hot glue gun for attaching straps and decorations.
- Two lengths of webbing, ribbon or wide elastic about 120 cm (48 inches) each, for the shoulder straps.
- Two fabric squares roughly 10 cm (4 inches) square, to pad the shoulders.
- Acrylic craft paint and a brush or sponge, in whatever colours the costume needs.
- Optional: mesh or window screen material for a vision panel, small paper plates, felt, tissue paper, glow paint, reflective tape, and a second scrap box for bracing.
Box sizing comes down to the child’s height. For a child around 100 cm (40 inches) tall, a box 60 to 75 cm (24 to 30 inches) tall works. Older children need a box roughly the same height as they are, with 10 to 15 cm (4 to 6 inches) of clearance above the head so the child is not permanently hunched.
The cheap substitution for a purpose-bought box is two similar boxes with their bottoms removed, taped together end to end. It costs nothing, and the join doubles as a reinforcement strip. The one substitution to avoid is thin produce or mailer cardboard, which folds in the middle the first time a child leans on it.
How to Make a Cardboard Box Costume Kids Can Walk In: Step by Step
Step 1: Choose a Box and Measure Your Child
Measure before you mark anything. You need four numbers: the child’s height, shoulder width, chest circumference, and the distance from the floor to the top of their head when they stand tall.
Set the box on its end so the child can stand inside it and you can check clearance at the top. A good test is whether they can raise both arms fully without the box pressing into their shoulders. If the box is snug, go up a size rather than cutting it down later.
Step 2: Mark the Openings
Trace every opening in pencil first, cut second. That single habit prevents most of the mistakes people end up fixing with tape.
- Head opening: about 10 cm (4 inches) across, cut 5 to 8 cm (2 to 3 inches) down from the top edge so the rim does not hit the child’s chin.
- Arm holes: roughly 15 cm (6 inches) square, on each side, starting 5 cm (2 inches) below the top fold. Leave cardboard between the arm hole and the head hole as the shoulder area.
- Leg openings: at the bottom, one over each foot, about 20 cm (8 inches) long and 15 cm (6 inches) wide, cut through both layers of cardboard.
- Air holes: a few small circles low on each side. Marking them now saves hunting for spots later.
Keep at least 5 cm (2 inches) of cardboard around every opening. A head hole cut too close to the fold will split the first time the child ducks.
Step 3: Cut the Cardboard Carefully
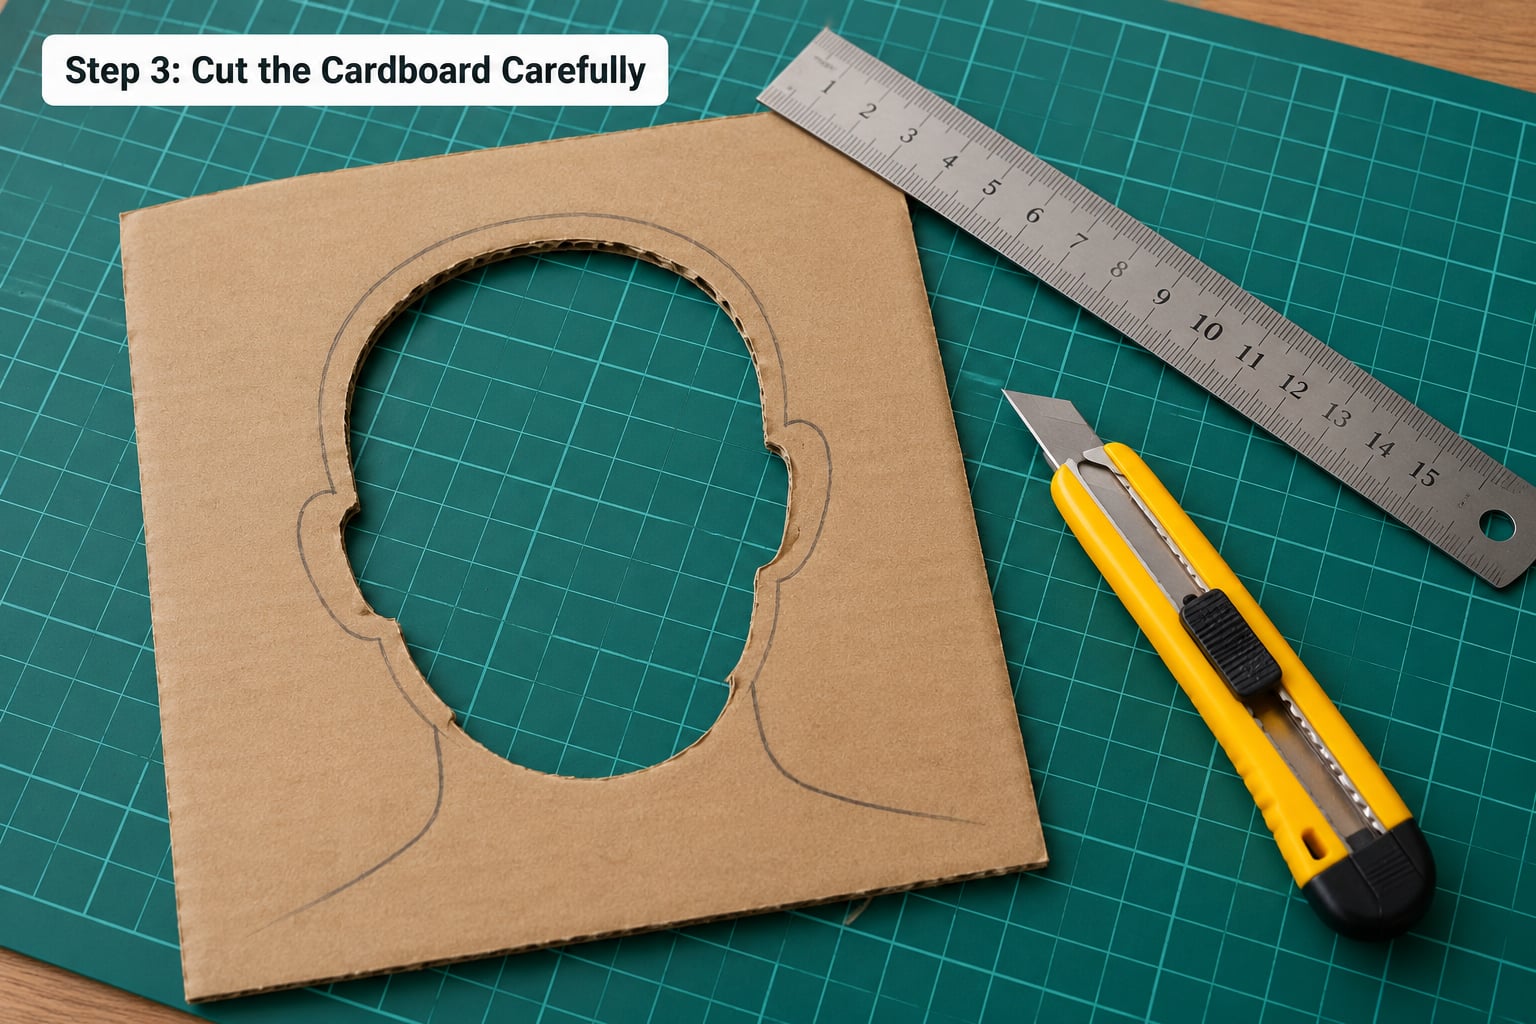
Cut on a cutting mat with the box lying flat and the blade travelling away from you. An adult should do every cut. Children can hold the ruler, hold the tape, or paint, but the knife stays with the grown-up.
Score the line with the ruler first, then run the blade through the score in two or three passes rather than trying to saw through in one. For the head opening, cut a square out of one corner and round it off with the knife tip afterwards. Rounded openings do not crack; square corners lift and tear.
Check your work with the child in place before moving on. Hold the box at shoulder height and ask them to raise their arms and step into the leg holes.
Step 4: Reinforce the Costume
Reinforcement is what separates a costume a child keeps on for an hour from one they abandon after ten minutes. Parents on crafting forums keep asking whether it is even necessary, and the answer is yes: cardboard fails at the seams and the bottom first, not at the sides.
- Flatten the inside flaps. Glue every loose inner flap flat with school glue, then tape it with masking tape. A flap that swings inside is a shin waiting to happen.
- Double-tape the vertical seams. Run one strip of duct tape down each corner seam, then a second strip at a slight angle so the tape crosses the seam.
- Brace the corners. Cut L-shaped pieces from a scrap box and glue them into the four top corners. This takes five minutes and is where most collapses start.
- Reinforce the bottom. Two strips of duct tape across the base, one at each end, take the weight of a child stepping in and out.
- Tape the cut edges. Every edge the knife touched gets a strip of tape or a bead of hot glue. Raw corrugated edges are sharp and snag sleeves and skin.
Use hot glue for immediate strength and school glue when you need time; tape holds shape, glue holds weight. Hot glue on corrugated cardboard penetrates the flutes and sets fast, which is why parents building a costume for a four-year-old reach for it first.
Step 5: Add Shoulder and Body Support
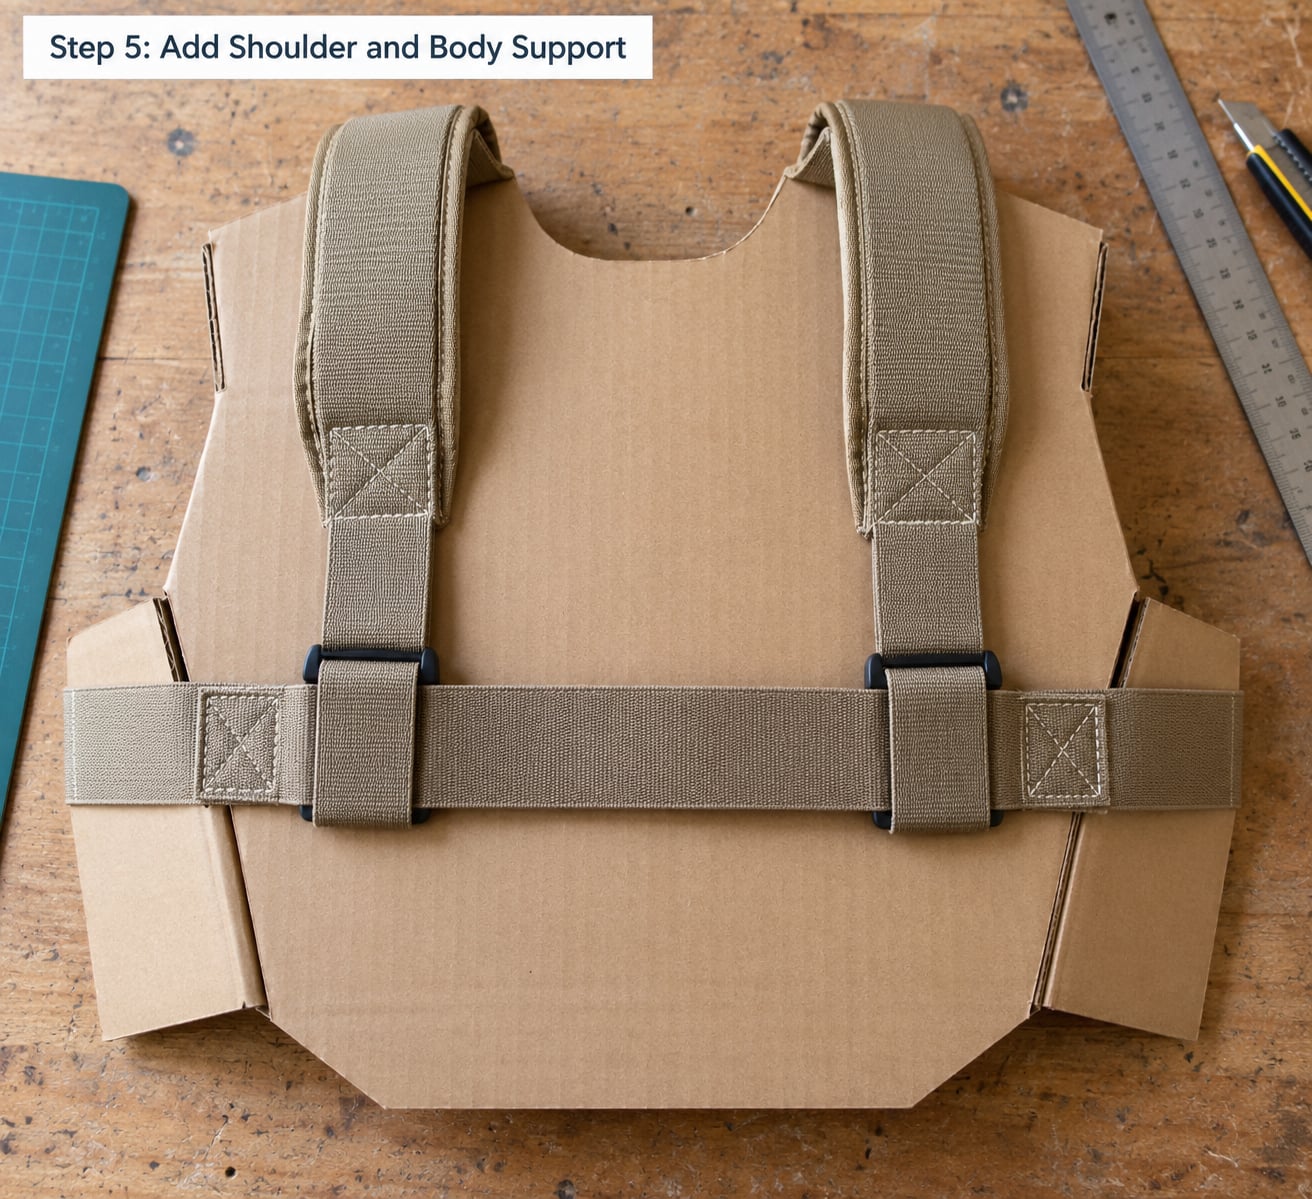
Straps are the part most people skip and most people regret skipping. Without them the box rides on the child’s neck, and no costume survives that. A back rucksack does the same job and can be borrowed instead of built.
Make each shoulder strap by attaching one length of webbing or wide elastic to the top of the box on each side, at the shoulder line, about 10 cm (4 inches) in from the arm hole. Let it pass over the child’s shoulder and meet at the back with a strip of elastic that acts as an adjuster.
Pad each shoulder where the strap sits. Glue a fabric square to the inside of the box over the strap end, then a second square on top, so the strap is sandwiched and cannot slide sideways. A chest strap across the front, made from elastic, stops the box swinging forward when the child runs.
Test the load before you decorate anything. Put the straps on the child and have them walk around the room, turn, and crouch. Anywhere the strap bites needs another pad or a wider strap.
Step 6: Decorate the Cardboard Box
Paint goes on after the reinforcing and before the heavy decorations. Two thin coats of acrylic craft paint dry faster and hold better than one thick coat, and the second coat hides the tape seams.
Different materials suit different themes. Tissue paper glued in overlapping strips makes scales, fabric or faux fur makes fur, and brown kraft paper glued in strips turns a plain box into a tree trunk. Paper plates make excellent scales, dials, buttons and eyes. Markers handle the small details that a brush cannot.
Keep the decoration light. A box covered in glued-on cardboard loses its shape, and anything rigid on the outside becomes something to trip over. Glow paint works well for a robot or an astronaut, and reflective tape on the front and shoulders is worth adding if the costume goes out after dark.
Glue details with dots rather than long snakes. A spiral of hot glue is stronger than a straight line, and it uses far less of your fingers when you have to prise them off later.
Step 7: Test Visibility and Movement
Have the child stand in the box and walk to the door, up and down a step, and around a corner. Watch their feet rather than the costume. If they cannot see where they are going, the costume is not finished, however good it looks.
Add a vision panel where the child can actually use it. A rectangle of mesh or window screen glued over a wide slit works better than two small eye holes, because a child turning their head needs a field of view rather than two keyholes. Widen the head opening if the mesh makes the view dim.
Cut ventilation holes next: a dozen circles about 2 cm (3/4 inch) across along both lower sides keeps the inside air moving. Cut the leg openings so the bottom of the box hangs at knee height or above, and trim any flap that catches on a leg.
Step 8: Fit and Wear the Finished Costume
Adjust each strap so two fingers slide underneath, then check again with the child standing up straight. Write the child’s name on the inside of the collar, because the inside of a box costume is the easiest place to lose a small child in a crowd.
Set a wear limit before the night rather than during it. Sixty to ninety minutes of walking is plenty for most children, and a cool drink and a rest indoors ends it happily rather than in tears.
Store the costume folded flat in a dry cupboard if you want it again next year, or dismantle it and put the clean cardboard in the recycling. Keep it away from damp storage, because damp corrugated cardboard delaminates and goes soft in a season.
Common Mistakes
Almost every problem with a walk-in box costume is one of these eight. Each has a fix you can apply before the child puts it on.
- The box is too small. A child who cannot straighten up or raise their arms will tire in minutes. Use the next size up; clearance matters more than looking accurate.
- The bottom gives way. The weight of a child stepping in lands on the base. Tape it in a cross, brace the corners, and add a scrap-cardboard plate inside if the child is young or lively.
- The child cannot see. Eye holes that are too small, or a dark interior, will end the evening. Cut one wide mesh vision panel and test it in daylight and in a hallway at night.
- Loose edges and sharp corners. Tape every cut edge and round every corner. This is a two-minute job and it removes the most common scrape reported by wearers.
- Overheating inside. A closed box in October weather gets warm fast. Add low side vents, keep the costume off for breaks, and never leave a child inside one unsupervised.
- Weak supports. Straps attached with a thin line of glue will snap. Attach each end with a wide patch of hot glue, tape over it, and pad the shoulders.
- Box slipping sideways. A single strap lets the costume rotate. Cross the straps at the back and add a chest strap or an elastic band at waist height.
- Flaps catching on legs. Untaped inner flaps swing with every step and trip the wearer. Glue them flat inside the box before anything else.
One habit covers most of the list: have the child walk before you decorate. A costume that is comfortable and visible when undecorated will still be comfortable when painted.
Frequently Asked Questions
What size cardboard box is best for a child costume?
For a child around 100 cm (40 inches) tall, a box 60 to 75 cm (24 to 30 inches) tall is right. Older children need a box about their own height with 10 to 15 cm (4 to 6 inches) of clearance above the head. Width should let them raise both arms and turn their shoulders. If you cannot find one big enough, tape two similar boxes end to end and use the join as a bracing strip.
Can I make a cardboard box costume without cutting the top off?
Yes, for an over-the-head costume. Leave the top on, cut a face opening and arm holes at chest height, and add shoulder straps. A full walk-in costume is different: the child steps inside, so the bottom must be open with leg openings and the top needs a head hole. The build above covers the walk-in version, where cutting the top is unavoidable.
How do I keep the costume from falling over while walking?
Work from the bottom up. Cut leg openings so the box hangs at knee height or above, tape the bottom in a cross, and brace the four top corners with L-shaped scrap cardboard. Add an elastic band around the child’s waist inside the box, and cross the shoulder straps at the back so they cannot rotate. Then have your child walk the room before you decorate anything.
What materials can I use to decorate a cardboard box costume?
Acrylic craft paint and markers handle most themes. Tissue paper glued in overlapping strips makes scales, felt makes plates and panels, fabric or faux fur makes an animal, and brown kraft paper turns a plain box into a tree trunk. Paper plates are excellent for buttons, dials and eyes. Glow paint suits a robot or astronaut, and reflective tape is worth adding for trick-or-treating after dark.
How can I make sure my child can see and breathe inside it?
Glue a wide rectangle of mesh or window screen over a vision slit rather than cutting two small eye holes, and keep the head opening large enough that the mesh does not darken the view. Punch a dozen holes about 2 cm (3/4 inch) across along both lower sides for airflow. Then have your child walk to the door and up and down a step while you watch their feet.
Is cardboard safe for a child to wear for a Halloween costume?
It is safe when the edges are finished and an adult supervises. Tape or glue over every cut edge, round the corners, and keep small loose parts away from younger children. Cardboard is not flame retardant, so it should never be near a lit jack-o-lantern or fire pit. Watch for overheating inside, and take the costume off every sixty to ninety minutes.
Conclusion
Start by finding the box and measuring your child, then trace every opening in pencil before the knife comes out. Reinforce the seams, corners and bottom, add padded shoulder straps, and have your child walk the hallway before a drop of paint goes on. Everything after that is decorating, and decorating is the easy part.