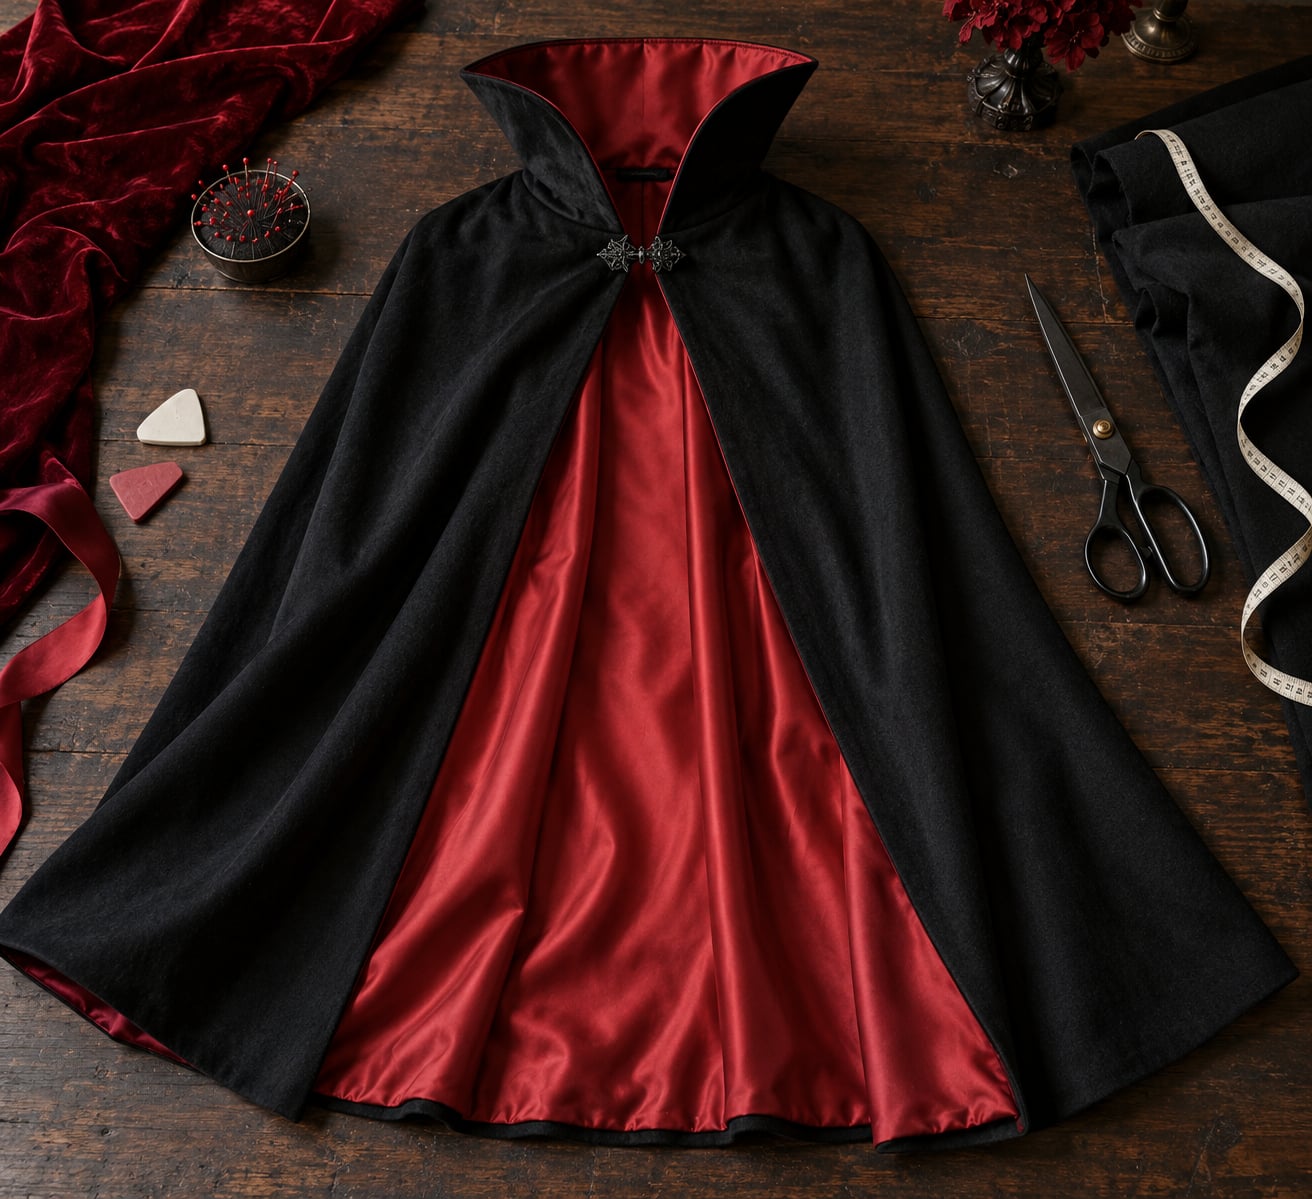
A thrifted jacket becomes a vampire cape by removing the sleeves, opening or replacing the back panel, and rebuilding the neckline into a tall standing collar. The jacket already gives you the shoulders, armholes and lining, so the only things you add are drape below the shoulder line and a closure at the neck. Budget roughly two hours for the sewn version, or half that if you glue instead of sewing.
Worth knowing what the finished piece is called before you go shopping for trim. It is a cape, a cloak, or a mantle, and the high-collared Victorian style is usually sold as an opera cloak or a Dracula cape. Sellers use all three words for the same garment.
The real trick is choosing the right coat before you cut anything, and testing the shape with temporary fasteners so nothing is permanent until the drape looks right.
Table of Contents
- What You Need
- Step-by-Step: How to Make a Vampire Cape From a Thrift Store Jacket
- Plan the Build Before You Cut
- Measure and Mark the Cape Shape
- Lay the Jacket Flat and Cut the Body
- Shape the Collar, Front Edges, and Hem
- Join or Fasten the Sides
- Add a Lining and Decorative Details
- Finish and Test the Vampire Cape
- Common Mistakes
- Frequently Asked Questions
- How to make a vampire cape from a thrift store jacket with no sewing?
- What kind of jacket is best for a DIY vampire cape?
- Should I keep the sleeves and collar from the old jacket?
- How do I make a thrift jacket cape fit more comfortably?
- How do I make the cape look old, tattered, or spooky?
- Conclusion
What You Need
You need one jacket that is dark, loose-fitting and unlined or lightly lined. A jacket with a back seam or a center opening flattens into a workable cape; heavy shoulder pads and thick quilted linings fight you at every stage.
- The jacket. Black, charcoal, deep plum or navy. Size M through XL works for adults, and a XL reads as roomy on a child. Skip anything with shoulder pads.
- Optional lining fabric. One to two yards of contrast lining if the jacket is unlined. Red satin gives the classic Dracula flash when the cape swings.
- Measuring and marking. Tape measure, tailor’s chalk or washable pen, and a straight ruler.
- Cutting tools. Sharp fabric shears for the body, small scissors for detail work, and a seam ripper to take apart existing seams.
- Fasteners. One-inch hook-and-loop tape, four snaps, a ribbon, or large safety pins for the no-sew route.
- Notions. Black fusible interfacing, bias tape or trim, and fabric glue if you are skipping the machine.
- Sewing supplies. Thread, hand needles, and a machine with a standard needle and a sharp pair of shears.
- Safety gear. A cutting mat and a spare blade. Cut away from your body, and cut one fabric layer at a time so the shears stay under control.
- Finishing materials. An iron with steam, fray check or fabric glue for raw edges, coarse sandpaper for distressing, and glow-in-the-dark paint for a last reveal.
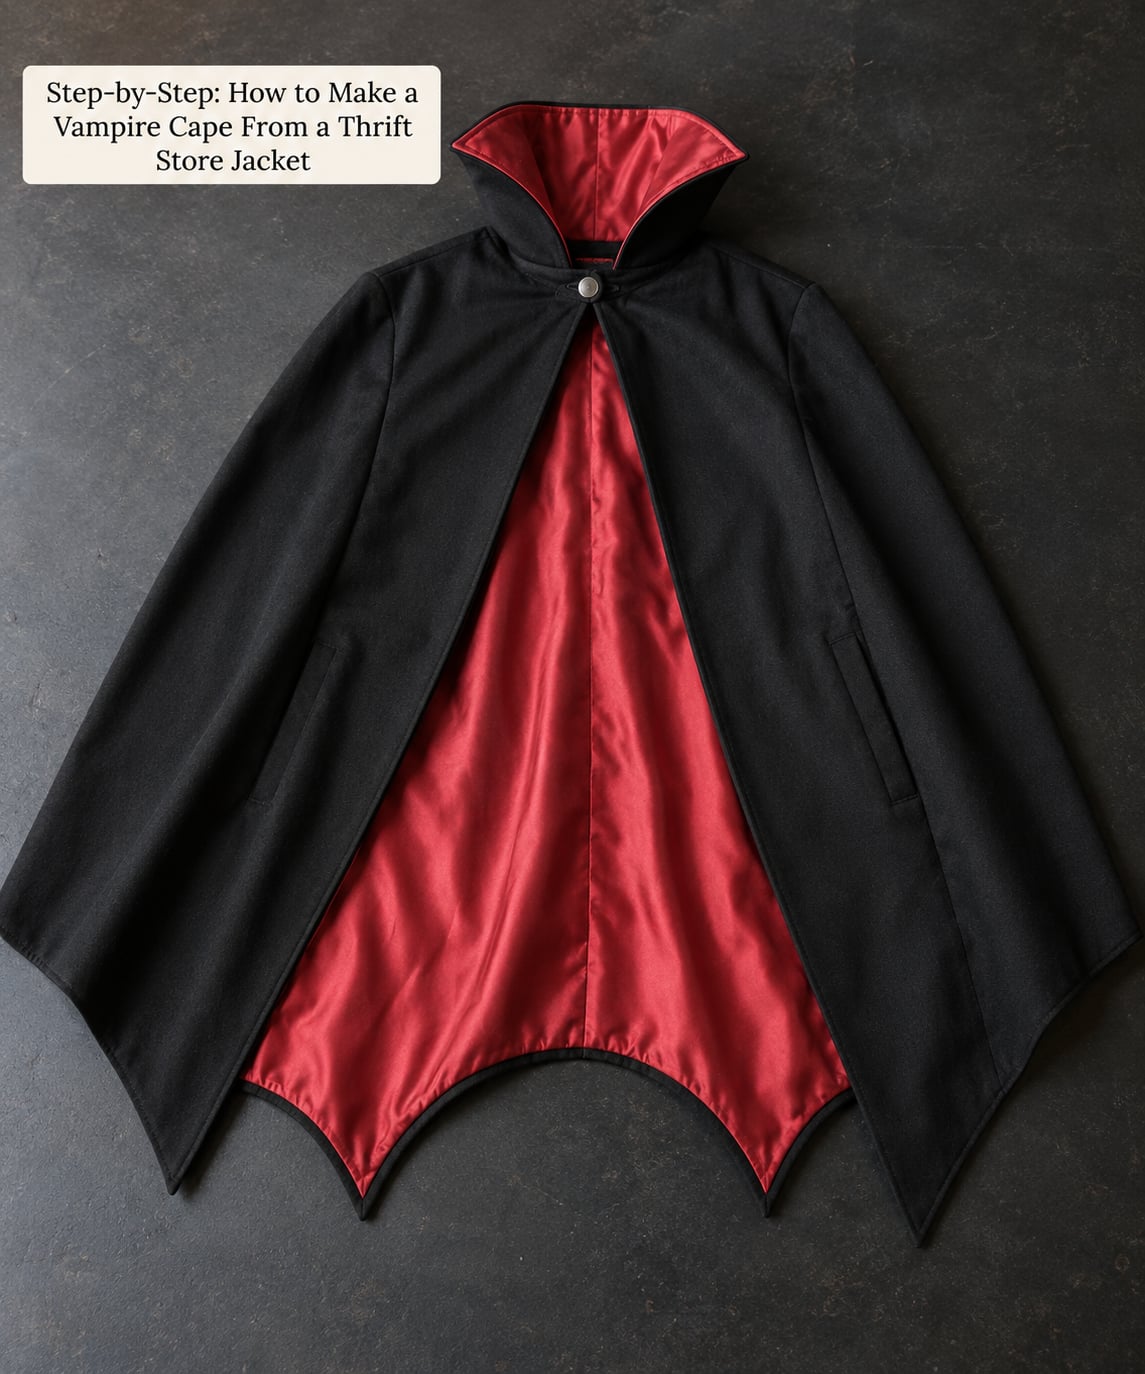
Step-by-Step: How to Make a Vampire Cape From a Thrift Store Jacket
Plan the Build Before You Cut
Plan the cape while the jacket is still on the hanger, because once you cut the sleeves off you cannot get the shoulders back. Choose a loose coat in a dark colour, check whether the back seam is sewn closed or left open as a vent, and confirm the fabric is unlined or only lightly lined.
Turn the jacket inside out and look at the seams before anything else. An open back seam means you can spread the panels and get drape with no cutting at all. A closed seam means you unpick it first, which takes ten minutes and a seam ripper.
Then decide on the finish. A lined cape in red satin looks theatrical and holds a hem better. An unlined cape drapes softer and moves faster, which matters if you are dancing. An open front is easier to put on over a costume and lets a white shirt show at the collar. A closed front reads more like a cloak.
Pull the care label off the inside collar and remove any existing shoulder pad or decorative hardware you do not want on the finished cape.
Measure and Mark the Cape Shape
Measure shoulder width, the distance from the collar to where you want the hem to fall, and the depth of the collar you are keeping. Mark those numbers in chalk on the wrong side of the fabric, working from the centre back outward so the two halves stay mirror images.
Aim for a gradual hem rather than a hard horizontal line. Draw a shallow arc from the side seam toward the centre so the cape widens toward the bottom, and check that the length still works over the clothes you plan to wear.
Before any cutting, pin the intended shape to the body with large safety pins or clips and put the jacket on. The hem should sit at mid-thigh for an adult walking costume and just above the knee for a child. If it hits the knees on an adult, it will drag by the end of the night.
That fitting is your signal. If the pinned shape drapes in a smooth curve with no bunching under the arm, the shape is right.
Lay the Jacket Flat and Cut the Body
Lay the jacket flat on your cutting mat with the back facing up, inside out, and smooth the fabric with your hands. Draw a chalk line down the exact centre back so you have a guide for symmetry.
Cut the sleeves off along the shoulder seam and then along the armhole seam, leaving a small margin of fabric at the shoulder seam so the shoulder does not thin out. Slow, short snips through one layer at a time beat one long cut, which is where most beginners slip and take out a chunk of the back.
If the back is quilted, do not try to reuse those panels as cape fabric. The batting makes the cape stiff and it will not fall the way you want.
The finished shoulder should look like a coat shoulder, not a raw seam. If the fabric frays as you cut, stop and zigzag or overcast that edge before continuing.
Shape the Collar, Front Edges, and Hem
Trim away extra bulk around the neckline so the collar sits flat against your neck, then trim the front edges straight down from the shoulder to the hem for a clean vertical line. Cut on the marked centre line for a closed cape, and leave the fronts open with a facing strip down each one for an open-front cape.
The signature vampire detail is a pointed front edge. Mark a point roughly six to eight inches down from the top of each front and cut a shallow V. Angle the cut slightly so the point sits on the front line and does not narrow the body of the cape.
For the hem, you have three easy options. A straight hem is fastest. A pointed hem repeats the V shape at regular intervals around the bottom edge. A scalloped hem needs no pattern at all: mark half-circles with a cup or a bowl as a template and cut along the line.
Hold the finished cape up against the original jacket and check both halves match before you move on. Mark any asymmetry in chalk now while the original is still there for reference.
Join or Fasten the Sides
Join the sides with hook-and-loop tape for a no-sew build: stick one strip along each open edge and test the fit before pressing it down permanently. Snaps or a ribbon tie work too, and safety pins make a fine temporary closure while you test the drape.
If you are sewing, pin the side seams right sides facing in, sew with a half-inch seam allowance, and press the seam open so the cape hangs flat. Reinforce the top four inches of each side seam with a second row of stitching, because that is where the fabric pulls every time you put the cape on.
Keep the front open and the cape pulls on over a shirt without any fastening at the neck. Close it and it behaves like a true cloak. The simplest neck closure is a strip of hook-and-loop tape at the collar, which a child can do up alone at trick-or-treating.
Avoid long ribbon ties on small children. A neck tie is a choking hazard, so use hook-and-loop tape or snaps if the wearer is under five.
Add a Lining and Decorative Details
A contrast lining changes the character of the whole garment. Cut the lining to the same shape as the outer cape, sew or glue it to the wrong side along the neckline and side seams, and leave the hem free so the lining shows when the cape lifts.
Pockets matter more than people expect on an adult build. Two patch pockets sewn at the hip give you somewhere for a phone and keys, and they break up a large expanse of black fabric.
For the neckline, a brooch clasp, a large decorative button, or a length of chain hooked to an eye pin gives you the Victorian look without a sewing lesson. Trim the hem with lace or gold braid for the opera-cloak version.
Distressing is the one step that rewards restraint. Snip small notches in the hem, sand the raw edge with coarse sandpaper until it thins out, then rub a little tea or coffee into the fabric. Glow-in-the-dark paint brushed along the hem reads well in a dark room and stays invisible at school the next morning.
Finish and Test the Vampire Cape
Finish the cape by pressing every seam flat, trimming any loose threads, and sealing raw edges with fray check or a thin line of fabric glue along the hem. The garment is done when it lies flat on a table with no twist through the centre back.
Put it on over your full costume and move around. Reach forward, turn fast and sit down. A cape that catches under the heels needs to be shortened two inches, and a cape that slides off the shoulders needs a back seam, not a longer front.
Test the neck fastening ten times in a row. If it takes more than two seconds, the fastener is too stiff or the opening is too small, and you will be fumbling with it in a dark hallway later.
Hang the finished cape on a hook and check it in a mirror. Even hem, even collar height, no gap at the shoulders means the transformation worked.
Common Mistakes
Most bad thrift-jacket capes come down to six fixable problems, and every one of them has a straightforward correction.
- Uneven cutting. Cutting fast takes out more fabric on one side. Mark the full shape in chalk first and cut along short snips so the blade stays on the line.
- Cutting across the grain. The cape then hangs stiff and pulls at the sides. Keep the grain running straight down from the shoulder so the drape falls vertically.
- Cutting into the shoulders. Slicing the armhole too close to the shoulder seam leaves a thin, unsupported cape that collapses. Leave a two-inch margin and reinforce the armhole with a strip of fusible interfacing.
- Making it too short. A cape that ends at the waist reads as a vest. Take the measurement while wearing the shoes and the costume layers you will actually wear.
- Uncomfortable closures. Metal snaps against the neck and stiff tape both irritate over a long night. Line the closure area with a strip of soft lining fabric.
- Ignoring reinforcement. Thin thrift fabrics fail first at the armhole and the top of the side seam. Apply fusible interfacing to both before the cape is worn once.
- Fraying edges. Loose weaves shed threads every time the cape swings. Zigzag the raw hem or run a line of fabric glue along it, then press.
- A collar that gapes or flops. The usual cause is a collar cut too short. Leave at least four inches of stand height and reinforce it with two layers of interfacing so it holds its shape all evening.
Two habits fix most fitting complaints. Always try the cape on over the layers you will wear on the night, and test the fit with temporary fasteners before making anything permanent.
Frequently Asked Questions
How to make a vampire cape from a thrift store jacket with no sewing?
Take the sleeves off along the shoulder and armhole seams, then join the body with hook-and-loop tape, snaps or large safety pins instead of stitching. Add felt or fleece panels for volume and glue them with fabric glue, letting each layer dry before handling. Bonded hem tape along the raw edge stops fraying. It works, it comes apart cleanly, and a child can redo it on their own.
What kind of jacket is best for a DIY vampire cape?
Look for a dark, loose-fitting coat that is unlined or lightly lined, with a back seam you can open or unpick. Long wool coats, opera coats, trench coats and soft blazers all convert well. Skip cropped jackets, heavy quilted puffers with thick batting, and anything with shoulder pads, because those fight the drape and the shoulders fall apart when you cut them.
Should I keep the sleeves and collar from the old jacket?
Keep the collar if it stands up on its own, since a tall Victorian collar is what sells the vampire look. Cut the sleeves away entirely and use the freed armhole edge as the shoulder line. If the collar is a soft shirt collar that folds flat, cut it away and build a standing collar from a strip of black fabric and stiff interfacing instead.
How do I make a thrift jacket cape fit more comfortably?
Add a back seam through the centre back so the cape cannot slide off the shoulders, and shorten the front if it catches under your heels. Line the neck closure with a strip of soft lining fabric so metal or stiff tape does not rub. Most important, test the fit over the exact clothes you will wear, with temporary fasteners, before anything is cut or glued permanently.
How do I make the cape look old, tattered, or spooky?
Snip small notches along the hem, sand the raw edge with coarse sandpaper to thin the fibres, and rub tea or coffee into the fabric for staining. Tear short slits in the outer layer and pull individual threads to fray them. Paint the hem with glow-in-the-dark paint for a version that reveals itself in the dark and disappears under daylight.
Conclusion
Start with the jacket, not the scissors. Pick a loose, dark, unlined coat that opens at the back, check that it flattens into a cape shape, and pin the hem length on your body before anything gets cut.
Once the pinned shape drapes the way you want, the rest is disassembly, shaping, and a closure at the neck. Test the fit with safety pins or hook-and-loop tape first, then commit to sewing or glue. A white shirt, black trousers, fangs and pale face paint finish the look, and the whole thing takes an evening.