Special effects makeup is the practice of building fake injuries, aging and creatures on the skin using liquid latex, scar wax and theatrical blood. Learning how to do special effects makeup for beginners takes three core materials, a decent sponge and about an hour of practice. Most first attempts take 45 to 90 minutes, and a pale-and-bruised zombie is the easiest look to land.
I know the intimidation factor is real. Beginners watch professional videos with foam latex, spirit gum and airbrushes and assume the hobby needs all of it. It does not. The gap between a convincing wound and a costume-shop mess is almost always edge blending, not expensive gear.
Below is the process I would hand a friend on their first night: what to gather, how to prep, how to build each layer, and how to take it all off without wrecking your skin. I keep it current for every Halloween season as formulas and product names shift around.
Table of Contents
- What You Need
- Step-by-Step
- How to Do Special Effects Makeup for Beginners: Plan the Look
- How to Do Special Effects Makeup for Beginners: Prepare and Protect the Skin
- Build a Pale, Bruised, or Flushed Base
- Create Wounds, Cuts, and Raised Effects
- Add Aging, Decay, and Monster Details
- Set, Finish, and Photograph the Makeup
- Common Mistakes
- Tips
- Frequently Asked Questions
- What supplies do I need to start learning special effects makeup?
- Is special effects makeup safe for beginners to use at home?
- What is the easiest Halloween special effects makeup look for a beginner?
- How can I make fake wounds look realistic without using real cuts?
- How do I choose the right colors for a zombie or undead look?
- How do I remove heavy special effects makeup safely?
- Conclusion
What You Need
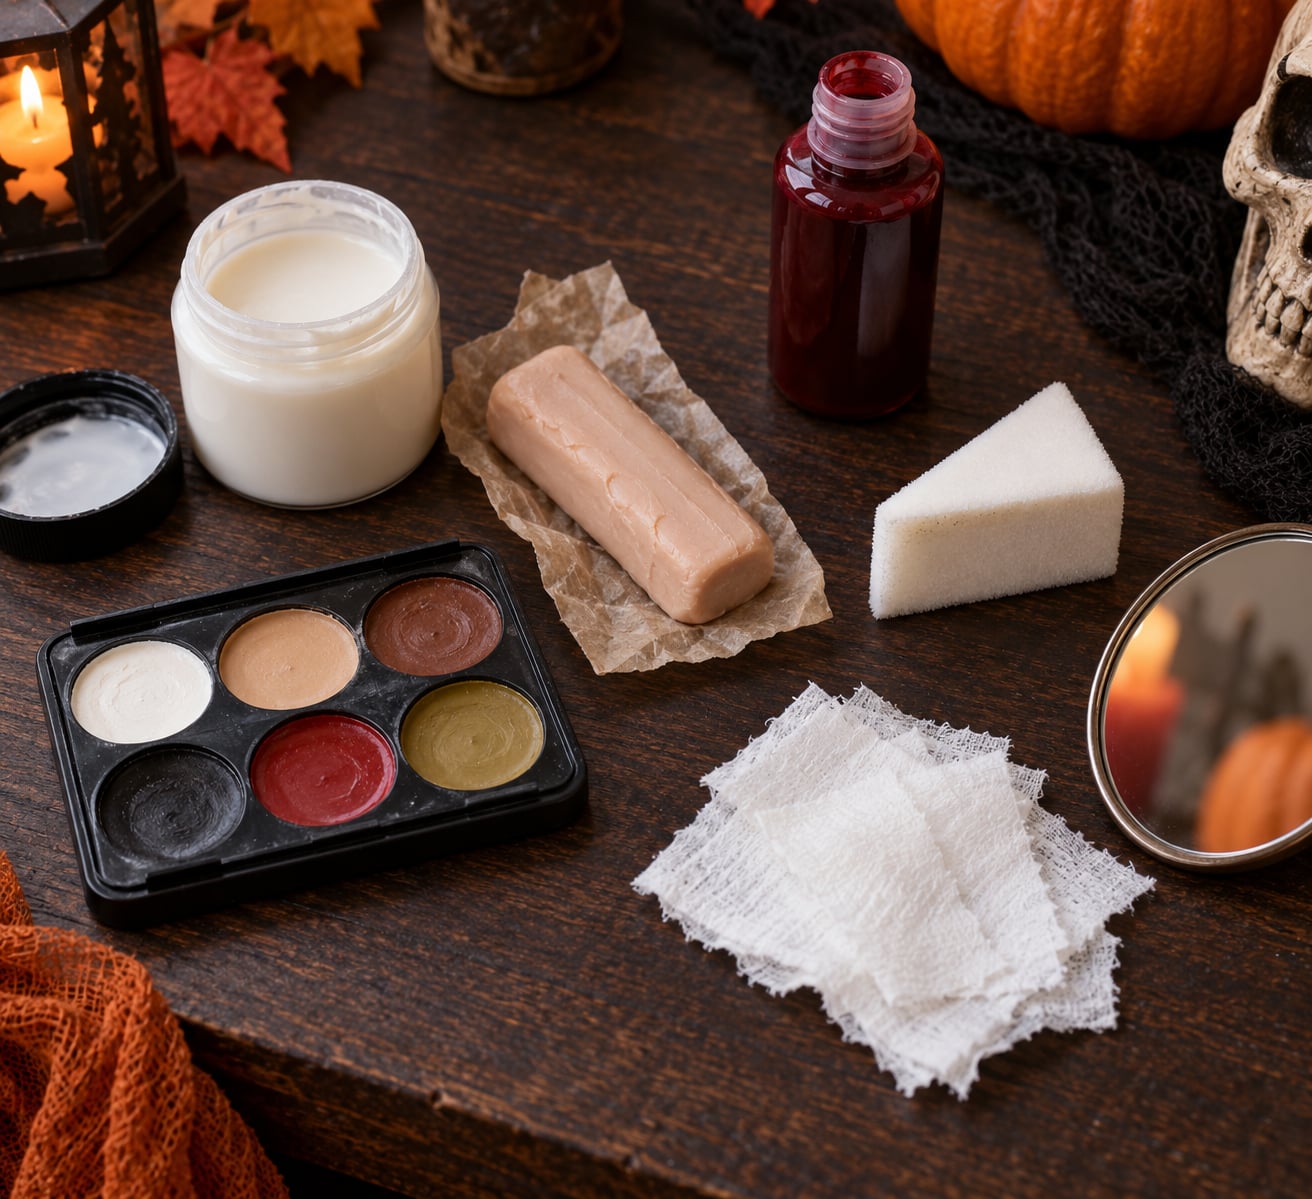
Beauty and costume supply stores carry everything a beginner SFX kit needs, and most of the essentials are ordinary makeup tools you may already own. Here is the working kit:
- 1 oz liquid latex (white or clear): dries to a flexible film you can shape with a tool, layer, tint and peel off in one piece.
- Modeling wax (scar wax): a pliable solid you press and stretch into raised scars, puffy bites and old wound edges.
- Theatrical blood: a thin syrup for fresh wounds and a darker, thicker version for dried scabs and scabbed cuts.
- Cream paints: opaque colour that sits on top of skin or latex and dries flat, unlike powder which catches on texture.
- Bruise wheel or a set of cream colours: gives you the layered purples, greens and yellows a real bruise needs instead of one flat purple splotch.
- Stipple sponge and small detail brushes: a wedge sponge stipples texture, a small flat brush shapes latex, a fine liner brush finds edges.
- Translucent setting powder: sets cream colour without adding lightness, and dusts between latex coats to stop them sticking to themselves.
- White school glue, toilet tissue and cocoa powder: the household route to a torn-skin look when the kit money is tight.
- Petroleum jelly, warm water and a good cleanser: the removal kit, which matters more than most beginners expect.
- Paper towel, a trash bag and a phone with a camera: for wiping tools, catching flakes and photographing your progress.
Buy the palette, the latex, the wax and the blood first. Everything else you can improvise or add once you know which effects you actually enjoy. The single most common beginner buying mistake is buying a big pre-made “gore” set that sits unused while the four basic materials run out.
A quick comparison of the three core materials:
| Material | What it builds | Dries in | Skill needed | Removal |
|---|---|---|---|---|
| Liquid latex | Thin films, cuts, peeling skin, wrinkle lines | 2 to 10 minutes per thin coat | Low | Peels off whole, easy |
| Modeling wax | Raised scars, knots, swollen bites, stitched edges | Does not dry, sets in place | Medium | Softens with heat, medium |
| Blood | Fresh or dried wound colour and pooling | Seconds to a few minutes | Low | Warm water, easy |
| White glue (swap) | Cheap cut, drips and skin edges | 5 to 15 minutes | Low | Peels or washes, medium |
Step-by-Step
How to do special effects makeup for beginners in the right order: plan the look, prepare the skin, lay a colour base, build the raised texture, add aging and detail, then set and photograph. Skipping the base and going straight to texture is why first attempts look like plastic.
How to Do Special Effects Makeup for Beginners: Plan the Look
Pick one character and one reference photo before you open a single product. Searching “zombie makeup tutorial for beginners” and pinning two images side by side teaches you more in five minutes than an hour of improvising.
Map the effects to the face. Forehead cuts read at a distance, cuts on the chin disappear, and anything near the mouth has to survive talking and eating. Decide now whether this is makeup only, or makeup plus simple costume pieces like a torn collar or a pair of dark contacts.
Then check the look in two lights: normal room light, and a dim hallway with a single warm bulb. SFX reads darker and harsher under porch light, so if the effect vanishes in dim light, deepen the shadow one step.
How to Do Special Effects Makeup for Beginners: Prepare and Protect the Skin
Patch test anything new on your inner arm or behind your ear 24 hours before the night. Latex allergy signs show up as redness, itching, swelling or a rash, and finding out at 9pm on Halloween Eve is miserable.
Cleansed, moisturised skin takes colour more evenly than skin you have just powdered. Skip heavy moisturiser on areas getting latex, because oil stops the film bonding properly.
Work under bright, even light with a mirror that shows your whole face, and keep a hand mirror for checking the back of your jaw. Wash your hands before you start and clean sponges and brushes between colours. Synthetic, non-porous brushes hold latex far better than natural bristles.
Keep latex off your eyelashes and out of your eyes, and take contacts out before you start. If you plan to wear them, put them in last, once everything is set, and remove them first when you take the makeup off.
Build a Pale, Bruised, or Flushed Base
Colour is the layer that makes a face look wrong in a believable way. The recipe for a decent corpse pallor is a pale cream or white cream paint, a mid-tone grey shadow under the cheekbones and temples, and a dusty lavender or green shadow around the eyes.
Work light to dark. Lay the pale base first, add the medium shadow second, the darkest detail last, and blend each one before moving on. A soft brush over a wet edge is faster than trying to fix a hard line later.
For a bruise, the order is the real trick. Red goes down first, then blue, then green, then yellow on top where it will heal. Yellow last is what makes it read as a few days old; yellow underneath turns it muddy and instantly fake.
Checkpoint before you move on: hold a hand mirror at arm’s length. If you can see the edge of any shape, blend it further. If a transition looks like a stripe, you need to feather the edge rather than add more colour.
Create Wounds, Cuts, and Raised Effects
For a latex gash, build a thin line of latex and stretch it gently with a tool so it thins to almost nothing at the centre, then lets it dry to a clear film. Paint the inside of the gap deep red, layer darker brown toward the edges, and run fresh theatrical blood out of one end with a slight downhill pull.
Two coats beat one thick coat, and a dusting of translucent powder between them keeps the second from grabbing the first. If the latex cracks as it dries, you applied it too thick in one pass.
For torn or peeling skin, brush on a thin latex layer, let it get tacky, lay torn squares of toilet tissue into it, and dust powder over the top before painting. The tissue edges are what sell it as skin rather than paper.
For a scar or a puffy bite, warm a pea-sized amount of modeling wax between your fingers, press it on, and pinch or pull it with your fingertips while it stays soft. Set it with translucent powder and paint around, not over, the edge.
Know the difference between makeup-only work and a removable prosthetic. Makeup-only means you build the effect on skin with latex, wax or tissue, and it comes off at the sink. A prosthetic is a pre-made silicone or foam piece glued on with spirit gum or prosthetic adhesive, and removal takes more time and a solvent remover. For your first Halloween, stay with makeup-only and save appliances for once you have the blending down.
Add Aging, Decay, and Monster Details
Aging is shadow and highlight, not a product. Suck your cheeks slightly in, and paint hollow shadows under the cheekbones, into the temples, around the eyes and beneath the jaw. Add a thin highlight on the cheekbone, the top of the nose and the centre of the forehead, and the face suddenly reads ten years older.
Fine wrinkle lines come from a thin latex line pulled tight and dried, then shaded with a soft brush so the dark sits on one side only. Cracked texture is the same technique, but staggered, dried, and painted with a pale colour so the cracks look like dried-out gaps.
Stitches are the friendliest first detail. Lay a raised wax strip, flatten it slightly, and cut short notches across it with a pointed tool. Paint shadow into the notches, add a darker line at the edge, and dab a little dried blood along the centre. A stitched zombie is the effect most beginners finish successfully on their first go, because the stitch spacing does the visual work for you.
For veins, draw thin translucent lines with a small brush and a cool grey-blue, then blur the edges slightly. For a cracked alien, cover the face in pale cream, stipple irregular darker patches, then build the crack lines in thin wax so they cast small real shadows under movement.
Set, Finish, and Photograph the Makeup
Set cream colour with translucent powder, holding the brush loosely so it does not disturb the texture you built. A layer of translucent powder across the finished look keeps it matte and reduces transfer onto costume fabric and pillows.
Now inspect twice. Check in bright light for edges you have missed, then in dim light for shadows that have gone too black. Photograph both versions, because the phone camera is showing you things your eyes have adapted to.
For photos, stand facing a window rather than a ceiling light, hold a sheet of white paper near your face to lift the shadows, and take one shot with the flash off. Turn off the flash entirely, since direct flash flattens every dimensional effect you just built.
Do not touch your face once it is set, and expect to touch it all night. Take a small towel and a hand sanitizer if the weather is warm. If you are wearing a mask, mask the area with powder and translucent tissue to stop it rubbing off.
To remove everything, start with the easiest thing first. Peel latex off in one piece from a corner rather than picking at it, then wash the skin with warm water and a cleanser. Wipe wax with petroleum jelly and a warm cloth, working in small circles until it lifts. Blood washes away with warm water alone. Finish with a moisturiser, and expect one or two slightly pink days afterwards if you scrubbed too hard.
Common Mistakes
- Over-applying product. Thick coats crack, look rubbery and peel off in sheets. Fix: two thin coats with a powder dusting between them.
- Harsh colour transitions. A visible edge gives the whole effect away instantly. Fix: feathering with a clean soft brush while the colour is still damp, from the outside inward.
- Wrong shades. Buying a “pale” that is too grey or a blood that is too orange is common. Fix: match your base to your own skin tone first, then lighten it, rather than guessing from the tube.
- Ignoring skin safety. A 24-hour patch test costs you one evening. Fix: patch test every new product, especially latex.
- Too much theatrical blood. Blood is a detail, not a coating. Fix: use a thin line, pool it at one end, and let the wound colour do the work.
- Not setting the look. Cream colour that is not powdered transfers onto everything. Fix: translucent powder plus a light dusting over the finished effect.
- Practising without a reference. Repeating the same motion is not practice. Fix: work from a pinned reference photo every time, and photograph the result to compare.
- Starting with prosthetics. A glued appliance on an unfinished base looks worse than good makeup. Fix: nail the base and blending first, appliances later.
Tips
Learn one effect properly before adding a second. A clean bruise with smooth edges is a skill, and once you own it you can reuse it in forty costumes.
Think in terms of a colour wheel. Cool colours recede, warm colours come forward, and a wound reads as deep because the dark sits next to warm skin rather than being drawn darker in place.
Photograph every attempt in the same spot with the same lighting. A phone photo is the only honest record of progress, and it is the one thing most beginners skip while chasing their memory of the result.
Keep the kit in one box, ordered light to dark, so you are not hunting for the dark brown at midnight. Leftover latex at the bottom of a jar goes off, so decant it into small amounts and throw out what smells sour.
Test small amounts on the back of your hand first. Most disasters are a five-second check you skipped.
The same techniques carry straight over to cosplay, theatre, film extra work, party looks and costume contests. Once edges blend properly, the character changes but the craft does not.
Frequently Asked Questions
What supplies do I need to start learning special effects makeup?
Start with liquid latex, modeling wax, theatrical blood, cream paints in a few tones, a wedge sponge, two small detail brushes and translucent setting powder. Add a bruise wheel or extra cream colours once you have the basics down. Most of the rest, including household substitutes, can come later.
Is special effects makeup safe for beginners to use at home?
It is generally fine when you patch test new products 24 hours ahead, keep latex away from your eyes and lashes, and remove your contacts first. Wash your hands and tools between colours, and stop if you see redness, itching or swelling. The main real risk is a skin reaction, not the product itself.
What is the easiest Halloween special effects makeup look for a beginner?
A pale, bruised face is the easiest, because it is colour only with no texture to build. Add a stitched wax wound and a thin blood line once that base is clean. You should be able to complete the whole look in 45 minutes with no latex shaping at all.
How can I make fake wounds look realistic without using real cuts?
Build the wound with liquid latex thinned and stretched in the centre, tint the inside deep red with darker brown toward the edges, then add a thin blood line that pools at one end. Never cut your skin, and never use a product you have not patch tested.
How do I choose the right colors for a zombie or undead look?
Start from a pale cream matched to your own skin tone, then add grey shadow under the cheekbones and temples, and lavender or green around the eyes. For bruises, layer red, then blue, then green, then yellow, with yellow on top for an older look. Feather every edge before you add the next shade.
How do I remove heavy special effects makeup safely?
Peel latex off whole from a corner instead of picking at it, then wash with warm water and a cleanser. Wipe modeling wax away with petroleum jelly and a warm cloth in small circles, and let blood wash off with water alone. Finish with a moisturiser and skip scrubs or makeup wipes.
Conclusion
Start with a pale, bruised base. It is the easiest special effects makeup for a first attempt, it needs no latex shaping, and finishing it well teaches you blending, which is the skill everything else depends on.
Patch test the night before, use clean tools, practise the base on an evening when nothing is at stake, and only add a stitched wax wound once the colour work is smooth. If you tell me whether you are prepping for Halloween, cosplay or general practice, I can point you at the one effect to learn next.