
A motion activated Halloween prop is a static decoration wired to a sensor, a controller, an actuator and a power supply so that when somebody walks past, it moves or fires off light, sound or fog. You can build one this weekend with a cheap PIR sensor and a relay module, and almost all of the work is choosing the effect, mounting the sensor in the right spot, and getting the trigger timing to behave.
I say that last part matters more than people expect. A prop that fires correctly while you stand in front of it at 4pm can sit there re-triggering every four seconds on the night, and that is the bug that shows up in nearly every haunted house thread I have read.
Everything here runs on 12V DC or less. Mains power goes in a weatherproof box, and if you are not comfortable with house wiring, hire an electrician for that part and keep your own work on the low-voltage side.
Table of Contents
- What You Need
- The four-part chain
- Prop body and movement hardware
- Wiring, enclosure and tools
- Protective kit
- Step-by-Step: How to Make a Motion Activated Halloween Prop
- 1. Plan the prop and its movement
- 2. Choose the motion sensor and controller
- 3. Build or adapt the prop mechanism
- 4. Wire the sensor and output device
- 5. Set the range, sensitivity, and delay
- 6. Enclose the electronics and add decorative details
- 7. Test the complete motion activated Halloween prop
- Common Mistakes
- Narrowing the field of view
- Power, weather and storage
- Frequently Asked Questions
- Do I need an Arduino to make a motion activated Halloween prop?
- Can a PIR sensor trigger a relay directly?
- Why does my motion activated prop keep re-triggering?
- How far away can a PIR sensor detect trick-or-treaters?
- How do I power a motion activated Halloween prop outdoors?
- Conclusion
What You Need
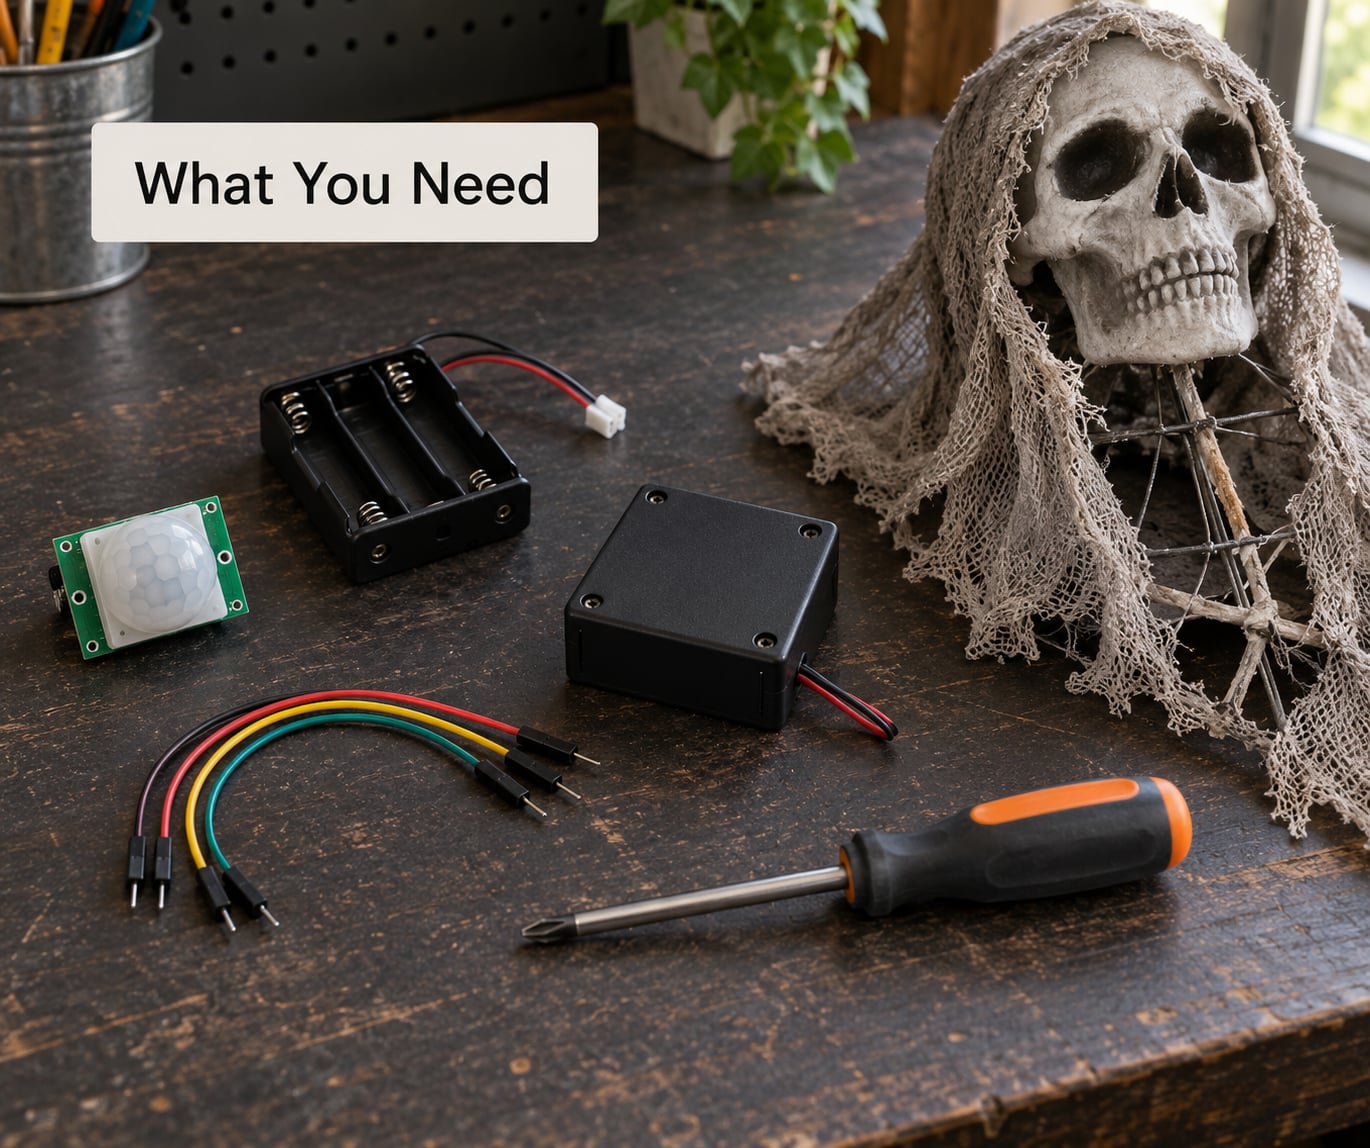
The sensor and the actuator are the parts people underbuy. Everything else is hardware store stuff.
The four-part chain
- Sensor. An HC-SR501 passive infrared module is the default choice for most builds. It watches for the change in infrared radiation a warm body throws as it moves through its field of view, and puts out a short high signal when it sees something. Typical specs: roughly a 100 degree sensing angle, useful range up to about 7 metres, 4.5 to 12V, and two small trimpots for sensitivity and time delay.
- Controller. Either a relay module, which switches the actuator on and off for you, or a microcontroller such as an Arduino Uno or Nano if you want a sequence instead of a single on/off.
- Actuator. Whatever makes the prop move: a servo, a geared DC motor, a solenoid valve feeding a pneumatic piston, or a linear actuator. Lights, a speaker and a fog machine count too.
- Power. A 12V DC supply or a sealed lead-acid battery pack. Mains power only if you are wiring it properly.
Prop body and movement hardware
Pick one effect and commit to it. A jumping spider, a rising skeleton, glowing eyes that snap on, a fog burst and a scream on a voice box are all achievable on the same electronics; doing all five at once means you are debugging five things at night.
For the body, hollow foam carved over a PVC or wire frame is light and cheap. Papier-mache over a plywood or PVC skeleton is cheaper still but fragile outdoors. If the prop is tall and top-heavy, add a counterweight on the back so the motor or piston is pushing against balance rather than fighting it.
Wiring, enclosure and tools
- 22 AWG stranded wire, DuPont jumper wires, and screw terminals or Wago connectors for anything that has to survive being moved
- A small weatherproof plastic enclosure with a cable gland, or a repurposed junction box
- A strip of heat-shrink tubing and a roll of electrical tape
- Phillips and flat-blade screwdrivers, wire strippers, needle-nose pliers, a multimeter and a soldering iron
- A fuse or inline breaker sized for whatever the actuator draws, plus a flyback diode across any coil load such as a solenoid or motor
Protective kit
Safety glasses when you cut PVC or foam, gloves when you handle a pump or reservoir, and a clear face shield or goggles if you are running compressed air. Keep mist and water away from the electronics and seal every cable entry point. If children walk the trick-or-treat path, guard the pinch points on any moving arm and make sure a knocked prop cannot fall onto anyone. Read the manufacturer’s instructions for any pump, compressor or power supply you use, and follow them.
Step-by-Step: How to Make a Motion Activated Halloween Prop
Build in this order and each stage gives you one thing to check. Mechanism first, electronics second. If you wire the sensor before the moving part works, you end up chasing a mechanical jam with a multimeter in your hand.
1. Plan the prop and its movement
Stand where your visitors will stand and watch the path. Decide where the trigger zone starts, then mark it on the ground with tape or chalk before you cut anything. Most first-time builders aim the sensor at the walkway and then wonder why the prop fires early.
Measure the prop and check where the mechanism has to sit. A pop-up needs a piston pushing vertically from a base frame. Rising heads need a linear travel path with a stop at the top. Glowing eyes only need a light, which makes them the cheapest build on this list.
How do you know the plan is right? Walk the path ten times and point at the spot where the prop should fire. That point is where the sensor goes.
2. Choose the motion sensor and controller
A PIR sensor is the right answer for most people. It ignores ambient light, it is cheap, it triggers on body movement, and it has no wiring beyond three pins. Its weakness is that it needs the target to cross its field of view rather than walk straight toward it, and it reacts badly to heat sources like a driveway, a dryer vent or fog machine output.
An ultrasonic sensor such as the HC-SR04 measures distance and works when someone walks straight at it, but it will happily trigger on a swinging branch and it has a narrow cone. Reach for it when your approach angle is head-on. A microwave sensor is the pick for long open yard approaches.
Now match the controller to the load, which is the question that comes up most often in the forums:
- Transistor or MOSFET. Right for DC motors, solenoids and LED strips under about 1 to 2 amps. Cheap, silent, fast switching. You still need a flyback diode across the coil. This is the answer when you only need one on/off output.
- Relay module. Right when the load is mains-ish or you want isolation. It clicks audibly, which is actually fine for a haunt prop. A 4-channel board lets one controller drive several props.
- Microcontroller. Right when you need a sequence: motor runs, pauses, light flashes, voice plays, then the prop parks and re-arms. A microcontroller cannot drive a solenoid directly, which is where most beginners go wrong.
Check the sensor’s supply voltage against your supply before you plug anything in. A 5V relay board on a 12V supply and a 12V PIR on a 5V supply are both common and both dead on arrival.
3. Build or adapt the prop mechanism
Mount the moving part to something rigid. Angle iron or a length of EMT conduit makes a decent frame and stays flat outdoors where a cardboard box would not.
Fix a stop so the prop cannot travel past its intended position, and a return so it does not crash back. For pneumatics, seat the piston body firmly and clamp the tubing where it cannot whip. For a servo-driven arm, check the servo can handle the load at that length before you drill the bracket.
Test it manually before a single wire goes near the electronics. A 9V battery and a couple of test leads are enough to confirm the piston extends fully and retracts cleanly. If it stalls halfway, the problem is mechanical and no amount of code will fix it.
Success looks like the mechanism completing a full cycle, ten times in a row, with no binding and no pinch points.
4. Wire the sensor and output device
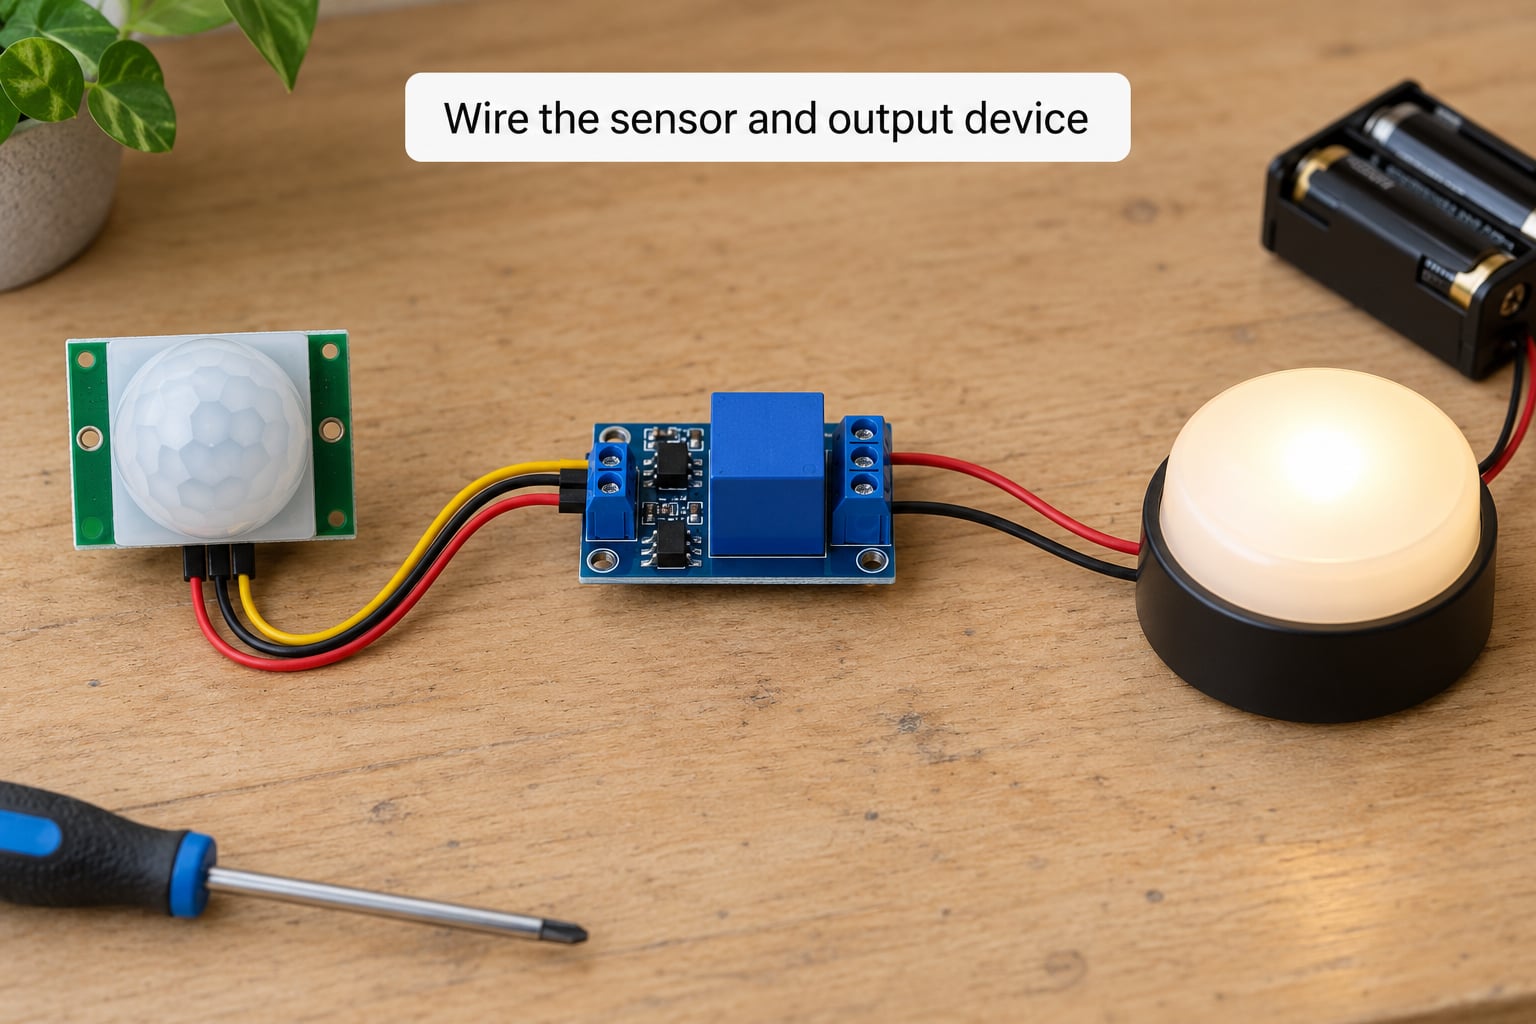
Unplug the power before you change anything. Every time.
The HC-SR501 has three pins. The pin mapping is the same whichever controller you pick:
| PIR pin | Connects to | Notes |
|---|---|---|
| VCC | 5V (or the supply within its 4.5 to 12V range) | Match the module’s supply exactly |
| GND | GND on the controller | This also ties the grounds together |
| OUT | A digital input pin, or the IN pin of a relay channel | Active high on the standard module; some are active low |
Read the silkscreen on your specific module before wiring. The three pins are not in the same order on every clone, and connecting a ground where a signal pin belongs is the single most common build killer.
From the controller output, run the load. Relay version: OUT to the relay IN pin, actuator across the relay contacts, and a flyback diode across a solenoid or motor if the board does not already have one. Transistor version: OUT through a resistor to the base or gate, the load to the collector or drain, and the emitter or source to ground.
Keep the sensor ground and the controller ground on the same ground, or the trigger signal will float and fire at random. Twist the sensor cable if you are running more than a couple of metres, and keep it away from mains wiring.
You know it is wired correctly when the relay clicks and the actuator fires once, then stops when you remove the trigger.
5. Set the range, sensitivity, and delay
Two trimpots on the back of the HC-SR501 do most of this work. Turn sensitivity up until it reliably catches a trick-or-treater walking at normal pace at the distance you want, then back it off one notch so it stops responding to leaves and insects.
Turn the time-delay trimpot to set how long the output stays high after the trigger. Long enough to run a full movement, short enough that the prop is idle again before the next group arrives.
Now deal with the re-triggering problem, which is really a logic problem rather than a sensor problem. Three timing values control it:
- Hold-off is the quiet period immediately after a trigger, when the sensor is ignored no matter what it sees. Set it to the length of the animation plus a second.
- Dwell is how long the output stays energised, which is how long your prop moves.
- Re-arm is the delay before the sensor is listened to again. Longer than hold-off, so a group standing still does not set the prop off four times.
With a relay module and no microcontroller, you get hold-off from the PIR’s own delay trimpot. If you need a longer lockout than that, a small microcontroller or a 555 timer is the way to do it.
Test at three walking speeds: an adult stroll, a child’s run, and a slow shuffle while they are fiddling with a costume bag. If a fast run misses it, raise sensitivity before you blame the sensor range.
6. Enclose the electronics and add decorative details
Put the controller and power supply in the weatherproof box, leaving the sensor on a short cable run outside it. Seal the cable gland, drip-loop the wire so water runs off rather than into the box, and mount the box somewhere out of sight that you can still reach with a screwdriver.
Leave access. A prop you cannot open on the night is a prop you cannot fix on the night, so do not bury the enclosure under a permanent skin of foam or caulk. A hinged or screw-on lid is worth the extra five minutes.
Weatherproofing matters more than people expect. Dew forms overnight and finds every seam. If the display has to sit out through weeks of damp evenings, mount the enclosure under a lip or overhang and consider a small desiccant pack inside.
Then decorate. Do not cover the PIR’s Fresnel lens with paint, caulk or fabric, and keep decorative elements clear of the movement path. Glowing eyes work well here: two diffused LEDs behind a translucent lens on the same relay channel as the rest of the effect.
7. Test the complete motion activated Halloween prop
Test at night or in a dark room. A PIR you cannot see the field of view of is a PIR you cannot aim.
Run through it deliberately. Walk the trigger zone ten times and count the fires. You want ten triggers for ten approaches, not four fires and six false positives. Watch the prop from the visitor’s eye level and note whether it moves long enough to read from the path.
Then check the things that only show up after two hours of running. Listen for buzzing from a relay or coil that is held on too long. Feel the battery or the power supply for heat. Pull gently on the sensor cable at the box to check for strain on the terminals. Stand still in the trigger zone for a full minute and confirm the prop does not re-fire while you are standing there.
Finally, check what happens when someone triggers it twice in quick succession. That is the case that either re-arms cleanly or leaves the mechanism halfway extended, and you want to know which before the queue arrives.
Common Mistakes
Almost every failure in this build shows up as one of a handful of symptoms. Here is what I would check first, based on what haunt builders report coming back from a night of testing.
| Symptom | Likely cause | Fix |
|---|---|---|
| Prop fires constantly or repeats while a guest stands still | No hold-off; sensor re-arms during the animation | Lengthen the time-delay trimpot, or add a re-arm delay of a few seconds in the controller |
| Motion activates while nobody is there | Heat source, moving foliage, fog or an insect in the field of view | Narrow the field of view with a short length of black PVC pipe, aim past the heat source, drop sensitivity one notch |
| Sensor never triggers | Supplied at the wrong voltage, or wired out instead of in | Check VCC against the module spec, confirm the trigger pin, and test the sensor on its own with a multimeter |
| Motor or solenoid runs continuously and never parks | Output stuck high, or the park step drives the active-high coil wrongly | Confirm the controller actually de-energises the output; check the active-low versus active-high version of the module |
| Driver chip runs hot or dies | Coil load beyond the chip’s current rating, or no flyback diode | Switch to a higher-current transistor or MOSFET, add the diode across the coil, check the stall current of the motor |
| Random static on the sensor input | Sensor and controller not sharing a ground | Bond the grounds at one point and re-test |
| Triggers too late or too early | Field of view aimed at the wrong depth | Re-mark the trigger zone on the ground with tape, then re-aim to match |
Narrowing the field of view
This one trick solves most false-trigger problems. The HC-SR501 sees roughly a 100 degree cone, which is far wider than a walkway. Push the sensor down the inside of a length of black PVC pipe and let the pipe wall kill everything outside your intended cone. The top-ranking pop-up prop build uses exactly this trick, with the sensor mounted inside a section of 2-inch black pipe, and it makes the difference between a prop that fires for you and a prop that fires for the wind.
One builder recommended in a recent pumpkin tutorial also points the sensor out through the prop’s own mouth. It hides the module, aims it where people actually walk, and keeps the cone narrow at the same time.
Power, weather and storage
Work out the draw before you pick a power supply. Sum the actuator current plus the controller, then leave headroom. A supply with no headroom runs hot and becomes the thing that fails on the second night.
Battery-powered displays need a runtime estimate. Divide the amp-hour rating by average draw and you get a rough number, but only if you can switch the prop off between activations. Holding a solenoid energised all night will flatten a battery long before the arithmetic suggests.
Between seasons, remove the batteries. Lead-acid cells left partly discharged in a cold shed lose capacity permanently, and a corroded battery in an enclosed box is a mess you do not want to find in spring.
If you are running a fog machine on the same trigger, keep its reservoir and tubing away from the electronics and never put a misting line where it can reach a relay board. Compressed air for a pneumatic pop-up deserves the same respect: mount the cylinder so a failed hose vents away from anyone standing at the prop, not toward them.
Frequently Asked Questions
Do I need an Arduino to make a motion activated Halloween prop?
No, not for most builds. A PIR sensor wired to a relay module will switch a light, a solenoid or a small motor with no code at all. An Arduino earns its place when you need a sequence, such as a motor that runs, pauses, plays a sound and then parks itself, or when you need a re-arm delay longer than the sensor’s own time-delay setting.
Can a PIR sensor trigger a relay directly?
Yes. Wire the PIR VCC to its supply, GND to ground, and OUT to the IN pin of a relay channel on a 5V relay module. The sensor output is a small logic-level signal, so it drives the relay’s control input rather than the load itself. Keep the sensor and the relay board on a common ground, and confirm whether your sensor is active high or active low before you rely on the trigger.
Why does my motion activated prop keep re-triggering?
Almost always missing hold-off logic. The sensor re-arms while the animation is still running, so a guest standing in the trigger zone sets it off again and again. Turn the HC-SR501’s time-delay trimpot up so the output stays high for the full length of the movement, and add a separate re-arm delay of several seconds in your controller. Both together stop the repeat fire.
How far away can a PIR sensor detect trick-or-treaters?
An HC-SR501 is rated for useful detection up to about 7 metres, though real outdoor performance depends on the approach angle, the target’s clothing and how much of the cone you leave open. To trigger from a sidewalk 20 to 25 feet away, mount the sensor there and run a cable back to the prop, or use the narrow-beam PVC mounting trick.
How do I power a motion activated Halloween prop outdoors?
A 12V DC supply or a sealed lead-acid battery pack keeps everything on the low-voltage side. Size the supply so the total draw stays well under its rating, put the controller and supply inside a sealed weatherproof box, and drip-loop every cable entry. Battery displays last longer if you switch the load off between activations instead of holding the output on.
Conclusion
Start with the two decisions that cannot be changed later: what the prop does, and where the trigger zone begins. Mark that spot on the ground with tape, then get the mechanism moving on a battery before a single wire goes near the sensor.
Once the movement works, add the sensor, the controller and the power in that order, and test after each one. Aim and set the delay in the dark, because that is the only way to judge a cone you cannot see. Then check every connection, cover the electronics in something that keeps dew out, and leave yourself a way to open it on the night.
Most of the work in learning how to make a motion activated Halloween prop is not the wiring. It is the patience to stand in your own trigger zone for ten minutes and make the prop behave.