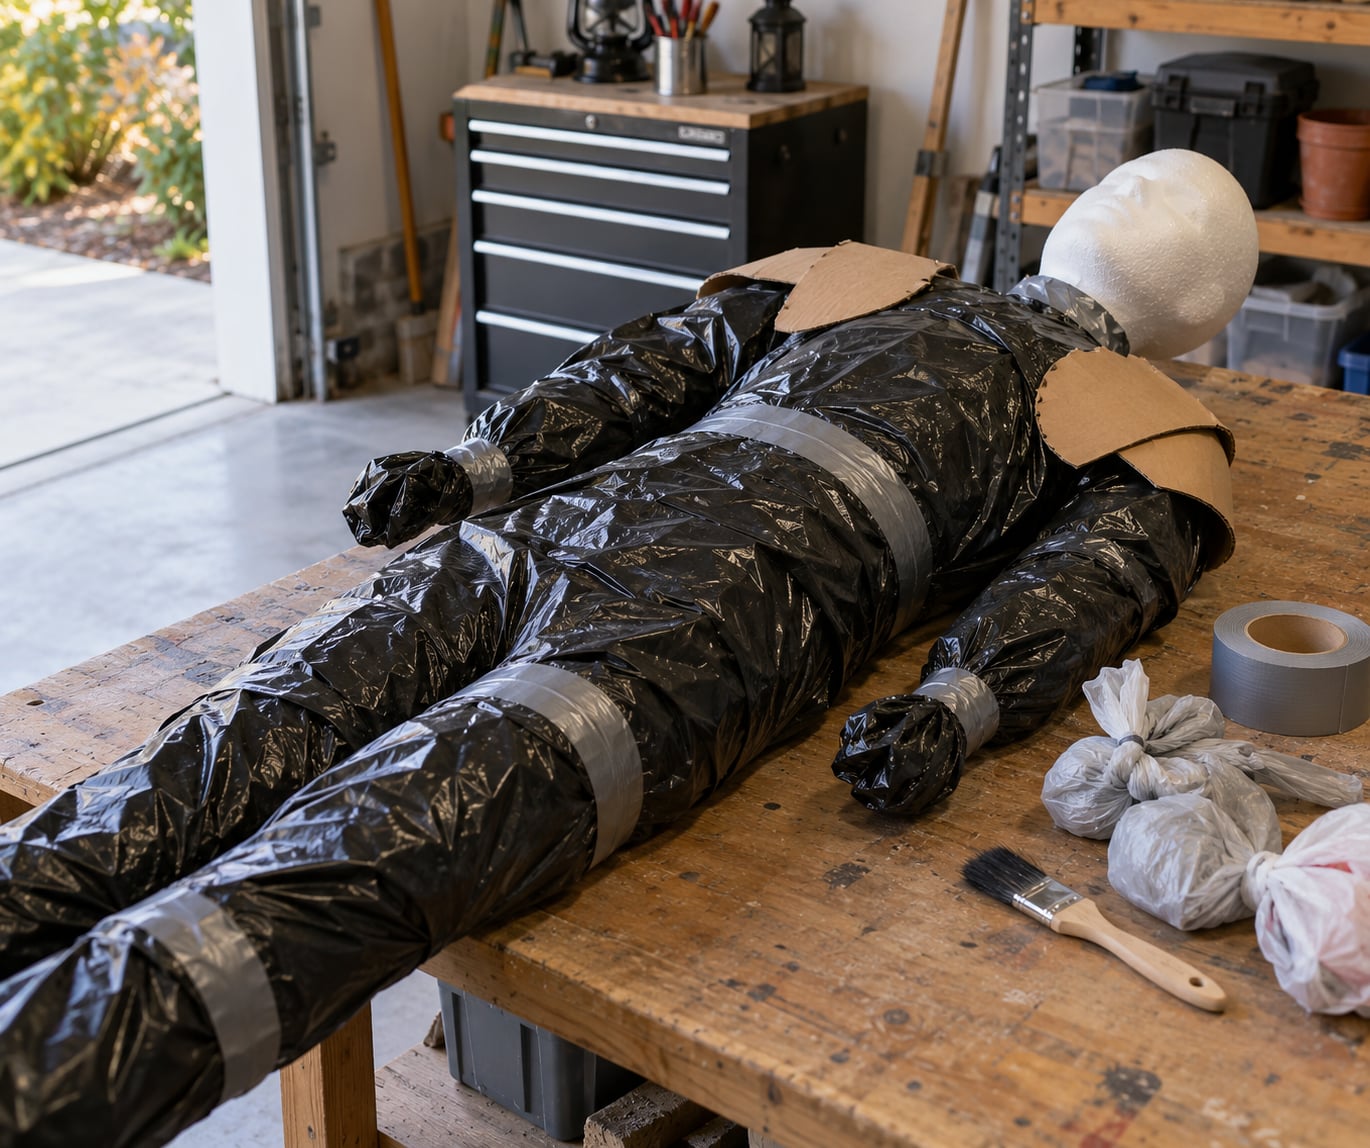
A corpsed prop is a fake body built to read as dead, and the trash-bag version forms a human shape out of stuffed plastic bags, holds it up with a duct tape frame, then wraps the whole thing in black bags so it looks like a corpse instead of a pile of rubbish. This is how to make a corpsed prop with trash bags that holds up outdoors, and most of the work is an afternoon of taping. You need nothing a hardware store does not stock, and you can skip the mannequin entirely.
Prop makers call this corpsing, and it is worth knowing the word. A body bag prop is a corpse already wrapped; a corpsed prop is any figure dressed up to look dead. This build sits in between: the black wrap reads as a bag, and the head and hands sticking out read as a body. That combination is what makes it work at night.
The single most useful technique here comes from stage prop builders: start big and compress with tape. You add bulk first, then squeeze the form down into a human shape with wrap tension. Trying to build a slim body by adding less material almost never ends up right.
Table of Contents
- What You Need
- Step-by-Step: How to Make a Corpsed Prop with Trash Bags
- Build the Basic Body Form
- How to Layer the Trash Bags
- Add the Decay Details So the Corpsed Prop Reads as Dead
- Dress and Finish the Corpsed Prop
- Common Mistakes
- Frequently Asked Questions
- What color trash bags are best for a corpsed prop?
- Can I make a corpsed prop with clear trash bags instead of black ones?
- How do I keep the trash bags from looking too shiny?
- What can I use instead of a mannequin for the head?
- How do I make the corpsed prop sturdy enough to stand?
- How can I make the prop reusable for multiple Halloween seasons?
What You Need
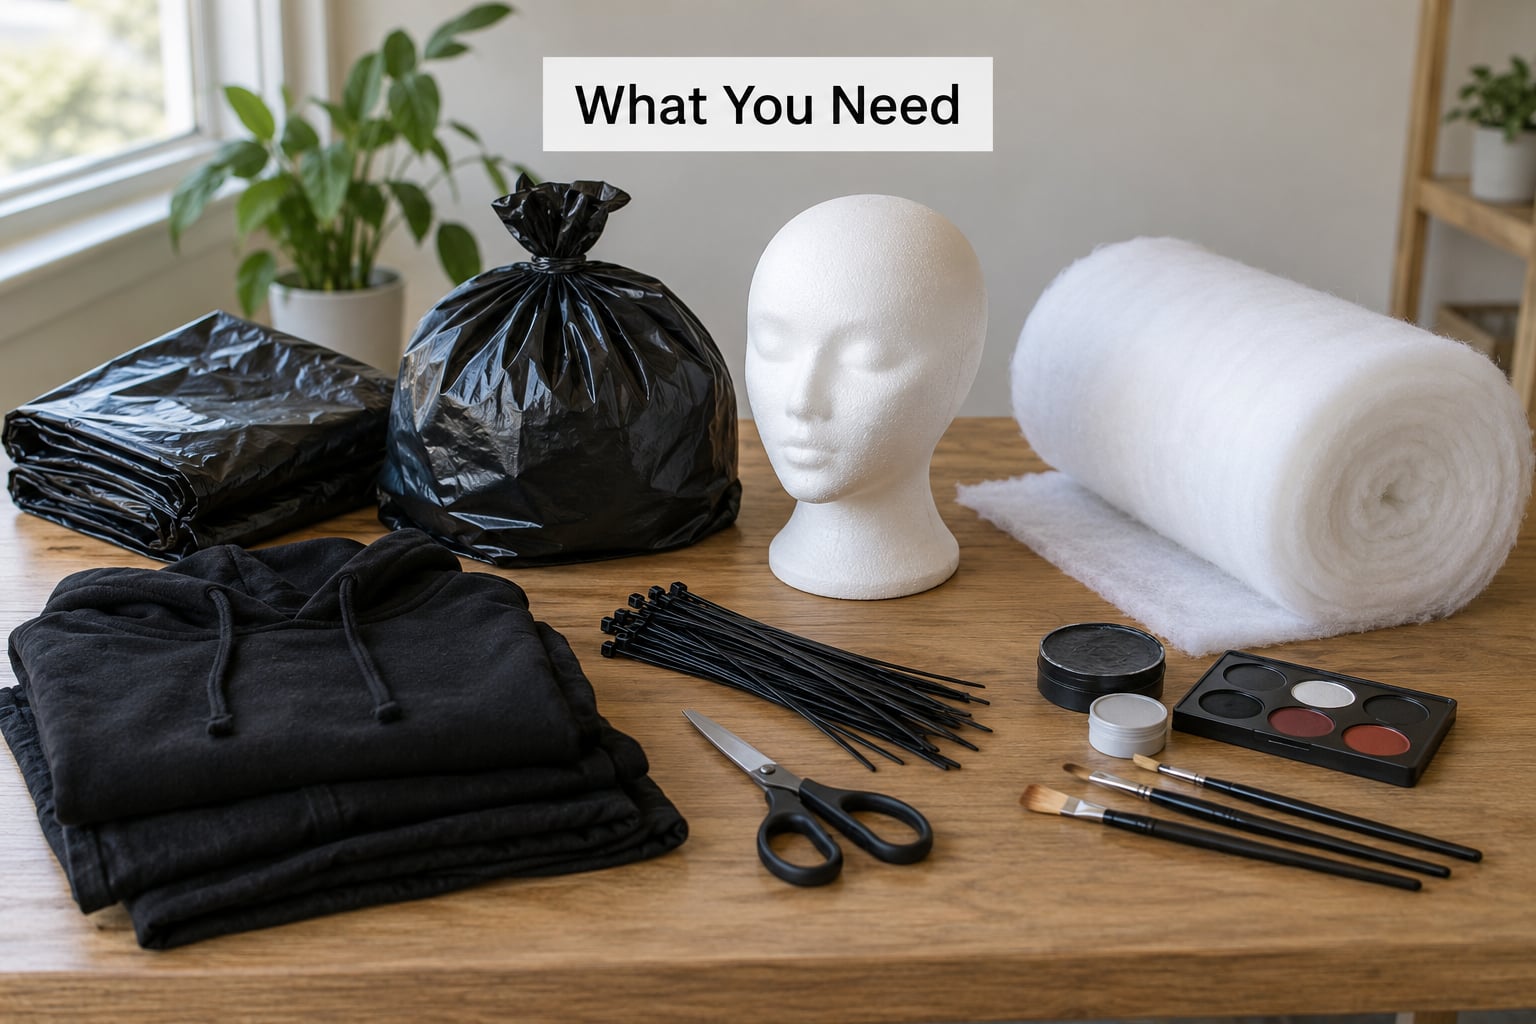
Everything below is either on hand already or comes from a dollar aisle and a hardware aisle. Quantities are for one life-size adult figure.
- Black trash bags, 6 to 8 — lawn and leaf sized for the torso and legs, standard kitchen size for the head and feet.
- Plastic grocery bags, roughly 30 — knotted together into rough balls, this is the bulk of the stuffing.
- Duct tape, one full roll — the single most important item on the list. It forms the frame, the wrap and every joint.
- A foam head form — the cheap hollow styrofoam head from a craft store works. A ball of the right circumference with tape and paint also works.
- Cardboard, 2 large pieces — for the torso and hip plates that give the body shoulders and a pelvis.
- Old clothing — one long shirt and one pair of trousers or a skirt are plenty.
- Rope, 6 to 10 feet — for hanging, plus a staple or eye screw if it goes up high.
- Optional but useful: bubble wrap for soft bulk, zip ties as adjustable ties instead of tape, theatrical white and bruise makeup, washable dark dye for the eye and mouth treatment, a stapler, and safety glasses.
Skip the bubble wrap if you have no grocery bags. Skip the makeup entirely if the prop will sit behind a window or in a maze where nobody gets close.
For indoor use, paper packing filler is fine and cheap. For outdoor use, use no paper at all. It soaks through, collapses under its own weight, and turns the figure into a sad heap within a day of rain or a stray sprinkler. This is the failure that haunts most first attempts.
Step-by-Step: How to Make a Corpsed Prop with Trash Bags
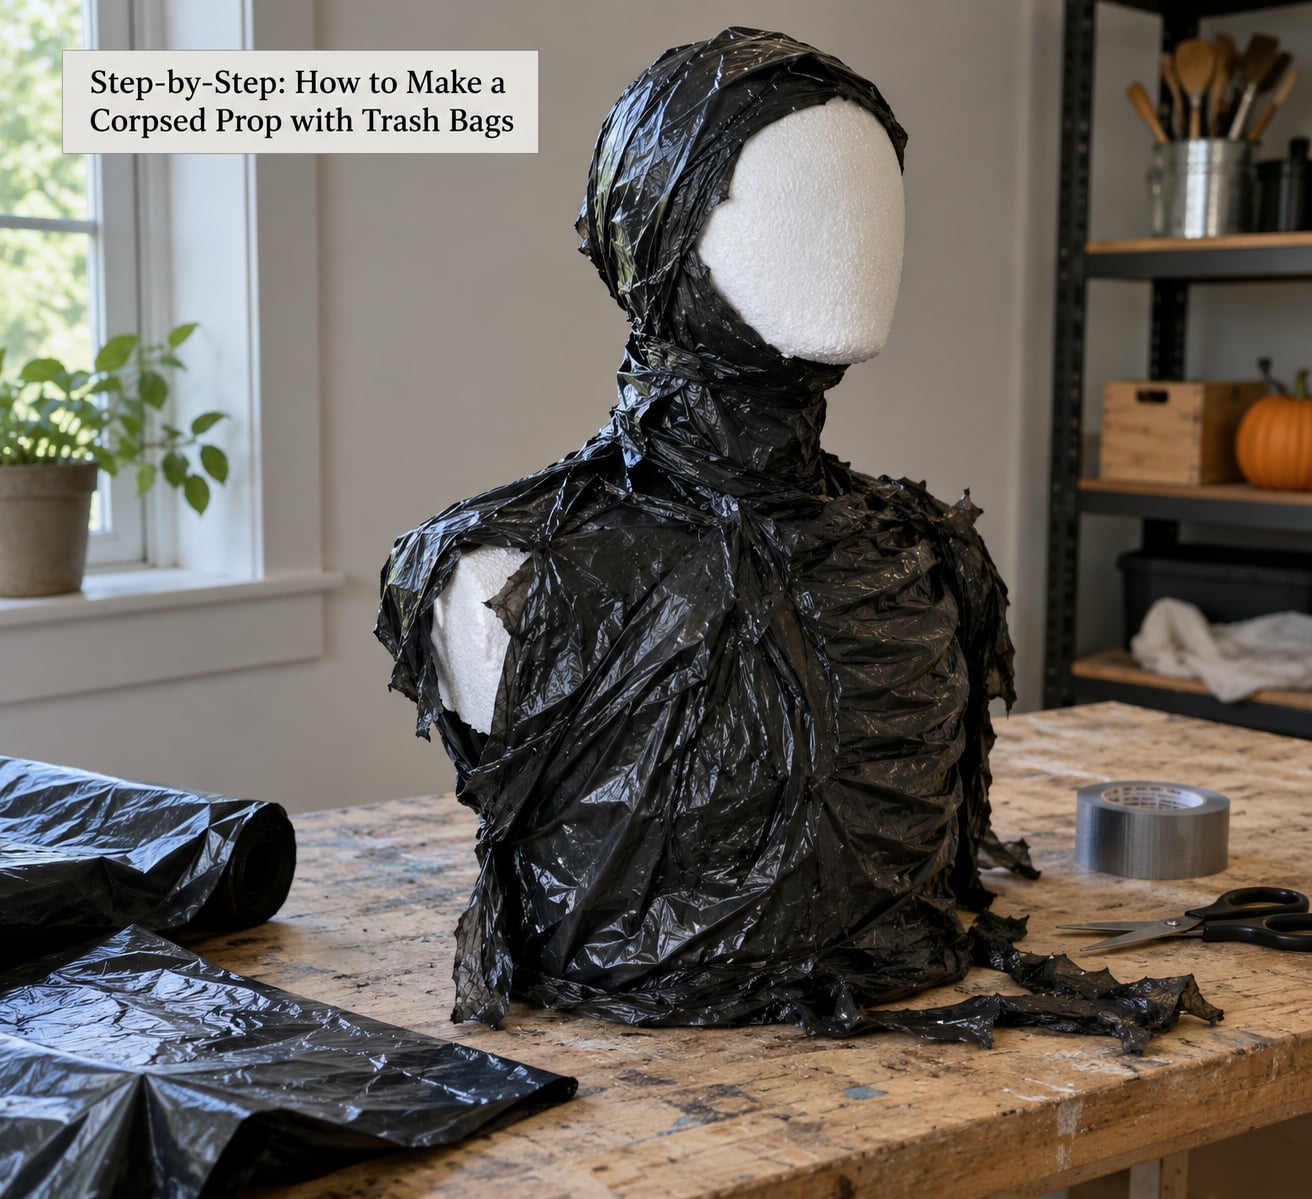
Work in four stages: form, layer, detail, finish. Check your work at the end of each stage before moving on, because every later stage hides the mistakes of the earlier one.
Build the Basic Body Form
Start with the frame, which is the part most people skip and later regret. Cut two cardboard shapes for the shoulders and hips, roughly torso sized, and slot them so they sit about 30 cm apart. Run duct tape from the top of the shoulder plate to the bottom of the hip plate on both sides, and once more down the centre.
Those three taped strips work like suspenders. They carry the entire weight of the figure inside the bags, which is exactly why the bags stop stretching, slumping and tearing. People on stage prop forums describe the same fix when their bodies have to survive being carried around a set.
Now pack the frame with knotted grocery bags, starting bigger than the shape you want. Cover the torso, fill the gap between the plates with a body, and let it overflow generously.
For limbs, roll a bundle of bags into a tube, wrap it in a black bag and tape the ends, then run a strip of tape from each shoulder down to the hip to hold the arm against the body. Make legs separately and tape them together at the ankle so they stay paired.
Test it now. Set the frame on the floor and press down on the chest with your full weight. If it holds, your armature works. If it pancakes, add another tape strip before you wrap anything.
How to Layer the Trash Bags
Grab one bag open and pull it over the head, with the closed end of the bag at the face. Tape around the neck to gather the plastic, then pull the loose plastic away from the front of the face so the profile stays readable through the plastic. Taped-off eye and mouth hollows do most of the work of making the head read as dead, so resist the urge to smooth the bag flat over it.
Add a body bag over the shoulders and torso, then a second bag from the hips down over the legs, overlapping the first at the waist. Tape the join in a spiral instead of one ring, because a spiral spreads the tension.
Now vary the wrap deliberately. Pull one area tight so it stretches into a taut, thin-skin look, and push another area into a loose fold. Real skin is neither uniformly tight nor uniformly slack. Change the direction of each pass around the body, and leave deliberate gathers at the elbows, knees and waist.
Where the bags end, cut one more bag open along its side seam and use it as a flat sheet rather than a tube. That single sheet patches the gap between the last bag and the head, covers the shoulders cleanly, and is far tidier than trying to stretch a small bag over a wide section. Tape it down the centre of the back in short, crosswise strips, roughly 8 cm each.
Tuck and tape the excess flat against the underside of the body while the figure is still on the table. The belly side can stay loose, since nobody sees it.
Check again: does the silhouette read as a person from three metres back? Does the face show through? If both are yes, the wrap is done.
Add the Decay Details So the Corpsed Prop Reads as Dead
Work from the biggest shape to the smallest detail, and stop while it still looks right rather than crowding the surface.
Start with compression. Squeeze sections of the wrap with tape bands to pull in a waist, hollow a temple, flatten a shin, or sink a collarbone. Sagging, thin and stretched sits in one band of tension across the body, and it is what separates a corpse from a sleeping person.
Then add surface. Tear small holes in the outer bags and push the layer beneath through, so the plastic reads as broken skin. Cut a few short slits for the knee, elbow and ribs. Knot a scrap of black bag at the neck for an open wound edge, and dab the inside with washable dye.
For colour, paint diluted grey and green in a thin coat over the whole figure and let it dry before you add anything darker. Deep lines of brown and near-black at the elbows, throat and knees do the heavy lifting in daylight, when the prop has to survive a neighbour walking past at noon.
Leave some surface untouched. A figure covered in equal detail everywhere reads as costume makeup; a figure with detail concentrated in a few places reads as decay.
Dress and Finish the Corpsed Prop
Cover the seams. A shirt pulled over the shoulders and torn at the hem, and trousers stuffed with grocery bags for the legs, hide every join and instantly sell the scale. Add a pair of shoes or taped cardboard soles, since feet sticking out of a black wrap are the detail that makes the whole thing convincing.
For hands, buy cheap rubber ones or mould a hand from papier-mache bandages over a cardboard palm. Tie or tape them to the arm ends and stain the fingers dark. Hair works the same way: a wig cropped short, or clumps of synthetic hair taped directly to the scalp.
Finish the face last. Pale theatrical makeup under the bag, with dark colour in the eye sockets, along the lip line and under the nose, and a dried blood line at one temple. Keep the blood washable so the costume stays laundry-friendly and the carpet stays clean.
Think about the trick-or-treaters who will get within a metre of this. Grey-green skin and a dark mouth read as horror. A detached head, exposed bone or anything that looks like real tissue does not, and it upsets a lot of families. Stop short of that line.
Finally, light it. Black bags swallow light, and after sunset an unlit figure is genuinely invisible. Aim one warm spotlight or a flickering LED at the head and chest, from above and slightly to one side, and the same prop that vanished now has real depth.
Common Mistakes
The bags look like new, shiny plastic. A matte finish kills the shine: spray them with grey and black acrylic, or dust them with cornstarch or fine sand for texture. A coat of clear matte sealer over flat paint works too.
The body loses its shape. It needs a load-bearing armature, and it needs one under the wrap rather than on top of it. Three duct tape strips from shoulder to hip is the cheapest fix in this whole article.
There are visible gaps. Gaps come from using the wrong bag size. Cut one bag open as a sheet to cover anything a bag will not stretch over, especially the shoulders and the join at the waist.
The attachment points tear under their own weight. Tape directly bag to bag at every joint, run strips along the load paths rather than across them, and add a zip tie or two wherever a joint carries real weight, such as the neck and ankles.
The face disappears. Gather the plastic away from the front of the head, tape down a hood shape above the eyes and one below the mouth, and leave the eye and mouth hollows untaped. Duct tape flats make it worse, not better.
The prop looks too good outdoors. Wrap it in dirt and dust mixed with a little grey paint, and hide the bright tape ends under folds. Real corpses are not clean, and a spotless prop reads as a prop.
The details vanish from a distance. Push the readable information outward: head position, hands, one shoe, a pale face. Big shape reads at thirty metres, fine texture reads at one metre, and you only have three seconds.
A few habits make the prop last. Assemble it in a garage or shed and carry it out rather than building it in the wind. Weight it at the base with bricks or a sandbag so wind cannot turn it into a sail. Tie hanging props with a safety line as well as the rope, and set them away from the sidewalk so nobody walks into it. Store it indoors between seasons in a large bag or a plastic bin so the bags do not collect spider webs, and patch tears rather than rebuild, since most damage is a single seam.
Frequently Asked Questions
What color trash bags are best for a corpsed prop?
Black is the standard choice for a corpsed prop because the dark surface hides the colours of the stuffing and the tape underneath, and it reads as a body bag from a distance. Heavy-duty black lawn and leaf bags also take more taping and stretching without tearing. If you want a more realistic, less bag-like figure, work the opposite way: cover black bags with pale grey paint or costume pieces.
Can I make a corpsed prop with clear trash bags instead of black ones?
Yes, and clear bags are useful for one specific trick: laying two or three layers of clear bag over a black wrap creates depth and a slightly milky, fogged finish that softens the shine and gives the figure a waxy skin look. Used alone with no dark layer underneath, clear bags show every seam, every bit of tape and the bright colour of whatever you stuffed inside, so the result reads as garbage rather than a body.
How do I keep the trash bags from looking too shiny?
Kill the gloss with a matte finish. Spray the wrapped prop with black and grey acrylic paint, then dust it with cornstarch, plaster dust or fine sand for real texture. Clear matte sealer over flat paint locks it in. Roughening the surface with a stiff brush before painting also helps, because plastic that has been scuffed holds paint better than plastic straight from the roll.
What can I use instead of a mannequin for the head?
A hollow foam head from a craft store is the cheapest good option and costs less than a drink. A styrofoam ball of the right head circumference, taped to a neck tube and painted, works nearly as well. You can also skip the head entirely and stretch a black bag over a taped cardboard shape, then mark the eye sockets and mouth with dark dye so the hollows read as a face.
How do I make the corpsed prop sturdy enough to stand?
Stand it on a base rather than on its feet: a plywood board, a flat piece of cardboard or a shallow box weighted with bricks or sand, taped to the legs. If the figure has to stand unsupported, the duct tape suspender frame from shoulders to hips is what holds it. Stand it in a spot out of the wind, and check it after the first gust rather than discovering the problem at dusk.
How can I make the prop reusable for multiple Halloween seasons?
Store it indoors in a large bin or heavy bag so the plastic does not collect dust, spiders and moisture, and keep the head and hands as separate pieces so the figure can be assembled in an hour each year. Most damage is one torn seam or a cracked collarbone, and both are a two-minute tape repair rather than a rebuild. Fresh makeup, fresh dirt and a fresh coat of paint each October make an old prop look new.
Start with the frame, not the bags. Cut two cardboard plates, run three duct tape strips between them, and press the whole thing to test it before you wrap a single thing. Once that holds, the rest of how to make a corpsed prop with trash bags is just layering, compressing and lighting, and you can rebuild last year’s prop instead of starting from nothing.