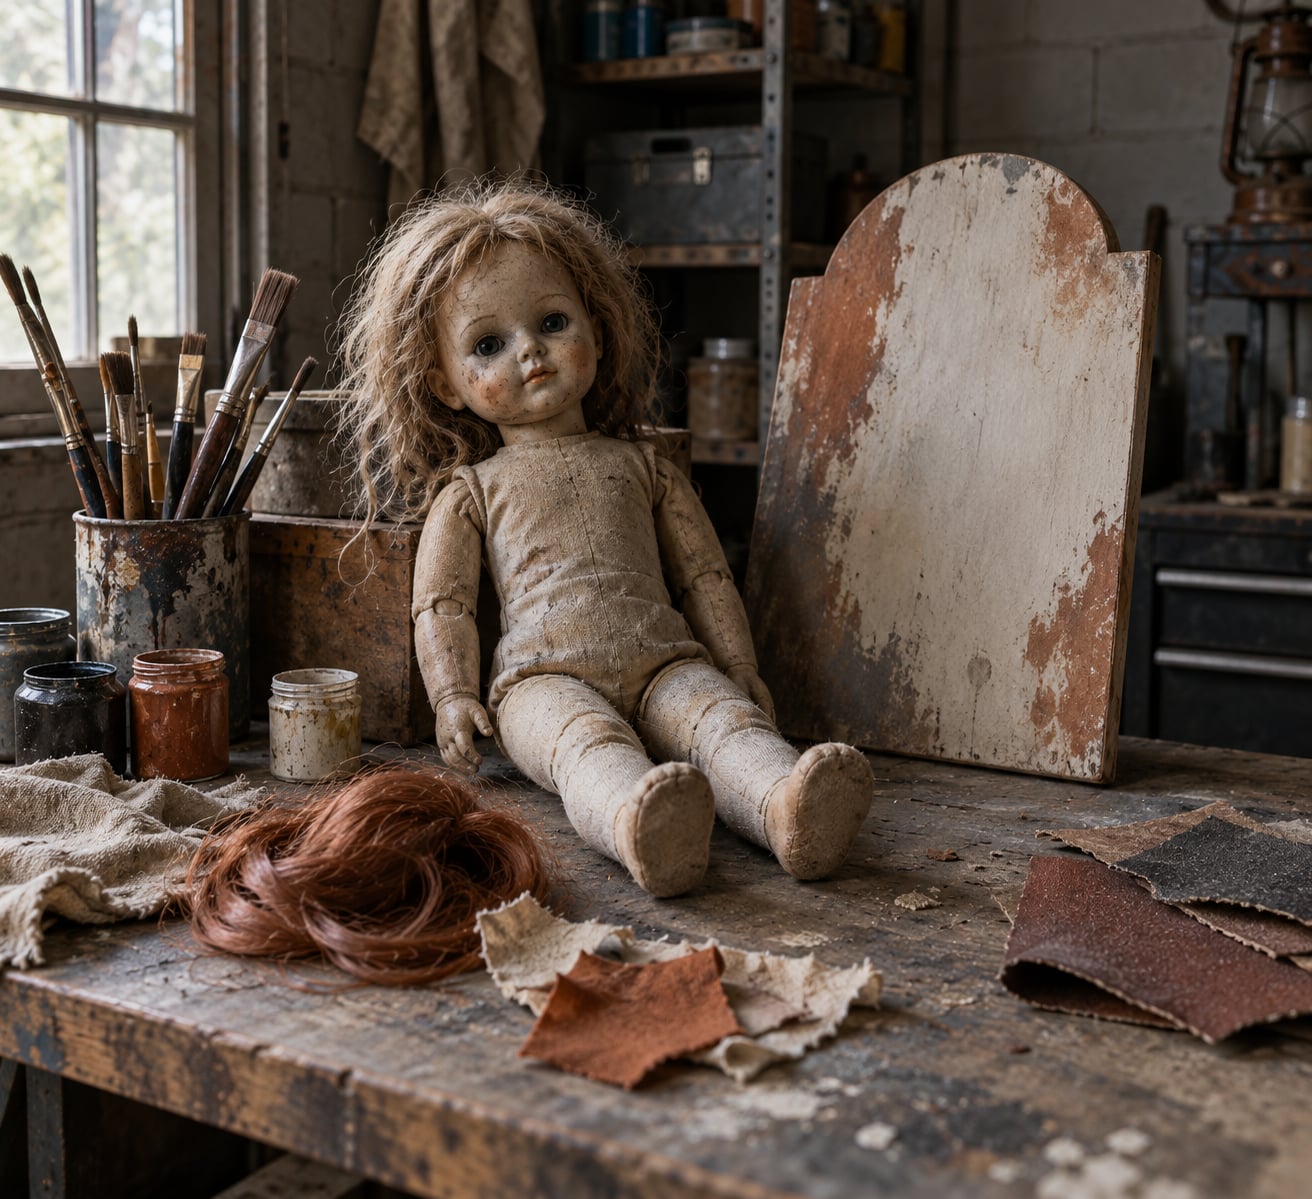
To make a creepy doll prop from a thrift store toy, you change the doll’s silhouette first, then age it with thin paint layers, thinned matted hair, and a frayed thrifted outfit. Budget roughly two to three hours for the first pass, plus drying time overnight, and expect the paint adhesion on vinyl to be the one thing that decides whether the prop survives the season.
The reason thrift store dolls work so well is that nobody attached emotion to them. You can cut, bend, stain and hang a doll nobody loved and it just reads as a prop, which is exactly why most of the best haunted house pieces started in a donation bin.
Table of Contents
- What You Need
- Step-by-Step
- 1. How to Make a Creepy Doll Prop from a Thrift Store Toy: Choose the Right Toy
- 2. Disassemble Only the Parts You Need
- 3. Reshape the Doll’s Body and Face
- 4. Add Synthetic Hair and Skin Details
- 5. Paint, Stain, and Weather the Doll
- 6. Make a Distressed Outfit
- 7. Pose, Mount, and Finish the Prop
- Common Mistakes
- Frequently Asked Questions
- What kind of thrift store toy works best for a creepy doll prop?
- Do I need to sew the doll’s clothing to complete this project?
- Is a modified thrift store doll safe to leave around young children?
- Can I use a creepy doll prop outdoors or in damp weather?
- How should I store the finished prop between Halloween seasons?
- Conclusion
What You Need
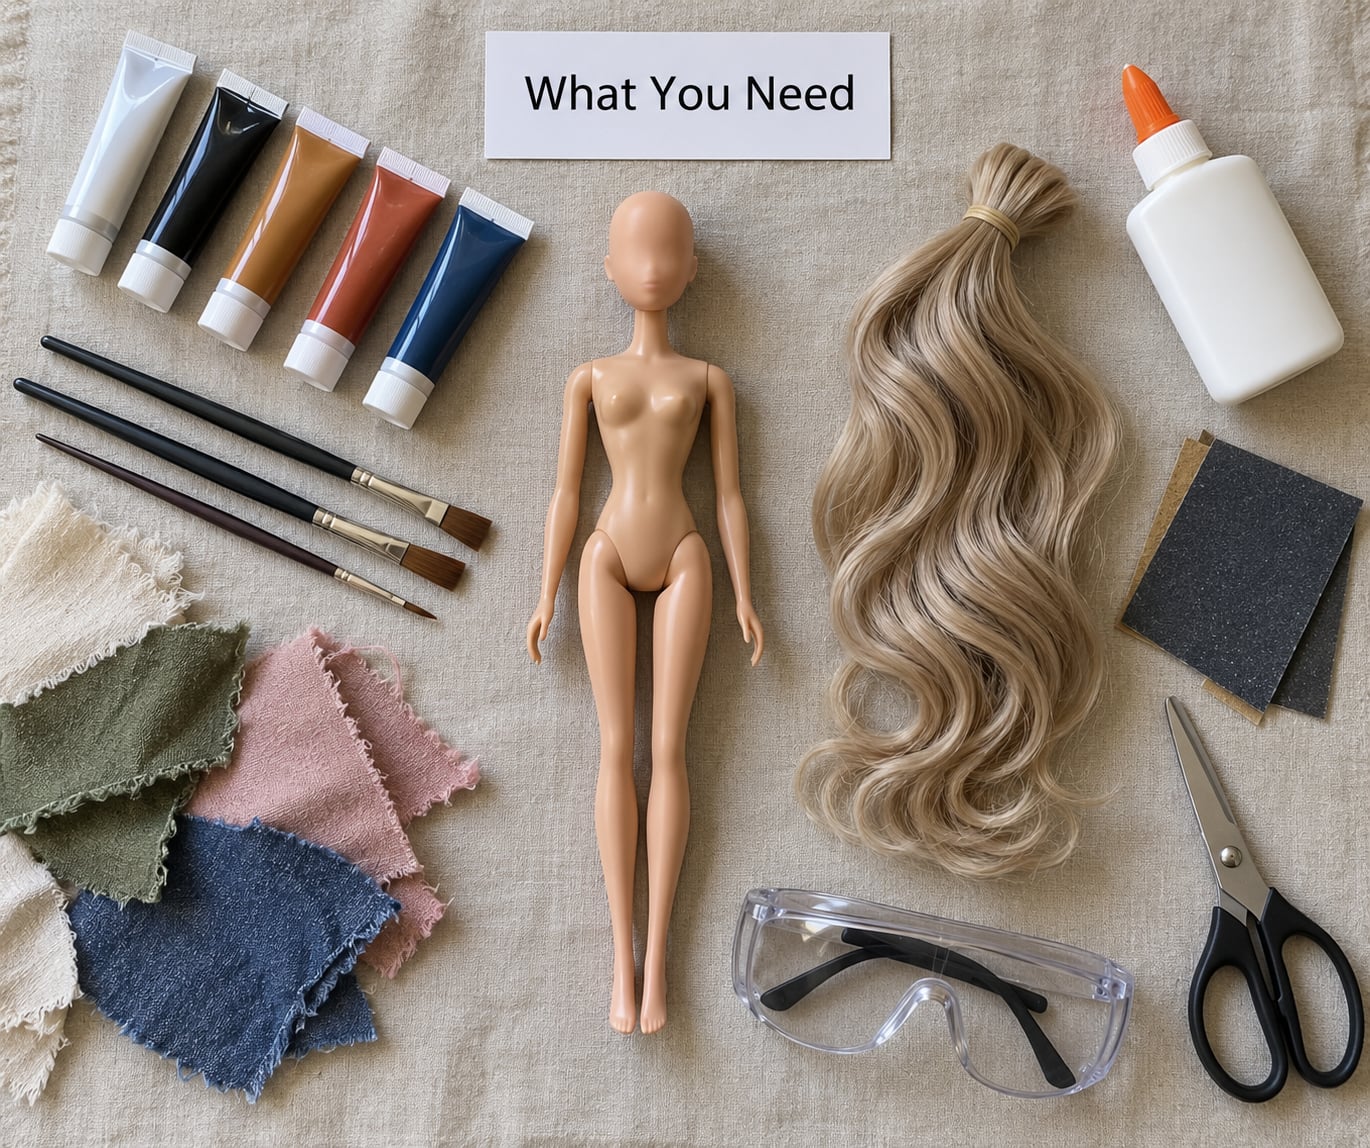
You do not need a special prop budget. Most of this list is craft shelf stuff you may already own, and a spray product is optional rather than required.
- The toy. An unbranded doll with a solid torso, limbs that still click into place, and a face you find unsettling rather than sweet. Skip anything with a glued-on wig you cannot remove, and skip porcelain if you are clumsy, because it snaps.
- Acrylic paint. A base color that reads as flesh or bone, plus a black or dark brown for crease shading, plus two or three accent colors for staining. A dollar bottle of craft acrylic paint from a thrift store bin is enough.
- Brushes. One medium flat for base coats, one small round for crease shading, and a cheap wide flat for dry brushing once everything is dry.
- Synthetic hair. One pack of cheap yarn hair or craft wig fiber, available wherever costume pieces are sold, or salvaged from a discarded costume wig.
- Fabric. Two or three old garments in muted colors, plus a scrap of thin cotton for wrapped joints.
- Adhesives. Fabric glue or craft glue, hot glue for mounting, and optional wood glue for securing a base.
- Distressing materials. Sandpaper or a file, a sponge, brown and black paint for washes, and a toothbrush for spatter.
- Mounting supplies. A scrap of wood, a wall hook or Command strip, or a wire easel for a shelf.
- Eye protection. Safety glasses if you are filing, spattering, or working with a doll that has hard plastic or porcelain parts.
- Optional weathering products. Fake blood, tea and coffee for staining fabric, and a water-based sealant for the final coat.
Set up in a ventilated area, ideally near a window, and lay down a dust sheet or a couple of old sheets. Sprays and solvent-based glues are the only steps that need real airflow; everything else is fine at a kitchen table. If a child is helping, keep the cutting, filing, and spray steps firmly on the adult side of the table.
Step-by-Step
1. How to Make a Creepy Doll Prop from a Thrift Store Toy: Choose the Right Toy
Pick the doll in person. Good thrift stores, yard sales, and the discard bin outside a dollar store after Halloween are the realistic hunting grounds, and a doll you paid a couple of dollars for is cheap enough that you can ruin the first attempt without regret.
What you want is a torso that does not flex, limbs that seat firmly, and a head with some solid mass behind the face. Turn it over and look for hairline cracks, loose limb sockets, or a hollow-sounding shell, and put those back on the shelf. It will feel wrong to reject a doll for being pretty, but a pretty face is the single hardest thing to undo with paint.
You know the base is right when you can hold the doll by one arm and shake it gently with no wobble at the shoulder. If the head rocks loosely, you can still work with it, but pad the neck first.
2. Disassemble Only the Parts You Need
Thrift store dolls arrive dusty, sticky with old adhesive, and sometimes faintly damp in the storage bin, so clean before you cut. A damp cloth with a drop of dish soap, then a separate damp cloth to wipe off the residue, is enough. Let it dry completely overnight if it smelled musty.
Then take apart only what gets in the way of the silhouette you want: the wig, the original outfit, a stuffed skirt, or a limb that blocks the pose. Use a small screwdriver at the joints rather than force, and put screws and pins in a labeled container or a folded strip of masking tape.
The sign this stage worked is a clean set of parts and a bare doll with no glue residue on the seams. Keep anything that looks useful, especially fabric, because those scraps become the outfit later.
3. Reshape the Doll’s Body and Face
This is the step that separates a prop from a painted toy, and doing it first is the whole trick. Bend the neck to one side with the joint supported by your palm, and a soft vinyl arm can be warmed briefly in hand warmth or with a hair dryer on cool before it takes a new angle. Test the bend with a paint marker first, because the surface is what gives out, not the joint.
Push the limb shells apart at a hard plastic elbow or knee and wedge a small folded scrap of thin foam, and thin fabric stuffed into the gap holds the new shape. Stuffing packed into the torso changes the weight distribution so the doll sits and slumps instead of standing rigid.
For a face change, work modeling paste or lightweight air-dry clay into the cheekbones and jaw, then press a thumbnail into it for sunken or hollow features. The observable success is a hard time recognising the original face in profile. If you can still see the original smile, add more.
4. Add Synthetic Hair and Skin Details
For matted hair, cut the synthetic fiber into uneven lengths, then tangle a handful with a wide-tooth comb or your fingers until it forms clumps. Glue it on in patches rather than as one piece, and leave the parting visible so the scalp shows through, which reads as a thinning, neglected head.
Leave about a third of the fiber unglued and pull it forward over the face. Trim the ends at different lengths rather than one clean line, because uneven edges catch light the way real matted hair does.
For skin details, thin your dark paint with water and run it into wrinkles, seams, and the crease where the arm meets the torso, and stipple a sponge dipped in thinned brown across the cheeks and knuckles for uneven discoloration. A dry toothbrush loaded with nearly dry paint gives you spatter that reads as grime. Keep the marks irregular; every evenly spaced mark looks applied.
5. Paint, Stain, and Weather the Doll
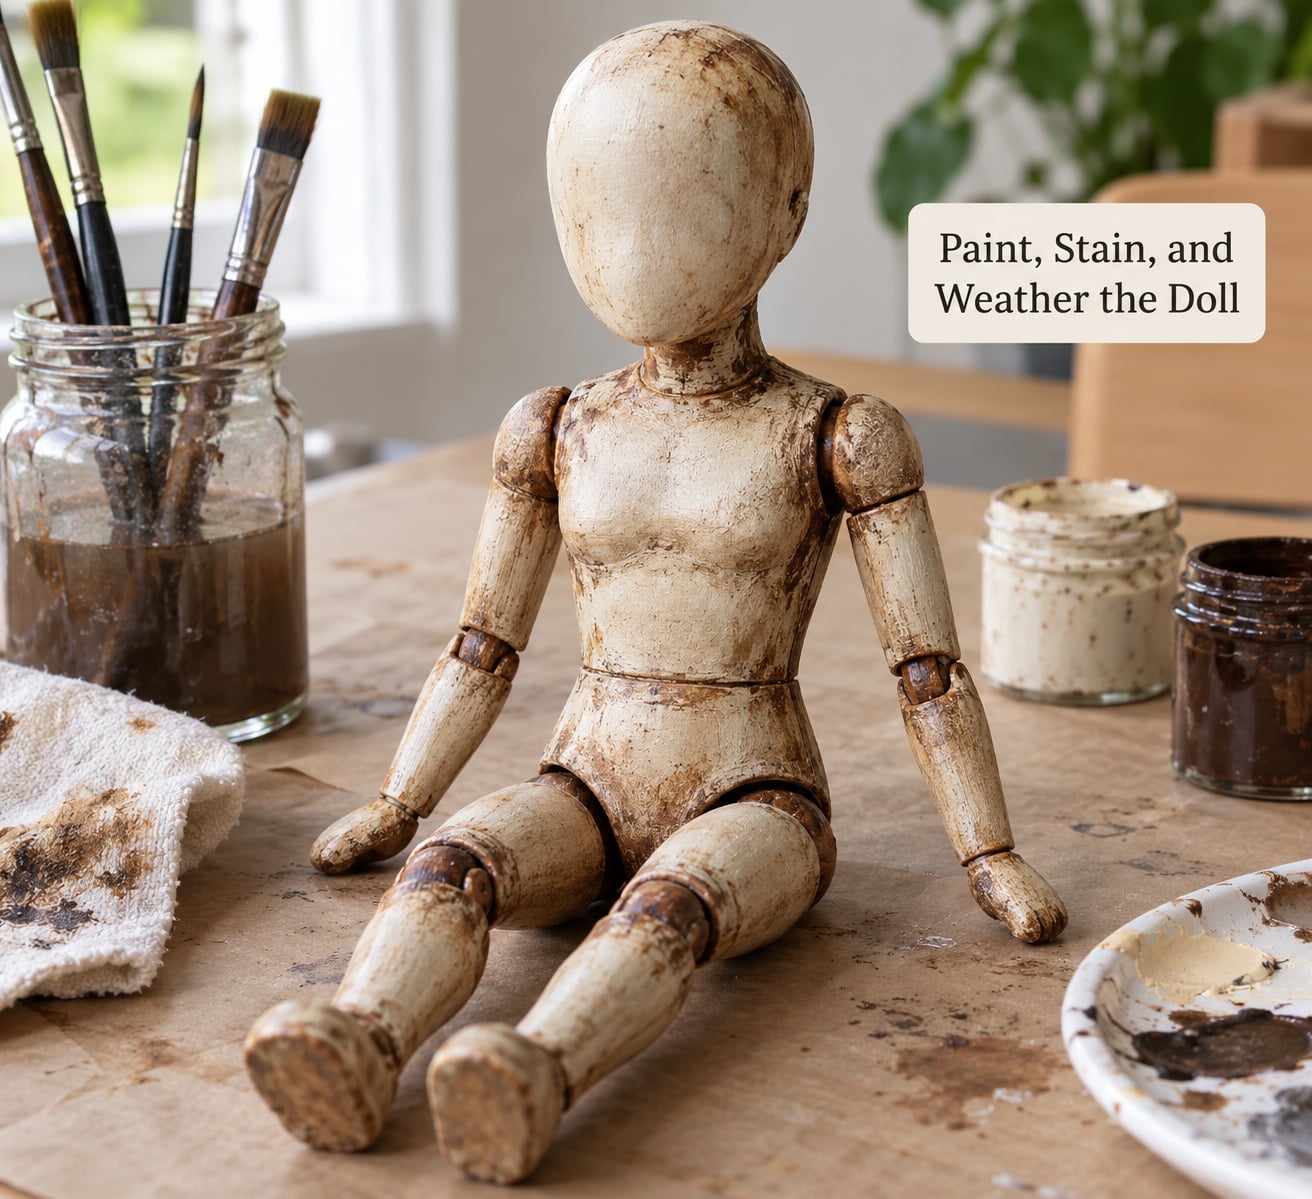
Paint thin. The single most common complaint from people who tried this is that acrylic paint slides off vinyl and peels away in sheets a week later, so the rule is several thin layers with full drying time rather than one thick coat.
Work in this order. First a thin base coat of your flesh or bone color, keeping it patchy so the original plastic shows through in places. Second, thinned black or dark brown pushed into every crease, seam, and joint with a round brush. Third, your accent shades, mixed on the palette, dabbed on the raised areas. Fourth and last, once everything is dry, a light dry brush of near-white on the edges of the face, fingers, and fabric folds to catch light on the high points.
For cracked porcelain, apply a crackle medium over a fully dry base coat, then add a second color on top and let it craze as it dries. For a stitched look, push the individual staples of a hand stapler into the torso or neck and paint over them. A hand stapler rather than an air compressor is the better tool here, because compressed air chips the paint you just laid down.
You will know the paint stage worked when you can turn the doll in a low light and the shadows land in the creases by themselves. If the finish feels tacky, it has not cured. Give it a full day before sealing, or the sealant will bond to a soft surface and peel later.
6. Make a Distressed Outfit
Skip the sewing machine entirely. Cut or tear thrifted garments into rough rectangles, layer two or three pieces, and tint them with strong tea, coffee, or heavily diluted brown paint to knock back the color and kill the new-cloth smell. Fray the hems by pulling single threads out with tweezers, which is faster than any hem you could stitch.
For a no-sew fit, wrap fabric around the torso and secure it with fabric glue, oversized safety pins, or strips of flesh-colored wrap tape. Layer a torn shawl or a cut-off sock over the shoulders, and leave one shoulder falling lower than the other, because a symmetric costume hides the work you did on the body.
The finished outfit should look like it has been worn for years by something that does not wear clothes properly. If it looks tidy, tear it again.
7. Pose, Mount, and Finish the Prop
Pose the doll first, then build the mount around that pose. For a wall piece, screw a small scrap of wood behind the shoulders or the pelvis, then hang the board with a picture hook; for a shelf, set the base into a shallow wooden box or clamp the legs to a wire easel. Angle the base so it tips slightly forward, which reads as a dead weight leaning toward whoever walks in.
Hide the support behind the outfit or under a fold of fabric. Then add the last details: dust sprayed from a nail brush, pulled cobwebs stretched across one shoulder, loose threads hanging off a sleeve, and a few strands of hair across the face.
For storage, box it in tissue in a dry closet between seasons, upright rather than face down, and keep it away from anywhere with mice or damp basements. Carry it by the base, not the head, and expect to touch up scuffed areas the following year with a spot of the same base color.
Common Mistakes
Paint peeling off vinyl. This is the big one. It happens when the surface has oil or factory gloss left on it, when coats go on too thick, or when you seal before the paint cures. Wipe the doll with rubbing alcohol first, keep every coat thin, and wait a full day between the last coat and the sealant.
Distressing that looks stamped on. Even crackle medium, even blood drops, and evenly spaced staples all read as fake. Break every pattern: vary the crack direction, cluster the stains instead of spacing them, and let some areas stay completely clean.
Stiff synthetic hair. Fiber glued in a single heavy sheet looks like a wig. Work in small patches, tangle each one before gluing, and pull loose strands forward at the end.
An unstable mount. If the doll is standing on a shelf, the base needs to be weighted or screwed down, not balanced. A prop that topples mid-season is worse than no prop.
Glue marks and visible hardware. Hot glue leaves shiny blobs in plain sight. Push glue into seams and under fabric instead, and paint over any squeeze-out before the final seal.
A costume that hides the doll. Long, clean layers of fabric can conceal the bent limbs and sunken face you spent an hour building. Keep the silhouette visible, and make sure the altered pose still reads from across the room.
Two habits will save you more time than any technique here. Practice the whole process once on a cheap spare doll, since the first attempt is a learning run for your hands and not a display piece. And keep every coating water-based if the prop lives indoors, because a solvent-based layer will fog the plastic underneath over time and leave you with a dull, hazy finish you cannot undo.
Frequently Asked Questions
What kind of thrift store toy works best for a creepy doll prop?
Choose a doll with a solid torso, limbs that seat firmly, and no glued-on wig. Turn it over and reject anything with hairline cracks, loose limb sockets, or a hollow shell. Hard vinyl or soft vinyl is ideal because it takes a new bend and holds paint once cleaned and primed. Porcelain works for a cracked-finish look but snaps easily, so save it for static displays rather than poses.
Do I need to sew the doll’s clothing to complete this project?
No. A convincing distressed costume needs no stitching at all. Cut or tear thrifted garments into rough layers, tint them with tea, coffee, or diluted brown paint, fray the hems by pulling out single threads, and hold everything in place with fabric glue, oversized safety pins, or wrap tape. The layering and fraying do the work, and the uneven fit is what sells the aged look.
Is a modified thrift store doll safe to leave around young children?
Treat the finished prop as decor and place it out of reach. Small hardware from the disassembled doll, like staples, pins, and screws, come loose over a season and become choking hazards. Paint on a hard plastic doll is also a choking risk if a child chews on a limb. If young children are in the house, keep the prop on a high shelf, and put any detached pieces in a closed container.
Can I use a creepy doll prop outdoors or in damp weather?
Only with preparation. Paper crepe, thin cotton, and fabric glue will not survive dew or rain, and water-based paint will run or bloom. For outdoor display, seal every coat with a water-resistant sealant, substitute acrylic-dressed fabric for anything papery, and mount the doll on treated wood or a coated stake rather than raw cardboard. Even then, bring the prop in if a storm is forecast before October 31.
How should I store the finished prop between Halloween seasons?
Store it upright in a dry closet, boxed in acid-free tissue or plain unbleached paper, with nothing pressing against the face. Avoid basements, sheds, and any space with rodents, because synthetic hair and fabric attract them. Carry the prop by its base or mount board rather than the head, and expect to touch up scuffed areas with a spot of the same base color before you set it out again.
Conclusion
Start with the base, not the paint. Choose a sturdy thrifted doll with a solid torso, bend the neck and limbs, and change the silhouette before anything else, because a bent pose and a hollow face will do more for the effect than any amount of paint applied to an untouched doll.
Once the shape is wrong in the right way, layer thin paint, patch the hair into clumps, add a frayed thrifted outfit, and mount the prop where the support stays out of sight. Finish that first rough transformation, judge it from across the room, and only then add the fine detail that makes the whole scene convincing.