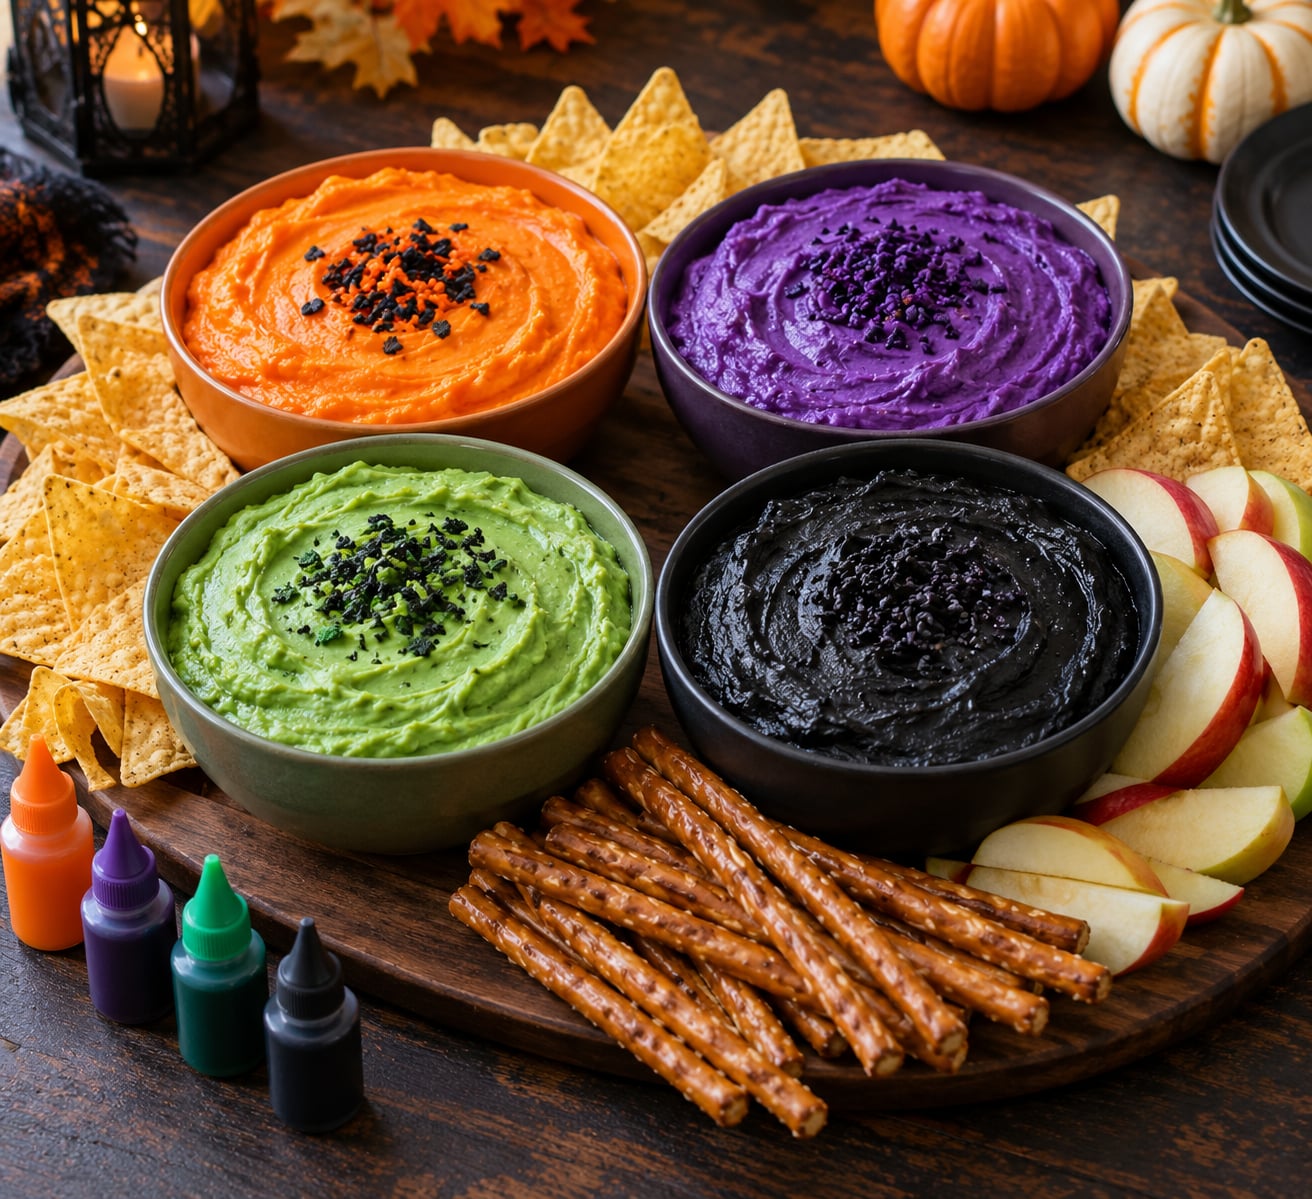
To make colored dips for a Halloween spread, mix your dip base until smooth, then stir in gel food coloring a drop at a time until you hit the shade you want. Chill the finished bowl for about 30 minutes, then set the dips in small dishes around a platter with contrasting dippers. Most of it is five-minute work per bowl.
The reason this works is that color does more for a party table than garnish ever did. A bowl of ordinary hummus with a gouge eye on top still reads beige in the middle. The same hummus tinted slime green reads Halloween from across the room, and nobody has to carve a single pumpkin.
Everything below runs on one rule: add color slowly and add it last. Gel coloring concentrates, so a single drop can take a whole batch from cheerful to radioactive. Add two, stir, look, then decide whether you need a third.
Table of Contents
- What You Need for Colored Dips for a Halloween Spread
- How to Make Colored Dips for a Halloween Spread: Choose Your Colors
- How to Make Colored Dips for a Halloween Spread: Mix the Bases
- How to Make Colored Dips for a Halloween Spread: Add the Color
- How to Make Colored Dips for a Halloween Spread: Finish and Serve
- Common Mistakes
- Frequently Asked Questions
- What is the best way to color dip without making it watery?
- Can I make naturally colored Halloween dips for a party?
- How long should homemade colored dips be refrigerated before serving?
- Can I make colored dips the day before a Halloween party?
- Which Halloween dip colors are easiest to create at home?
- What can I use instead of sour cream or Greek yogurt?
- Conclusion
What You Need for Colored Dips for a Halloween Spread
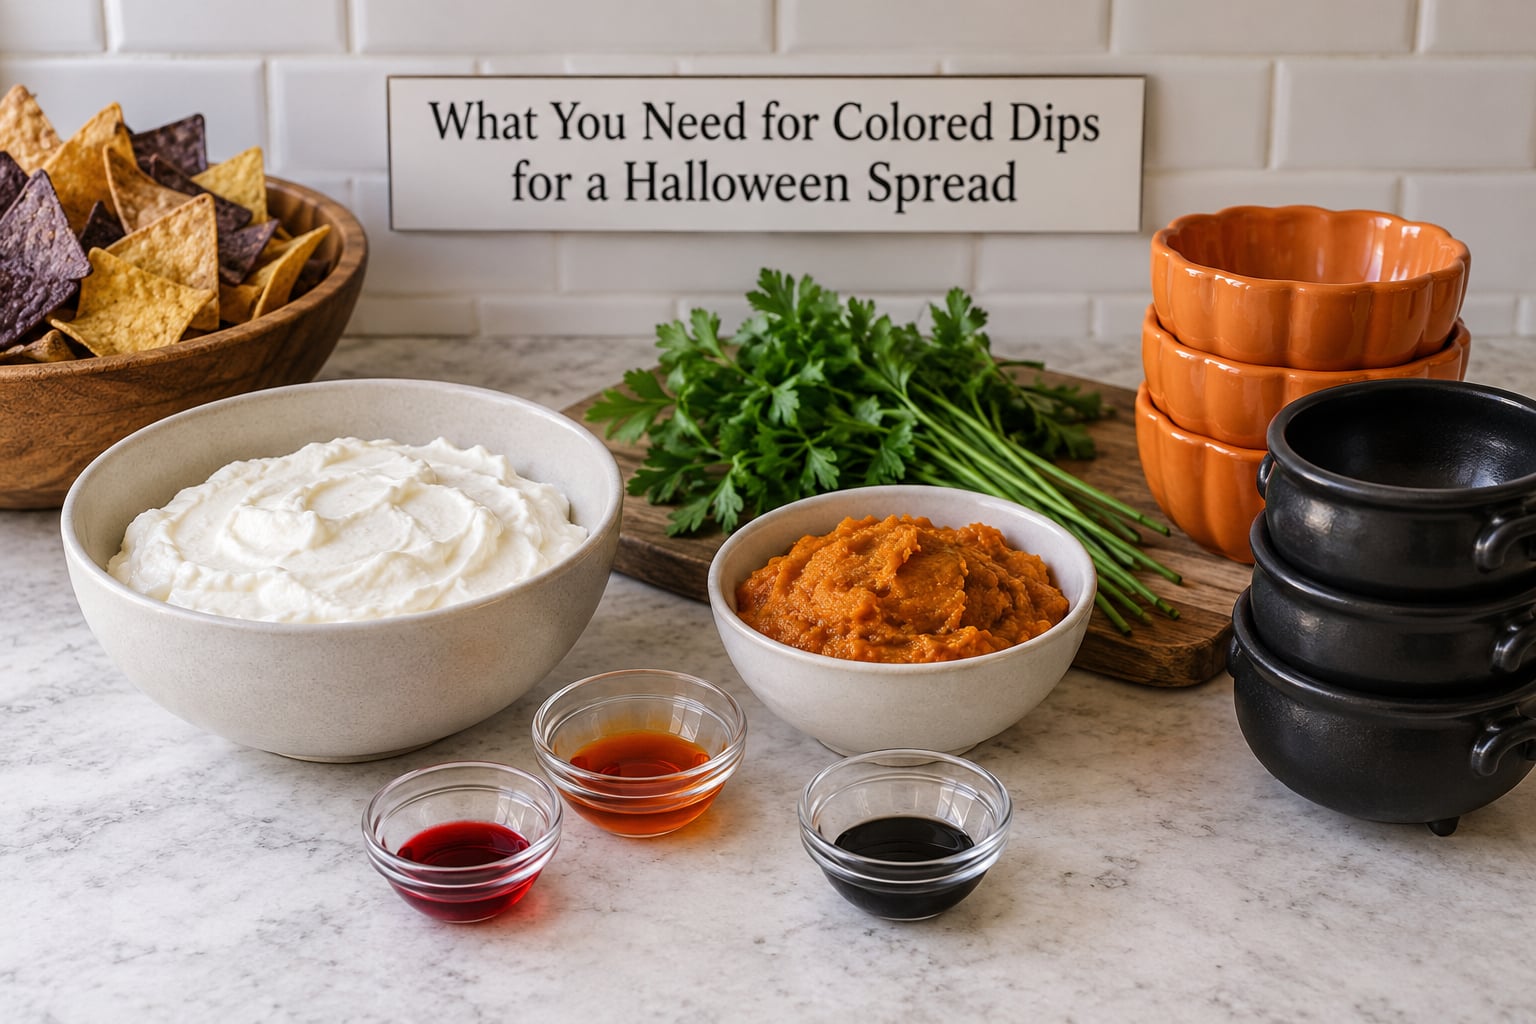
Start with three or four bases rather than eight. Four bowls in four distinct colors reads as a spread. Eight bowls in eight shades of brown reads as leftovers, and you will spend the whole party apologizing for the beige one.
For bases, pick from plain Greek yogurt with sour cream, cream cheese with a splash of milk, a canned bean mash, hummus, or a dairy-free option like white bean purée or coconut yogurt. Buy the unflavored versions. Vanilla yogurt makes a strange purple dip and nobody warns you about it.
For color, you want gel food coloring rather than the thin liquid bottles. Gel is several times more concentrated and, more importantly, it does not add water, so it will not loosen your dip. Liquid drops work in a pinch, but they can turn a thick bean dip into a puddle if you measure with the cap.
A small set of gel colors covers almost everything: red, orange, yellow, green, blue, violet, and black. Everything else you make by mixing two of them. That is the whole color palette.
You also want a mixing bowl per dip, a rubber spatula, a toothpick or a thin knife for marbling, and small airtight containers for transporting. Skip the squeeze bottles unless you are plating a layered dip; they add work and leak.
How to Make Colored Dips for a Halloween Spread: Choose Your Colors
A palette of five is plenty: pumpkin orange, swamp green, witch purple, bat black, and devil red. Pick a color, then pick a base thick enough to hold it. Thin dips look washed out because the color has nowhere to sit.
Some shades arrive free in the ingredients. Pumpkin purée gives a warm orange that tastes like pie. Chopped spinach or a spoonful of matcha powder gives green. Beet juice, blackberries, or purple sweet potato give purple. Those are your dye-free path, covered further down.
The rest need gel. Red, blue, violet, and orange from food color are strong and consistent. Black is the exception, and it is the one that makes people unhappy. Gel black usually lands as a flat dark gray unless you use a lot of it, and a lot of it can taste faintly bitter. A spoon of activated charcoal powder mixed into a creamy base gives a truer matte black and neutralizes the bitterness.
How to Make Colored Dips for a Halloween Spread: Mix the Bases
Mix every base before you add a single drop of color. You want to know it is seasoned and scoopable while it is still boring.
For a creamy base serving about 12, mix 1 cup Greek yogurt, 1/2 cup sour cream, the juice of half a lemon, a small clove of grated garlic, 1/2 teaspoon smoked paprika, and a pinch of salt. For a thick, tangy dip, use 1 cup cream cheese, 1/4 cup milk, and a pinch each of salt and pepper instead. Cream cheese dips need more liquid than you think at first; stir it in a tablespoon at a time.
For a bean base, mash one 15-ounce can of white beans with 2 tablespoons olive oil, the juice of a lemon, and a clove of garlic until smooth. White beans take color better than black beans and taste milder. Hummus straight from the tub is the fastest base of all and takes color like a dream.
Once mixed, test the texture with a spoon held upright. If the dip slides off in a slow ribbon, it is right. If it stands in a stiff peak, thin it with a spoonful of water or lemon juice, because color will not fix a dip that was too thick to begin with.
Rest each base in the fridge for 15 minutes before coloring. Cold dip holds color more evenly, and you avoid the melted, soupy bowl that comes from adding liquid coloring to a warm mixture.
How to Make Colored Dips for a Halloween Spread: Add the Color
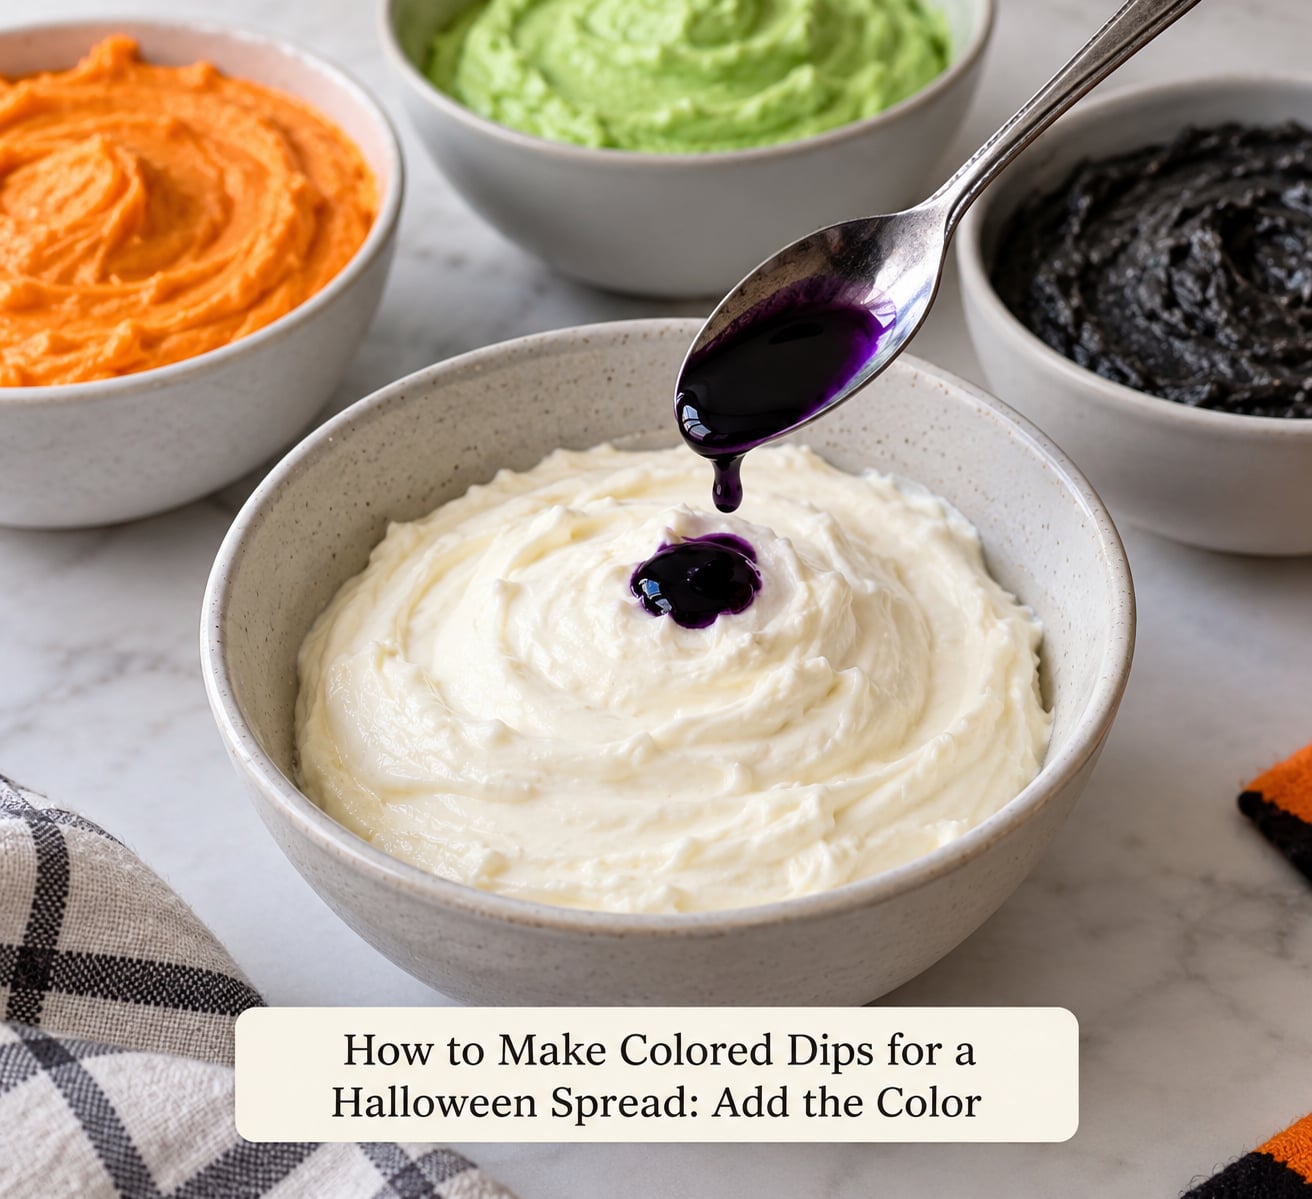
Put a drop of gel on the tip of a clean toothpick and touch it to the surface of the dip rather than dropping it straight in. That gives you a faint tint instead of a blotch, and it is the difference between one drop and one tearful disaster.
Stir from the center outward with a spatula until the color disappears completely, then scrape the sides. Every streak you leave behind becomes a stripe after it chills, so take the extra thirty seconds.
| Halloween color | Mix this | Starting drops per cup | Base note |
|---|---|---|---|
| Pumpkin orange | Red plus yellow | 1 red, 2 yellow | Add pumpkin puree for flavor, not just color |
| Swamp green | Yellow plus a touch of blue | 3 yellow, 1 blue | Matcha or spinach gives an earthier green |
| Witch purple | Red plus blue | 2 red, 2 blue | Berry puree colors and flavors at once |
| Devil red | Red alone | 3 red | Under 2 drops reads pink against cream |
| Neon green | Yellow plus less blue | 4 yellow, 1 blue | Needs a thicker base to stop it staining dippers |
| Bat black | Black gel, or charcoal powder | 4 black, or 1/2 tsp charcoal | Charcoal is the more honest black |
These drop counts assume standard gel color in a roughly 1-cup portion. Every brand is a little different, so treat the numbers as a starting point and adjust by eye.
For a swirled look, tint two separate portions of the same base, one purple and one green, then fold them together in a bowl using only two or three strokes. Pull a toothpick through the swirl once and stop. Overworking it turns the whole bowl muddy gray, which is the single most common failure in colored dips.
The one thing never to do is double up on the color to fix a shade you do not like. Once it is too dark, add more of the uncolored base instead. That fixes the shade and keeps the flavor intact.
Natural coloring works the same way, just with a thinner result. Beet juice for red, blackberry or purple sweet potato for purple, spinach or kale for green, turmeric for yellow-orange, and black sesame or charcoal for black. These tend to sit a few shades softer than gel, which reads more rustic, and they are the sensible choice for a classroom party where bright artificial dye is a concern.
How to Make Colored Dips for a Halloween Spread: Finish and Serve
Taste the finished dip before it goes in the bowl. Food coloring dilutes flavor slightly, and a dip that needed salt before coloring almost always needs a pinch more after.
Garnish in two stages. Add sturdy herbs, sesame seeds, or crumbled bacon now so they soak into the surface while it chills. Save anything crisp or wet — chives, diced tomato, cracked pepper, tortilla strips — for the last minute before serving, or it will be soggy by party time.
Chill every dip for at least 30 minutes, longer for bean and cream cheese bases. This is not just for the food; cold color looks deeper and more even, and the dip holds its swirl instead of slumping in the dish.
For the platter, put the largest bowl in the center and ring the smaller bowls around it. Alternate light and dark shades so a black dip sits next to an orange one rather than beside another dark bowl. Label anything unusual, since guests cannot tell a black olive tapenade from a bat-wing dip by color alone. A small card with the dip name and its main flavor is enough.
Match dippers to the dip, not to the theme. Tortilla chips and a creamy dip, baby carrots and a bean dip, pretzel rods with anything cheddar-based, apple slices with a purple berry dip, and crackers with a savory spread. For the strong colors like neon green or black, use dark dippers, because a bright tint bleeds onto a pale cracker and the cracker is the one thing your guest actually eats.
Transport each dip in its own sealed container and set them in a cooler with ice packs. Once there, do not stack them, and keep everything cold until the last minute.
Common Mistakes
Too much color. This is the big one. Gel color builds up fast and there is no removing it. Add one drop at a time, stir fully between drops, and stop while the shade still looks slightly too light. It deepens as it sits.
A watery dip. Liquid drops, flavored yogurt, and over-thinned beans all add water. Use gel color, drain any canned beans well, and if the dip loosens after coloring, chill it hard for 20 minutes. Cream cheese and bean dips set back up on their own.
Coloring before seasoning. If you tint first and salt second, the salt dissolves unevenly and the dip tastes both flat and salty at once. Season, taste, then color.
Staining colors. Beet juice, turmeric, and neon green will mark a white bowl, a wooden spoon, and anyone who double-dips. Dark bowls, dark dippers, and a dipper per guest handles it.
Garnishing too early. Wet toppings on a chilled dip go soft and slide off. Crispy toppings added in the morning are soggy by the afternoon. Split them as described above.
Overlooking food safety. Perishable dips, which is nearly all of these, should not sit at room temperature for more than two hours, or one hour if the party is somewhere hot. Keep them on ice or in small batches you refill. Anyone with a weakened immune system, a pregnant guest, or an elderly guest should be offered the freshest bowl you have.
Allergy assumptions. Check your labels. Bean dips are usually vegan but not always gluten-free, cheese dips contain dairy, and nut-based dips are common in store-bought varieties. If you are serving a school group, hold the nut-free dips on a separate board so nobody crosses bowls with the wrong spoon.
One habit worth adopting: mix a tiny test portion first, a couple of tablespoons in a spare cup, and let it sit for ten minutes. Color deepens over time, and a test cup tells you what the real bowl will look like at serving. It costs you one spoon and a few minutes.
Frequently Asked Questions
What is the best way to color dip without making it watery?
Use gel food coloring rather than liquid drops. Gel is concentrated, so a tiny amount carries a lot of pigment and adds almost no moisture. Add it a drop at a time to a cold, well-seasoned base, stirring completely between drops. If a dip still loosens, chill it for 20 minutes; cream cheese and bean bases firm up again. Thin with a spoonful of the plain base rather than water when you can.
Can I make naturally colored Halloween dips for a party?
Yes, and they are worth the extra effort when artificial dye is a concern. Pumpkin puree or turmeric gives orange, spinach or matcha gives green, beet juice or blackberry puree gives red, and purple sweet potato or blackberries give purple. Black sesame or activated charcoal handles black. These shades sit softer than gel color and sometimes shift slightly once chilled, so tint a test portion first and check it after ten minutes.
How long should homemade colored dips be refrigerated before serving?
Refrigerate every colored dip for at least 30 minutes before serving so the color sets and the texture firms up. Cream cheese and bean dips benefit from an hour. Store them covered in the fridge at or below 40°F, and keep them there until the party rather than leaving them on the counter while you set up. Once out, perishable dips belong on ice and should not sit at room temperature past two hours.
Can I make colored dips the day before a Halloween party?
Yes, and for most creamy bases the color actually improves overnight because it has time to settle into the mixture. Mix and tint up to two days ahead, cover tightly, and refrigerate. Hold crunchy or wet garnishes back and add them on the day. Bean and cream cheese dips keep three to four days refrigerated. Give everything a smell and a stir before it goes out, and give fresh dips to anyone who needs the strictest handling.
Which Halloween dip colors are easiest to create at home?
Orange, red, and purple are the easiest. Orange is mostly yellow with a drop of red, red is a single color, and purple is red plus blue in equal small amounts. Green is close behind, needing mostly yellow with a trace of blue. Black is the hardest by a wide margin. Standard gel black often reads dark gray, and getting a true matte black usually takes either a spoon of activated charcoal powder or a heavy hand that can leave a bitter taste.
What can I use instead of sour cream or Greek yogurt?
For the tangy element in a dip, use plain coconut yogurt, unsweetened plant yogurt, a tablespoon of lemon juice with a splash of water, or softened cream cheese thinned with milk. White bean purée blended with tahini or olive oil gives a thick, dairy-free base that holds color well and scoops cleanly. Mashed avocado works for a same-day green dip, though it browns, so tint it right before serving.
Conclusion
The path that works every time: mix and season the base first, add gel color one drop at a time, adjust with more base rather than more color, chill for 30 minutes, and add anything crisp at the last moment. Keep the dips in separate bowls and keep them cold.
Your first move is easy. Pick one creamy base and one bean base tonight, buy four gel colors plus black, and make two dips before you buy anything else for the party. Once you have two colors you are happy with, the next two take about ten minutes each.