Fake webbing looks fluffy because the fibre arrives loosely spun, evenly packed and slack. To make a spider web look realistic instead of fluffy, pull the strands apart until they separate, anchor every corner under light tension, break a few sections on purpose, and let the rest sag. Thin material plus uneven spacing does most of the work.
That is the whole trick, honestly. Store-bought webbing is not a bad material, it just arrives as a rope-like clump with a factory seam and no tension at all. Untouched, it reads as cotton stuffing draped in a corner. Thirty seconds of teasing and stretching turns the same clump into something that passes from across the room.
Our whole porch is webbed every October, and the first year we did it the place looked like someone had shaken a stuffing pillow over the entryway. Ten years later the process takes about twenty minutes for the same coverage, and most of that is finding a corner to hide the seam in.
Table of Contents
- What You Need
- Step-by-Step: Build a Thin, Natural-Looking Spider Web
- Choose a Material That Stays Thin
- Make the Web Frame Slightly Irregular
- Stretch the Web With Light Tension
- Add Broken, Partial Sections
- Shape and Distress the Finished Web
- Common Mistakes and Fixes
- Tips for Using Realistic Spider Webs in Halloween Decorations
- Frequently Asked Questions
- What material makes a fake spider web look most realistic?
- Can I use fishing line to make a Halloween spider web?
- How do I make a spider web look less perfect and more natural?
- What is the best way to make a large spider web for a wall or window?
- How do I keep a fake spider web from looking fluffy?
- Can I make a realistic spider web outdoors?
- Conclusion
What You Need
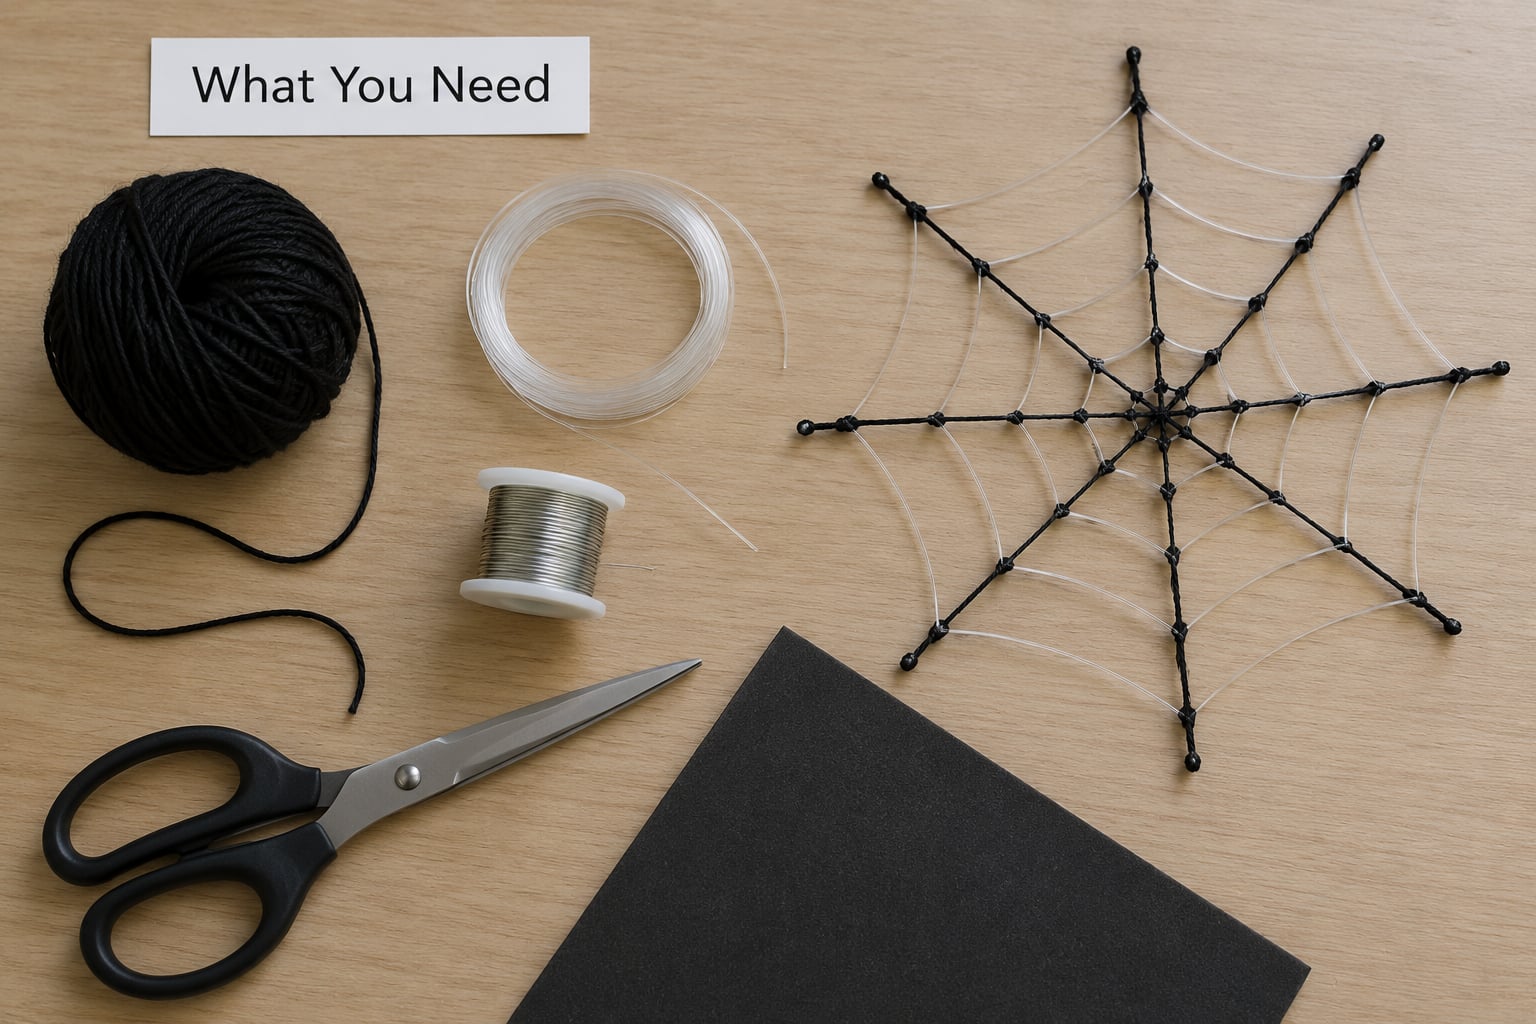
None of this is specialised. Everything on the list is either a craft supply you already own or something from a dollar aisle.
- Stretch webbing — the classic material. Pull a section apart gently, do not rip it, and the loose fibre becomes a bundle of fine strands.
- Clear fishing line or dental floss — nearly invisible when backlit, ideal for windows and dioramas.
- Thin yarn or embroidery floss — holds an angular frame and reads well in daylight.
- Fine craft wire — lets you build a real radial-and-spiral pattern on a foam board or diorama base.
- Scissors — for trimming loose ends. Long blades beat small ones here.
- Anchors — thumb tacks, removable command hooks, velcro strips or staples, depending on the surface.
- A spray bottle and a stiff brush — a light mist relaxes clumped fibre, and a brush combs strands back into line.
Skip cotton batting and thick yarn for anything close to the viewer. They hold too much volume, and no amount of stretching takes the bulk out.
Step-by-Step: Build a Thin, Natural-Looking Spider Web
Choose a Material That Stays Thin
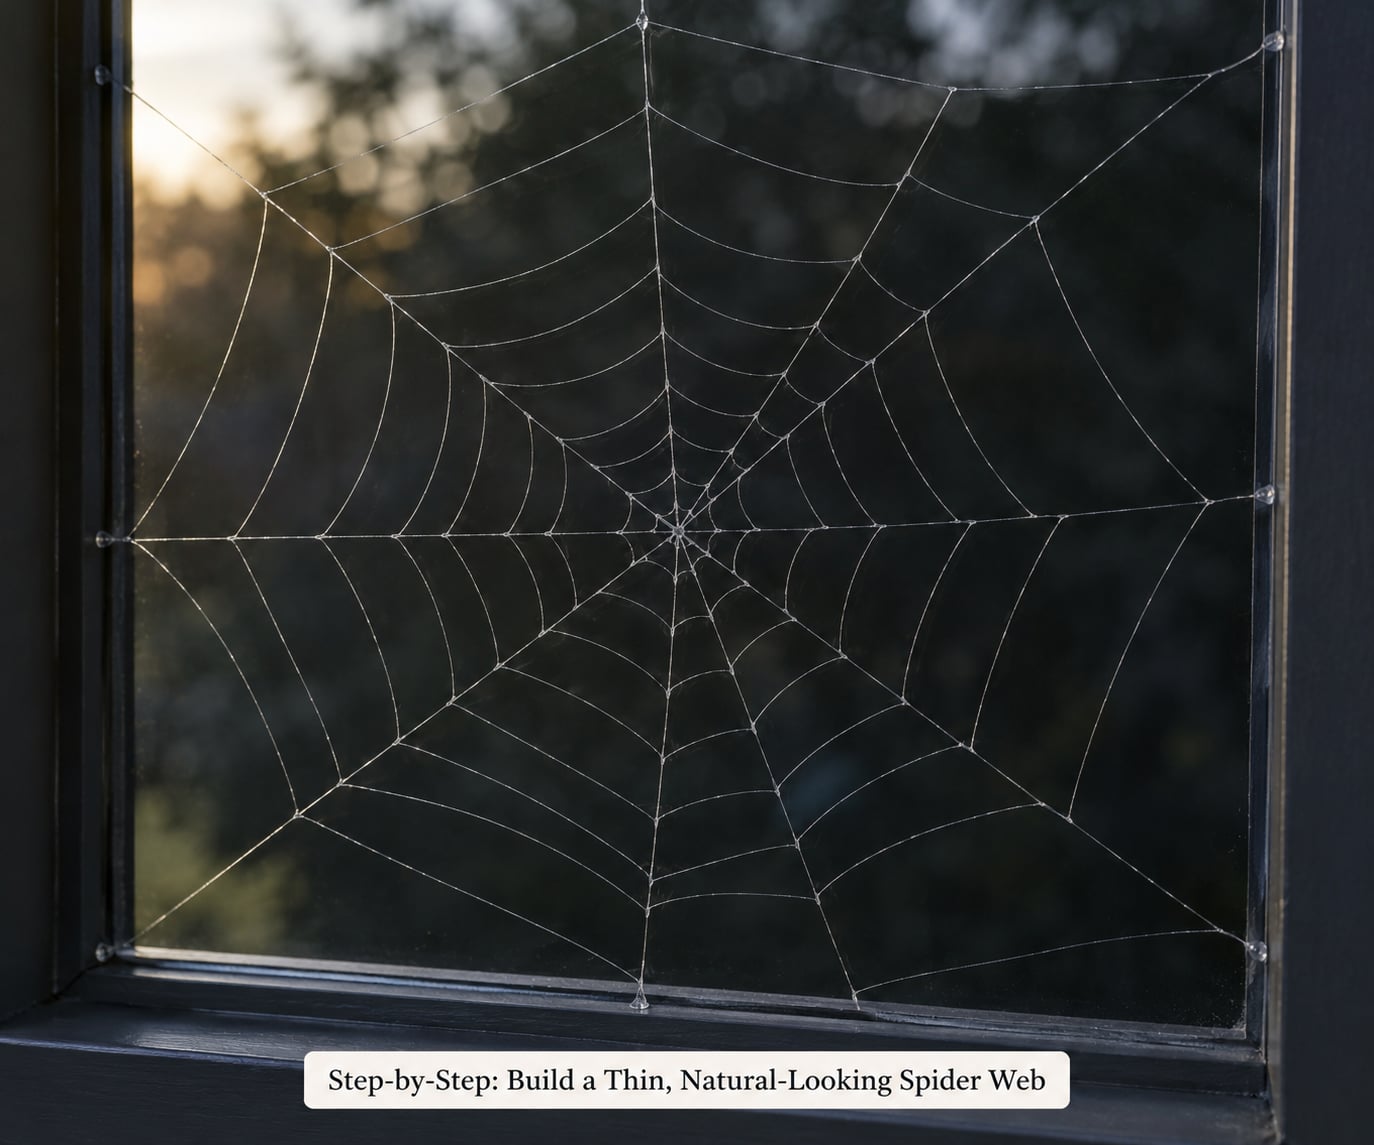
Material weight decides the whole result. Fluffy cotton batting, wool yarn and beef netting all carry visible thickness, so they read as fibre even when they are taut. Fine fishing line, embroidery floss and thin yarn keep their own width under tension.
Stretch a handspan of webbing and look at it before you commit. Good material separates into dozens of hair-fine strands you can see across the room. Bad material stays a single opaque rope no matter how hard you pull. Test it in daylight, because backlighting hides flaws that daylight shows.
Make the Web Frame Slightly Irregular
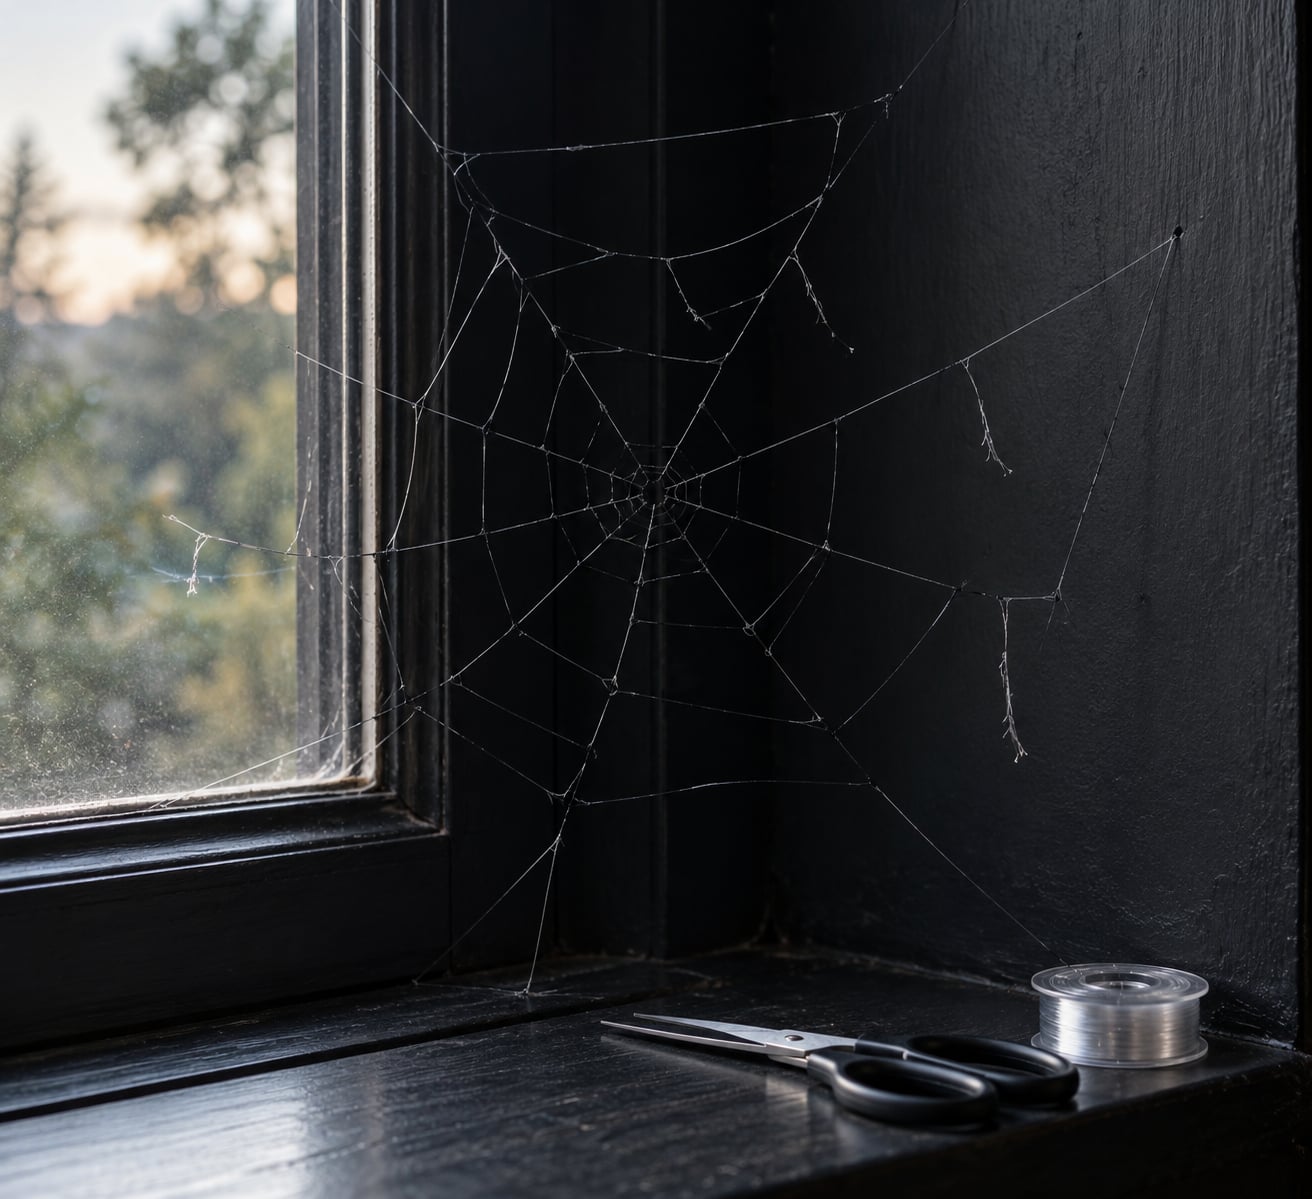
Anchor an uneven triangle or a crooked four-corner shape rather than a neat rectangle. Real orb webs are shaped by wind, distance between anchor points and whatever the spider could reach, so they are never symmetrical.
Let the lower corner hang slightly lower than the others and make one side a few inches shorter than the rest. Check it by squinting from across the room. If it looks like a design choice, add another uneven corner.
Stretch the Web With Light Tension
Anchor first, then pull gently until the strands are straight but not singing. Over-tensioned webbing snaps or thins to nothing, and slack webbing droops like drapery.
Work outward from your hidden corner in short pieces, about a hand long each, pinching and stretching as you go. Mist the section with water and comb it with a stiff brush if the fibres bunch. The web is finished when it holds a straight line but still shows a small curve between anchors.
Add Broken, Partial Sections
The neatest web is the least convincing one. Leave gaps, cut two or three strands short, skip a whole arc, and let one corner collapse slightly.
Weather does this to real webs. A patch of tighter repair threads in one area, a torn section where something brushed past, and an uneven density all read as age. Cut strands with scissors rather than pulling them, since a torn strand leaves a frayed end that looks even better.
Shape and Distress the Finished Web
Stand back several feet and look from a low angle, then from directly in front. Real silk catches light at particular angles, and a web that only looks good from one spot looks fake.
Trim stray hanging threads, bend one or two strands with a fingertip, and mist the whole thing very lightly with water or a diluted aerosol hairspray so it settles into a dusty, abandoned shape. If you want a decayed look, blot it with a dry brush and a little grey or brown paint.
Common Mistakes and Fixes
Using cotton batting or thick yarn. These hold volume and will always read as fluff. Switch to fine line, floss or thin yarn, and stretch each piece until it separates into strands.
Hanging the web perfectly square. Straight corners and even spacing look manufactured. Push one corner out of alignment and vary the edge lengths.
Leaving the web slack. Slack fibre gathers in soft bunches, and bunches read as fluff. Re-anchor and pull until each run of webbing sits straight with a slight curve between anchors.
Stretching everything the same amount. Even spacing is the giveaway after symmetry. Randomise the width of each section so some are dense and some nearly bare.
Leaving the seam visible. The factory join in a bolt of webbing is the single clearest sign of a fake web. Find it before you start, anchor that corner first, and stretch outward from it. If you cannot hide it, drape a spider or a bundle of leaves over the spot.
Adding loose filler at the end. Piling extra webbing into corners to fill gaps adds bulk. Thin the corners out instead, and let the structure carry itself.
Hot glue for fine strands. A glue gun makes rigid glossy lines that look like glue, and the strands harden instead of sagging. Use glue only to anchor a corner to a vertical surface, never to draw the web itself.
Tips for Using Realistic Spider Webs in Halloween Decorations
Stretch webbing collects leaves, dust and rain within a couple of nights outdoors, then turns into a dirty mat. For porches, trees and railings, use fishing line, thin twine or creepy cloth instead, and pin the anchor points into soil or mulch with metal landscape pins.
Matching the method to the wall matters. Thumb tacks work on drywall and leave small holes that spackle covers. Removable command hooks hold heavier sheets without touching the paint. Staples hold fast in wood but tear paper. Velcro strips peel clean from paint if the wall is wiped first.
Scale the density to the viewing distance. A tabletop diorama needs fishing line and near-perfect geometry. A room corner needs wide, uneven coverage that reads from the doorway. An entire wall takes two or three overlapping sheets so no single seam shows.
Lighting does more for realism than material. One spotlight or a blacklight pointed across the web makes thin strands glow and separates them from the background. A fully lit room flattens everything into a grey cloud.
Do not hang fake webbing outdoors over paths where real spiders build. Spiders have been found dead trapped in synthetic web, and loose strands get caught in genuine webs in the surrounding bushes. Let natural webs nearby stay undisturbed and keep your fake work on the structure.
Skip aerosol adhesives around skin and open flames, and let any misted surface dry fully before a candle or a heat lamp goes near it. Store finished sheets loosely in a large bag or a box between seasons so you can reuse them instead of buying new every October.
Frequently Asked Questions
What material makes a fake spider web look most realistic?
Thin, monofilament materials win: clear fishing line, dental floss, embroidery floss and fine craft wire. Stretch webbing works too, but only after you pull it apart so individual strands separate. What looks fluffy is always the same culprit, thick or bulky fibre. Cotton batting, wool yarn and beef netting keep their volume no matter how hard you stretch them, so they read as stuffing in daylight and as a grey cloud under a spotlight. If you want one choice for a window or diorama, fishing line is the most invisible.
Can I use fishing line to make a Halloween spider web?
Yes, and it is the best material for windows, glass doors and dioramas because it nearly disappears unless light hits it at an angle. Work with 10 to 20 pound test, which is thin but will not snap while you are anchoring it. Clear monofilament blends into a dark background; coloured line reads better in daylight. Fishing line cannot stretch into that fine webbing halo, so add a light mist of water if the strands look too rigid and crisp compared with a real web.
How do I make a spider web look less perfect and more natural?
Break the symmetry on purpose. Push one corner out of alignment, let a lower corner sit slightly deeper, vary the width of each section so some areas are dense and others nearly bare, and skip a whole arc. Add two or three cut strands with scissors so the ends stay frayed, plus one tighter patch of repair threads. Real webs are shaped by wind, rain and whatever the spider could reach, so uneven spacing and partial damage read as age while even spacing reads as craft.
What is the best way to make a large spider web for a wall or window?
Build it in sections rather than one sheet. Anchor a hidden corner first, stretch outward from it in hand-long pieces, and overlap two or three sheets so no single factory seam is visible from the main viewing angle. Use an angular frame instead of a rectangle, and stretch each run lightly so it stays straight with a slight curve between anchors. For a whole wall, work from a step ladder with an assistant holding the far corners, and light the finished web with one spotlight or blacklight.
How do I keep a fake spider web from looking fluffy?
Tension and thinning are everything. Pull the webbing apart gently so it separates into hair-fine strands, mist it lightly with water and comb it with a stiff brush, then anchor it with light stretch so each run sits straight. Untouched webbing hangs slack, and slack fibre gathers into soft bunches that instantly read as cotton stuffing. If it still looks bulky, the material is wrong, not the technique. Move to fishing line, floss or thin yarn rather than trying to stretch batting.
Can I make a realistic spider web outdoors?
Yes, but not with traditional stretch webbing. It collects leaves, dirt and rain within a couple of nights and mats into a dirty blanket. Use clear fishing line, thin twine or creepy cloth for porches, trees and railings, and anchor into soil or mulch with metal landscape pins. Expect to replace or adjust the web after bad weather. Keep the work on the structure itself and away from paths where real spiders build, since loose synthetic strands get caught in genuine webs nearby.
Conclusion
Start with the thinnest practical material you can find, then stretch it, tease it apart and anchor it with real tension before anything else goes on. Deliberately vary the spacing, break a few sections and leave gaps so the web looks weathered rather than symmetrical.
Once the structure reads as silk, add your spiders, dust and lighting. Doing it in that order is the difference between a web that looks homemade and one that makes people check the corner twice.