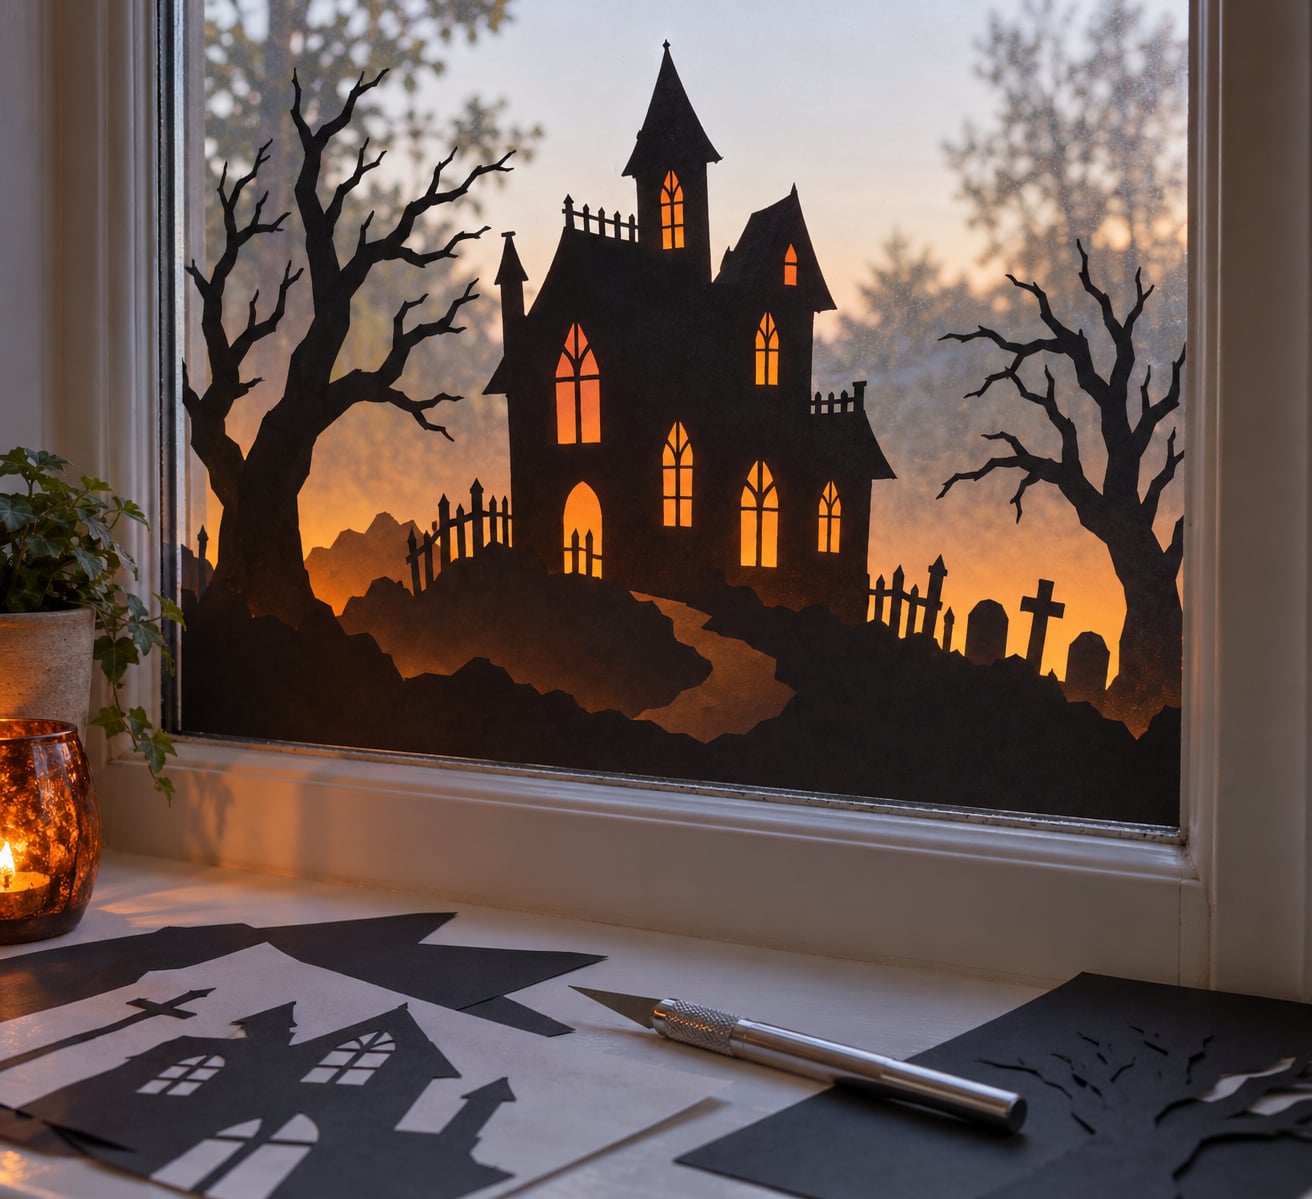
A spooky silhouette window display is dark cutout shapes taped to a window or to a fabric backdrop, lit from behind so they read as solid black shadows from the sidewalk. Three things make the effect work: an opaque material, a light source behind it, and a few inches of space between the shape and the glass.
Budget an hour for the first panel, less for each one after that. It is a forgiving craft because the shapes are simple and the lighting does half the work, which makes it a good rainy-afternoon project with kids or a quiet weekend job for one person.
The effect lives entirely at night. In daylight the display is just black paper on glass, so plan to judge it after dark, ideally from the far sidewalk rather than from six feet back.
Table of Contents
- What You Need
- Cheap swaps that work just as well
- Step-by-Step: How to Make a Spooky Silhouette Window Display
- 1. Choose a Simple, Bold Scene for Halloween Window Silhouettes
- 2. Sketch the Composition on Paper
- 3. Create the Foreground Silhouette Layer
- 4. Add Midground Details
- 5. Add Small Accents
- 6. Mount the Silhouettes Safely
- 7. Light the Display for Depth
- 8. Step Back and Check the Visibility from the Street
- Common Mistakes
- Tips for a Spooky Window Display
- Frequently Asked Questions
- What is the easiest material for a Halloween silhouette window display?
- Can I make a spooky silhouette display without damaging the window?
- How do I make a silhouette display visible from the street?
- What lighting works best behind a Halloween window silhouette?
- How big should a Halloween window display be?
- How do I remove cardboard or paper silhouettes from a window?
- Conclusion
What You Need
Everything below is available at a dollar store, a craft store or from a flat sheet you already own. Quantities are for one standard window, roughly 30 by 50 inches.
- Black cardstock or poster board, two or three 20 by 28 inch sheets. This is your main silhouette material.
- Black craft foam board, one sheet for the closest layer and for small stiff accents like fence posts.
- Black construction paper, a few sheets for thin midground details and anything that needs to bend, such as tree branches or cobweb corners.
- A white or pale backdrop, a plain white tablecloth, shower curtain or sheet. This is what the silhouettes get taped to.
- Removable mounts, suction cups for glass, plus painter’s tape or removable mounting strips for fabric and vinyl.
- Adhesive dots or glue dots for the small accents.
- Cutting tools, scissors for curves and a craft knife with a fresh blade for straight edges and window frames. Always cut on a protected surface.
- A pencil, a printed template or a phone photo to trace from.
- Battery-powered lights, a warm white LED strip or string lights for the sill, plus one orange and one purple source.
Cheap swaps that work just as well
| Instead of | Use | What changes |
|---|---|---|
| Black cardstock | A flat black coffee tablecloth or shower curtain | Free and seam-free over a wide window, but it flutters, so tape it flat |
| Foam board | Corrugated cardboard | Same opacity, less crisp edges, and it curls if it gets damp |
| Craft knife | Scissors alone | Slower on straight lines, kinder to small hands |
| LED strip | A desk lamp on a timer | Cheapest option and the one decorators reach for most |
| Bought vinyl decals | Hand-cut black paper | Costs nothing and you can size any shape to any window |
One safety note before you start. Use battery-powered LED lights and skip open flame entirely. Candles near paper and fabric on a window sill are a house fire waiting on a drafty night, and rentals and insurance policies often treat them as a problem anyway. If you light the display with anything warm, keep the cord and the heat source well away from the paper.
Step-by-Step: How to Make a Spooky Silhouette Window Display
How to make a spooky silhouette window display comes down to layered silhouettes, removable adhesive and battery-powered lighting. Build the biggest layer first, then work toward the window with progressively smaller and thinner pieces, and finish with a light source placed behind the scene.
1. Choose a Simple, Bold Scene for Halloween Window Silhouettes
Pick one strong idea and commit to it: a haunted house with bare trees, a witch on a broom, a full moon behind a dead tree, a graveyard, or a cat sitting on a windowsill. Halloween window silhouettes only read from the sidewalk when the shapes are large and instantly recognizable.
Rule of thumb I use: if you cannot describe the scene in three words, it is too complicated. Haunted house. Graveyard. Black cat. Anything needing a paragraph fails at 40 feet.
2. Sketch the Composition on Paper
Trace your main shape onto regular printer paper at full size first, so you can move it around the window before cutting anything expensive. Tape the paper outline to the glass with a few removable strips and step back to check the placement.
Leave a hand-width of empty glass around the outside edges. Crowding the frame kills the effect, and that empty border is where your backlight can spill through and make the whole thing glow.
3. Create the Foreground Silhouette Layer
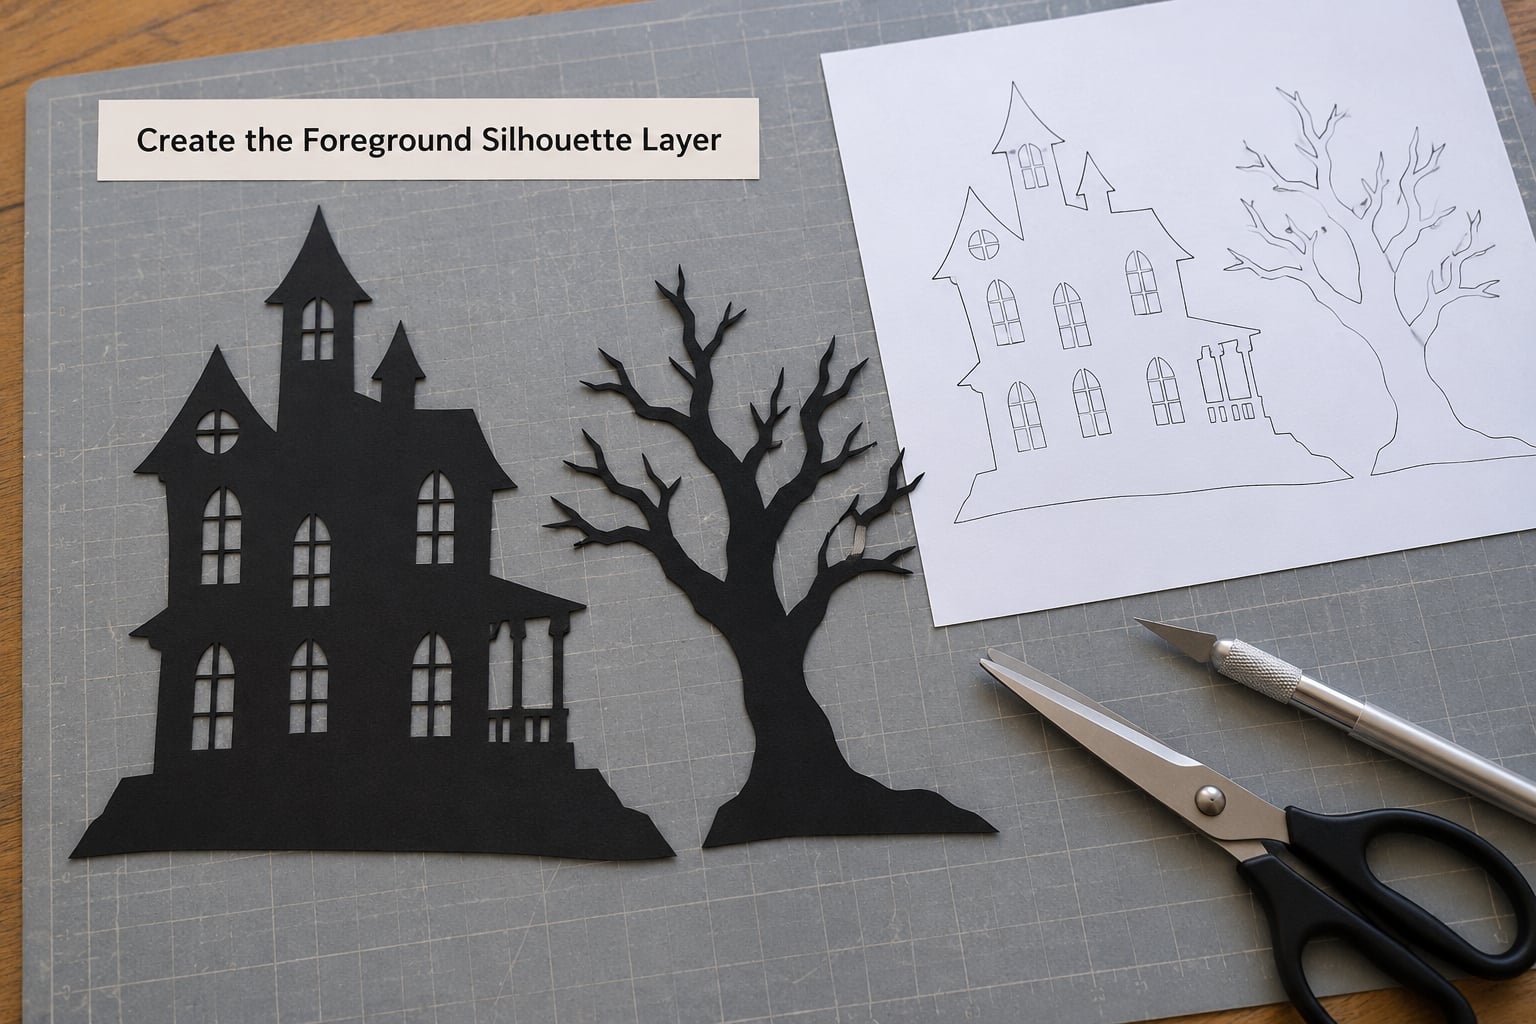
Now cut the real thing from your black cardstock or poster board. The foreground layer is the largest, closest and boldest shape in the scene: the house body, the tree trunk, the cat. Trace once, cut slowly, and keep the blade or scissors moving away from your other hand.
Test it against the paper template before you cut anything else. If it is noticeably smaller than the outline, you traced the wrong edge and it is cheaper to recut now than to hang a scene that sits crooked.
4. Add Midground Details
Build a second layer from a thinner material, black construction paper or lighter cardstock, and place it slightly higher or further from the glass than the foreground. This gap is what creates the layered depth that makes the display look dimensional rather than flat.
Good midground pieces: a crooked picket fence running across the bottom, three gravestones, a few bare branches crossing into the frame, or window frames cut into a larger wall shape. Keep them fewer than you think you need.
5. Add Small Accents
Small details go on last, on removable glue dots rather than tape, so you can reposition them after dark. Hanging spiders, a couple of bats in the upper corner, crooked window panes cut from foam board, a crescent moon, or a low strip of grey mist tissue paper across the bottom all work.
Five accents is plenty. Accents that crowd the main shape make the scene harder to read, and the eye goes to detail instead of to the silhouette.
6. Mount the Silhouettes Safely
Hang the backdrop first: tape the white tablecloth or sheet flat across the inside of the glass, using painter’s tape at the corners and every 12 inches or so. Then tape the silhouettes to the backdrop side that faces the room, not to the glass itself.
Taping to the back of the fabric is the trick that gets missed most. It softens and blurs the shadow edge, so the shape looks ghostly instead of like a sticker stuck to a pane. For a sharper, graphic look, mount directly on the glass with suction cups or removable strips instead.
Check the glass is clean and dry before you start, and never drill, staple or use permanent tape on a window you do not own.
7. Light the Display for Depth
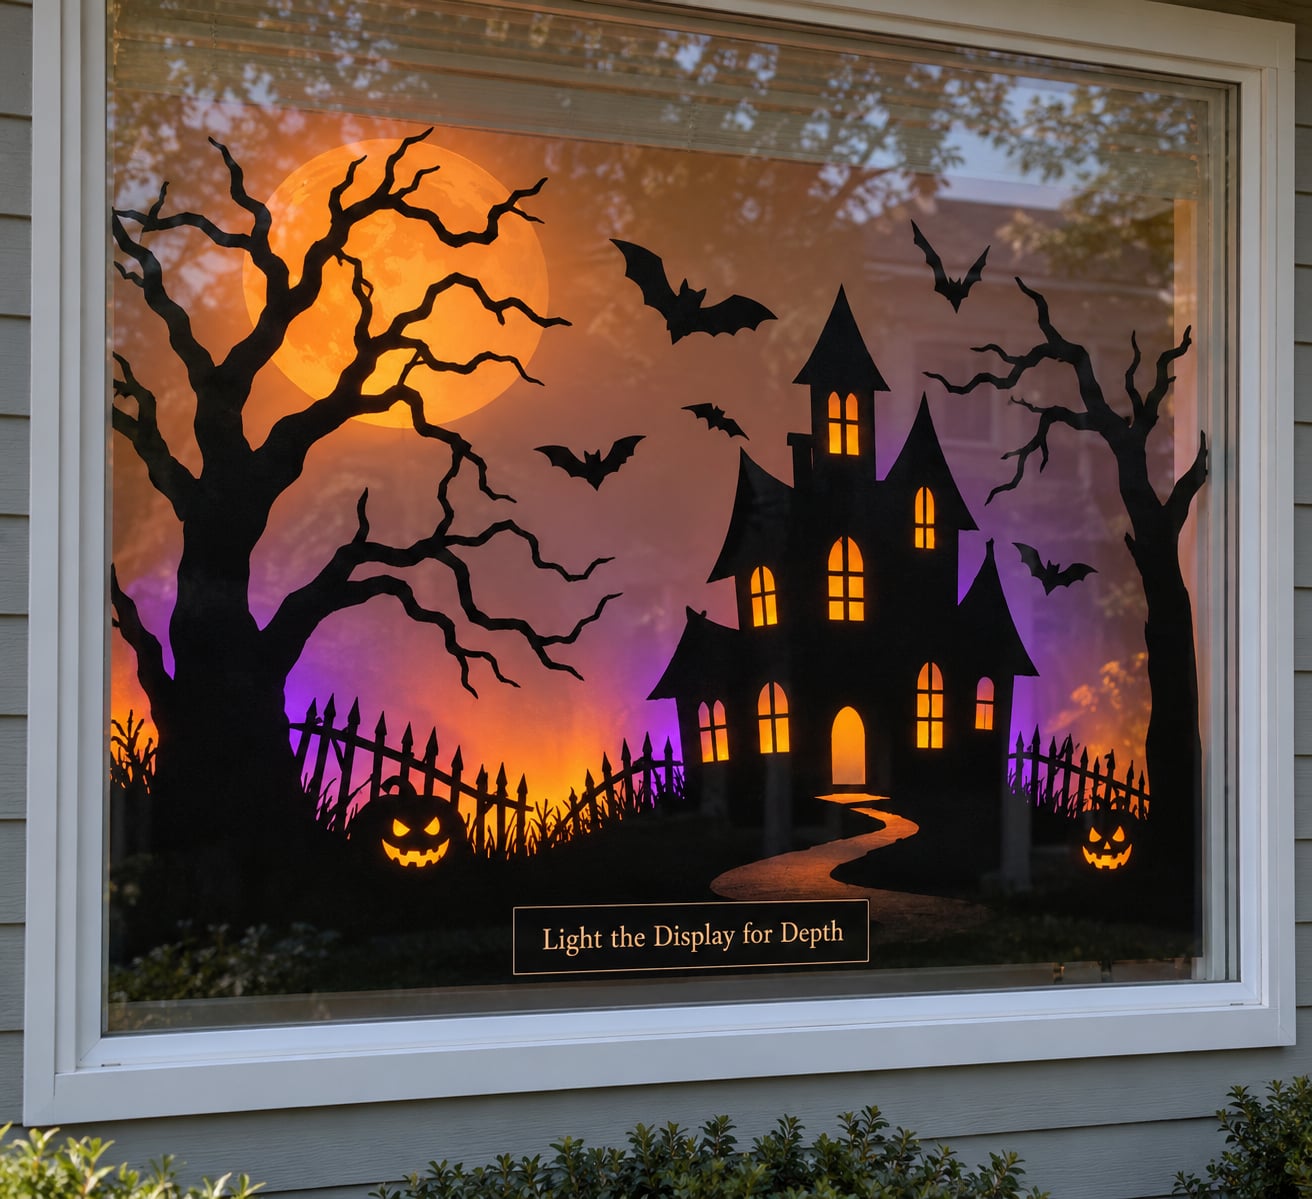
Warm white, orange and purple all work. Most decorators land on orange because it reads instantly as Halloween, and one purple source adds depth without another color fighting it. Skip plain cool white bulbs, which flatten the scene and make everything look like a photocopied shape.
Place a strip along the windowsill shining up and outward, or set a small lamp behind the backdrop and let the paper do the blocking. Keep cords clear of any heat, and stay well away from curtains. Then turn the room lights off, wait for your eyes to adjust, and look again.
8. Step Back and Check the Visibility from the Street
Check three distances: from inside the room, from the porch, and from the far side of the street. Most displays that fail do not fail on the porch, they fail at the last one.
If the scene disappears, the fix is almost always bigger shapes and more contrast, not more detail. Scale the main silhouette up, add a second shape beside it, and push the light a little farther behind the backdrop so the glow spreads.
Common Mistakes
Regular printer paper. This is the single most reported failure. Thin paper lets light bleed straight through it, so your careful silhouette turns into a faded grey ghost. Cut from black cardstock or poster board and the shape goes solid.
Too much detail. Spiders with eight individually drawn legs, faces with expressions, tiny gravestones with lettering. None of it survives 40 feet of night air. Simplify to the outline and let the lighting supply the drama.
Everything stuck flat to the glass. Shapes pressed directly against the pane look like stickers and cast a hard, unforgiving edge. Mount them on the back of a backdrop instead, a couple of inches off the glass, for a soft blurred shadow.
Shapes curling off the glass. Cardstock lifts at the corners when the window is cool and the room is warm. A very light mist of water on the back of the paper, blotted until barely damp, lays it flat again. Masking tape at the top edge works too.
Light glaring straight at the street. A bare lamp pointed outward makes your window brighter than your neighbors and washes out your own scene. Aim the light at the backdrop and let it spread sideways.
Tools, tape and packaging left on display. Scissors on the sill, a roll of tape in the corner, a craft knife within reach of a curious trick-or-treater. Clear the sill completely before you go to bed.
Mounting methods that damage or violate rules. No drilling, no nails, no permanent adhesive, no open flames. If you rent or live under a homeowners association, check what is allowed on the exterior glass before you start on October 1.
Tips for a Spooky Window Display
Layer at different heights. Put some pieces at the glass and some two inches back, and the eye reads depth instead of a flat collage. The midground pieces should sit higher than the base of the foreground shapes, the way a real scene stacks.
Space things unevenly. Even spacing looks manufactured. Cluster two shapes on one side, leave a gap, then place one lonely shape on the other. It reads as a scene with a story in it.
Mix matte and glossy. Matte black cardstock beside a slightly glossy vinyl piece gives the backlight two different behaviors, and the difference shows up as depth after dark.
Use a backdrop if privacy matters. A pale tablecloth or light-filtering curtain blocks the view in daylight and diffuses the glow at night, so you are not sitting in a lit display all evening. A blackout roller shade behind your silhouettes does the same job.
Going wide for a big picture window. Piecing together sheets shows every seam once they are backlit, which is the open complaint in most decorator forums. Buy a single wide roll: projector screen fabric, green screen cloth, or a wide fabric remnant sold by the yard. Trim it to fit and the whole window reads as one continuous scene.
Store the pieces flat and label them. Write the window and its layer on the back of each piece in pencil before you take everything down. Next October you rehang the same display in half the time.
Check it at dusk, then again on the night. The display needs to be readable at 7 pm when early trick-or-treaters arrive and still working at 9 pm. If it only reads in full darkness, add a second light source.
Frequently Asked Questions
What is the easiest material for a Halloween silhouette window display?
Black cardstock or 20 by 28 inch poster board is the easiest material, and it is also the one that works. Regular printer paper is the trap here: backlit, it goes translucent and your shape reads as a pale grey smudge. Cardstock blocks light completely and still cuts cleanly with ordinary scissors. Foam board is the upgrade if you want sturdier pieces or plan to reuse the display for several years.
Can I make a spooky silhouette display without damaging the window?
Yes, as long as everything you use is removable. Hang a pale tablecloth or sheet on the inside of the glass with painter’s tape, then tape your silhouettes to the back of that fabric. For mounting straight on the pane, use suction cups or removable mounting strips on clean, dry glass. Skip permanent tape, nails and any drilling, and check your rental or HOA rules before decorating exterior windows.
How do I make a silhouette display visible from the street?
Scale the shapes up, keep them bold, and push your light behind the backdrop instead of in front of it. Detail is the first thing to go: at 40 feet, an eight-legged spider becomes a dot. Test from the far sidewalk rather than the porch, since almost every display reads fine up close. If the scene still disappears, add a second large shape and a second light source rather than adding detail.
What lighting works best behind a Halloween window silhouette?
Warm white, orange and purple are the three colors that work. Orange reads as Halloween instantly, and one purple source adds depth without competing. Most people use a warm white LED strip or string lights along the windowsill aimed upward, or a single desk lamp behind the backdrop. Skip cool white bulbs, which flatten the scene. Avoid open flame entirely, paper is close by and drafts move quickly.
How big should a Halloween window display be?
Make the main silhouette roughly half the width of the window and fill most of the height, then leave a hand-width of clear glass around the edges. Bigger is safer than smaller, because nothing hurts readability more than an undersized scene. For a large picture window, buy one wide sheet of projector screen or green screen cloth rather than butting sheets together, which leaves seams that show under backlight.
How do I remove cardboard or paper silhouettes from a window?
Peel painter’s tape slowly and low, at a 45 degree angle to the glass, so it lifts off rather than yanking. Any leftover adhesive comes off glass with a little rubbing alcohol on a soft cloth, and the same method clears most removable strip residue. If the glass feels tacky, warm it slightly with your hands first, which softens the adhesive. Store every piece flat and label it for next year.
Conclusion
Choose one scene you can name in three words, cut the largest silhouette first, and test the lighting before you add anything small. Hang it on the back of a pale backdrop with painter’s tape, use battery LEDs, and check it from the far sidewalk. That order takes about an hour and gets you a display that reads from the curb and comes apart cleanly when the night ends.